From time to time, almost every company finds itself in need of replacing an asset.
Whether due to working with new platforms, revamping videos to fit current editions or just because they are simply outdated; there are ample reasons why this is a common occurrence amongst modern businesses.
Those assets usually live on a company’s website (e.g. videos on a marketing page or videos on a help article that are featured on the FAQ page).
Replacing an asset will keep its original asset ID, which means that you don’t need to re-embed the asset. Once replaced, the new asset will automatically be available everywhere.
Here is a step-by-step guide:
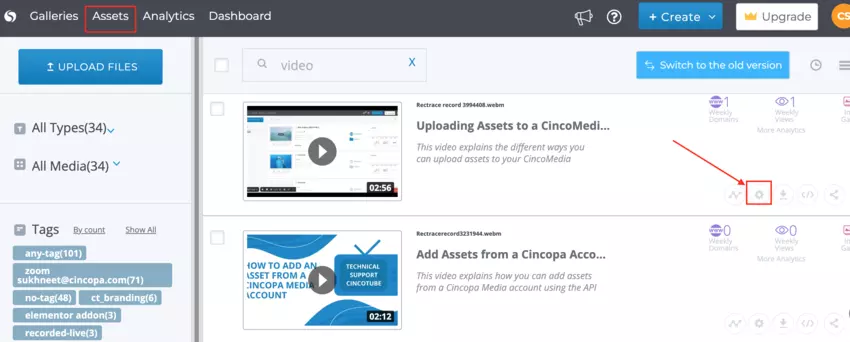
- Go to the Assets page, and choose the asset you would like to replace.
- Click on the ‘settings’ icon on the right (i.e. the gear icon).

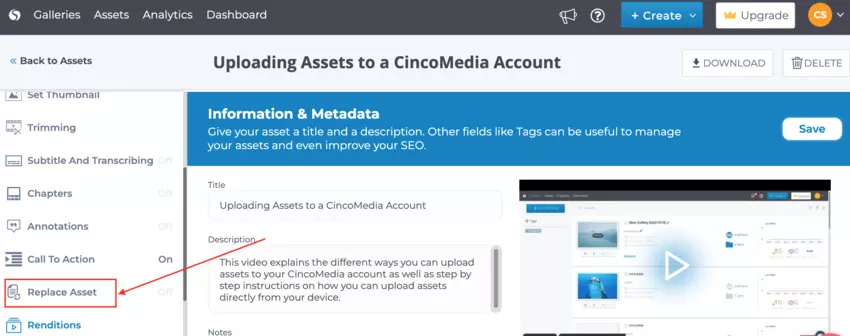
- Click on the Replace Asset option as shown below.

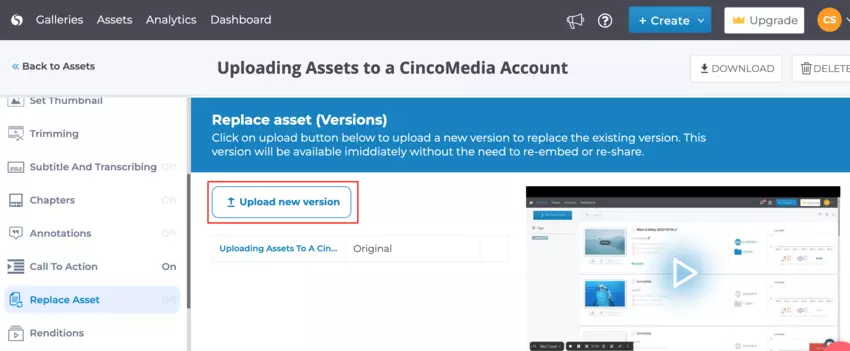
- Click on the Upload new version button.

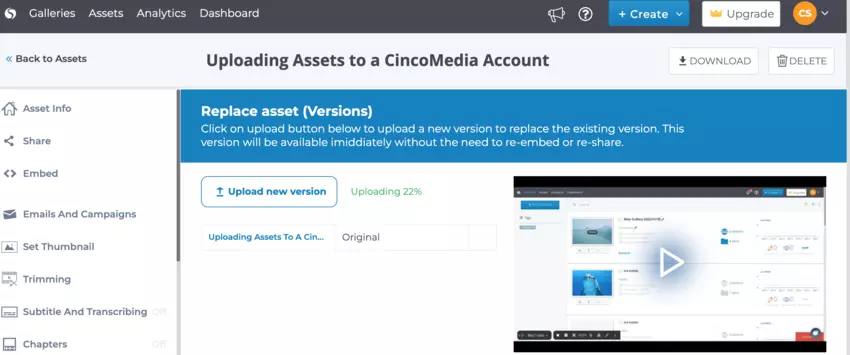
- Select the new file. Wait for the file to upload. Upon successful upload completion, the new file will replace the original file version.

Steps for uploading new version using the Extra Files option:
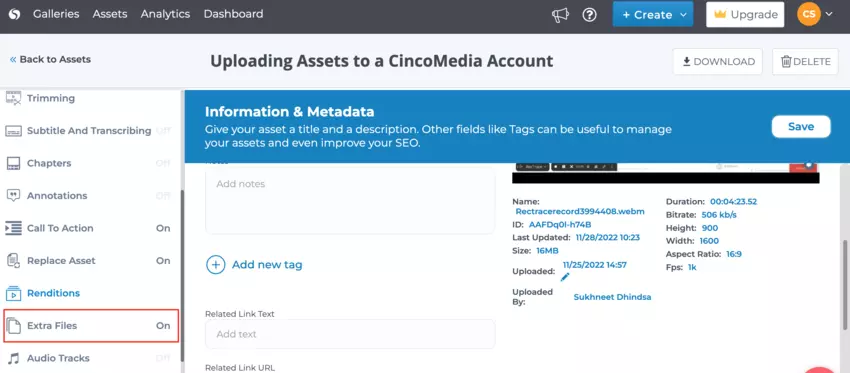
- From the Asset settings, choose the ‘EXTRA FILES’ function

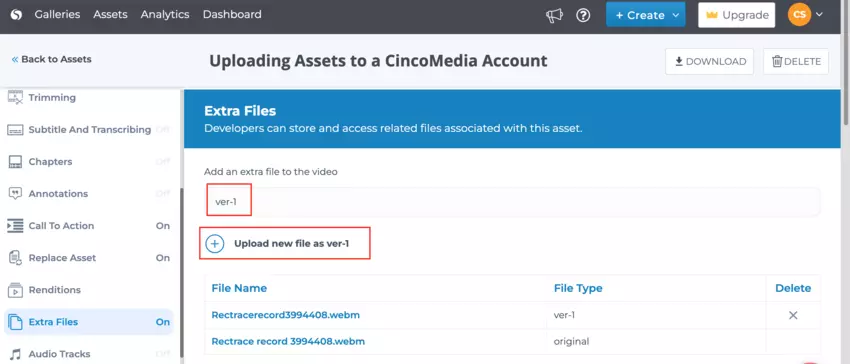
- Click on Add new file, change “extra” to “ver-1”. Then, click on the “Upload new file as ver-1″ and choose the new file to be uploaded, wait a few seconds until upload is done.
 Cincopa supports multiple versions which means that you can later upload “ver-2”, “ver-3” and so forth and the latest version will be active.The original file is still stored in Cincopa which means that you can delete the latest version and go back to the original.


 Cincopa supports multiple versions which means that you can later upload “ver-2”, “ver-3” and so forth and the latest version will be active.The original file is still stored in Cincopa which means that you can delete the latest version and go back to the original.