Subtitles and captions help improve accessibility, comprehension, and search visibility for video content. In Cincopa, captions can be generated automatically or added manually using SRT files. While automatic transcription helps speed up the process, transcripts often require manual review and correction to ensure accuracy.
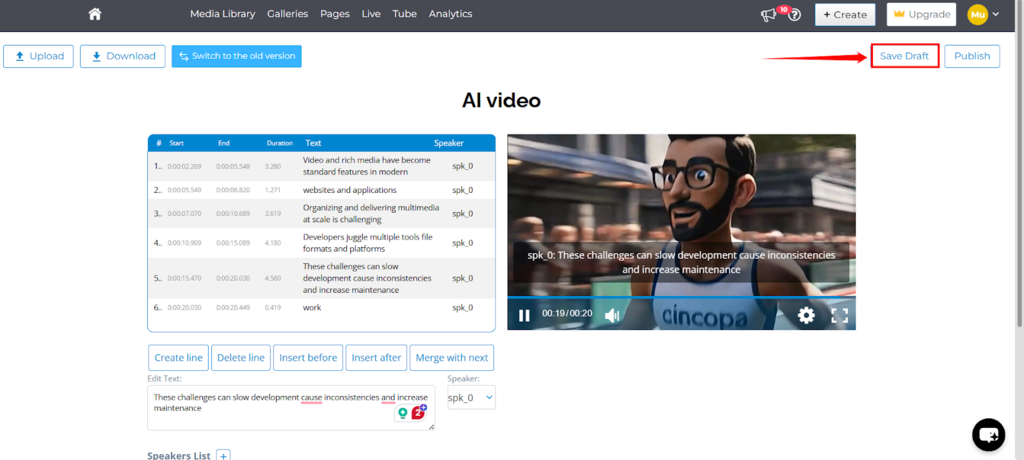
SRT Editor allows you to review and manually update the transcript associated with the selected video.
In the SRT Editor, the transcript is displayed in time-based segments. Each segment includes the spoken text along with its corresponding start and end timestamps. You can click into any text field to correct spelling, adjust wording, or fix recognition errors.
The editor also allows you to:
- Edit the transcript text directly
- Adjust timestamps if needed
- Review the transcript in sequence to ensure accuracy
Once your changes are complete, you can save and publish the updated transcript so the corrected captions are applied to the video.
This centralized editor makes it easier to maintain accurate transcripts without opening or editing each video individually.
How to edit Subtitles using Cincopa’s SRT Editor?
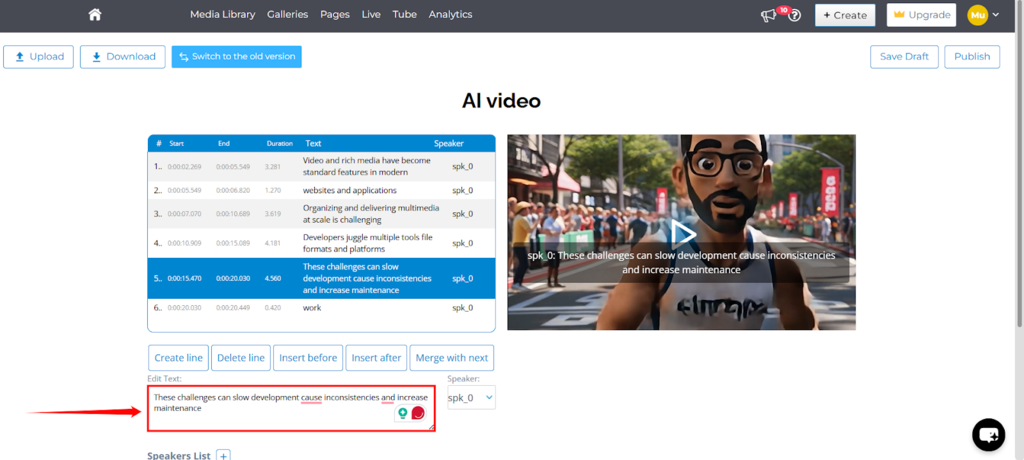
Step 1: From the transcript table, select the transcript line you want to edit. The selected row will be highlighted, and its text will appear in the Edit Text field below. In the Edit Text field, you can correct spelling, update words, or adjust the text to match the audio better.
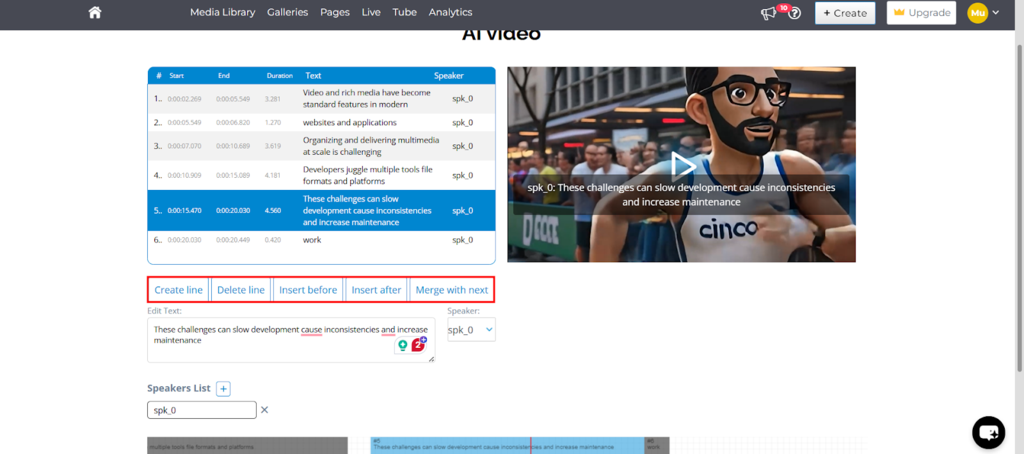
Step 2: Use the available actions to manage transcript lines:
- Create: a line to add a new transcript line
- Delete: a line to remove the selected line
- Insert: before adding a line before the selected one
- Insert: after adding a line after the selected one
- Merge: with next to combine the selected line with the following line
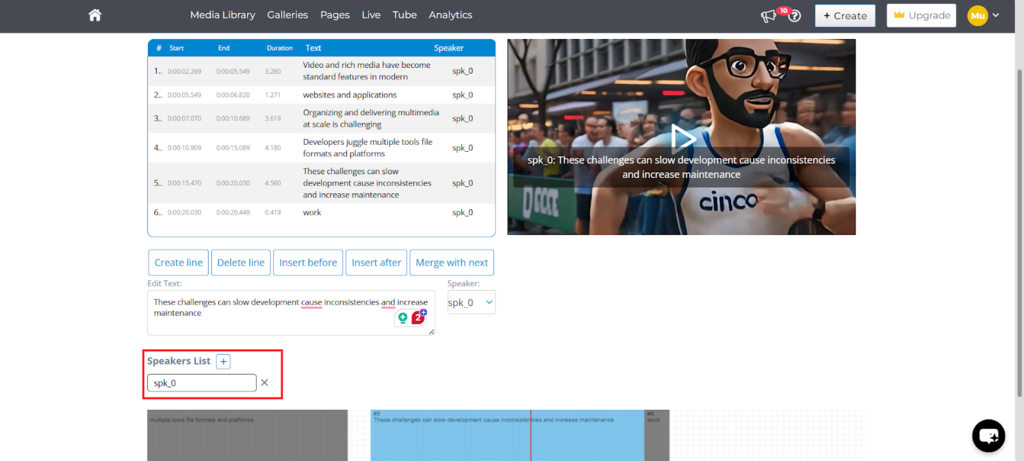
Step 3: In the Speakers List section, manually add new speakers or edit existing speaker names.
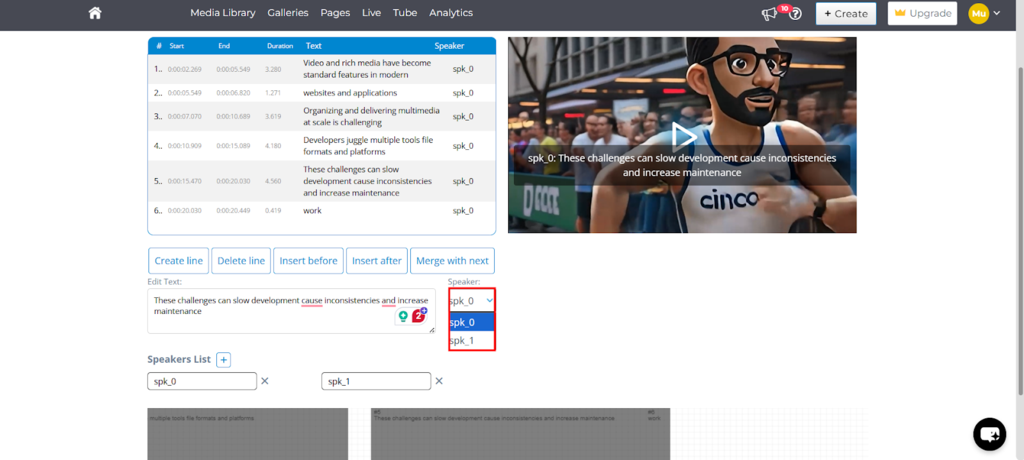
Step 4: Now assign a speaker to the selected transcript line using the Speaker dropdown.
Step 5: Use the video preview on the right side to play the video and verify that the transcript text and timing align with the audio.

Step 6: After editing the transcript, click Save Draft if you do not want the changes to go live immediately. This lets you review or continue editing later before publishing.
Step 7: Click on the Publish to choose how the transcript should be published.
- Include speaker’s name – When enabled, the transcript will display the speaker’s name for each dialogue segment. This option is optional and can be turned on or off based on your preference. It is useful for videos with multiple speakers, interviews, or panel discussions, as it makes the transcript easier to follow and understand.
- Save draft – Creates the transcript but does not publish it anywhere. The transcript is stored in your account and can be managed later from the Auto Transcribe & CC section in Account Settings. This option is useful if you want to review or control publishing manually at a later stage. Use this option if you would like to manually edit and publish the transcripts.
- Publish to SEO and VideoGPT – Generates the transcript and makes it available only for SEO and VideoGPT responses. Subtitles will not appear in the video player. This option is suitable if you want transcripts to support search visibility and VideoGPT answers without displaying captions to viewers. Use this option if you want to manually edit and publish the transcript to the player, but it is good enough for SEO and VideoGPT.
- Publish to Player and SEO/VideoGPT – Generates the transcript, publishes it as visible subtitles in the video player, and also makes it available for SEO and VideoGPT. You can review and edit the transcript before publishing, ensuring accurate captions for viewers while supporting VideoGPT and SEO use cases. You can always edit and perfect the transcript after it has been published.
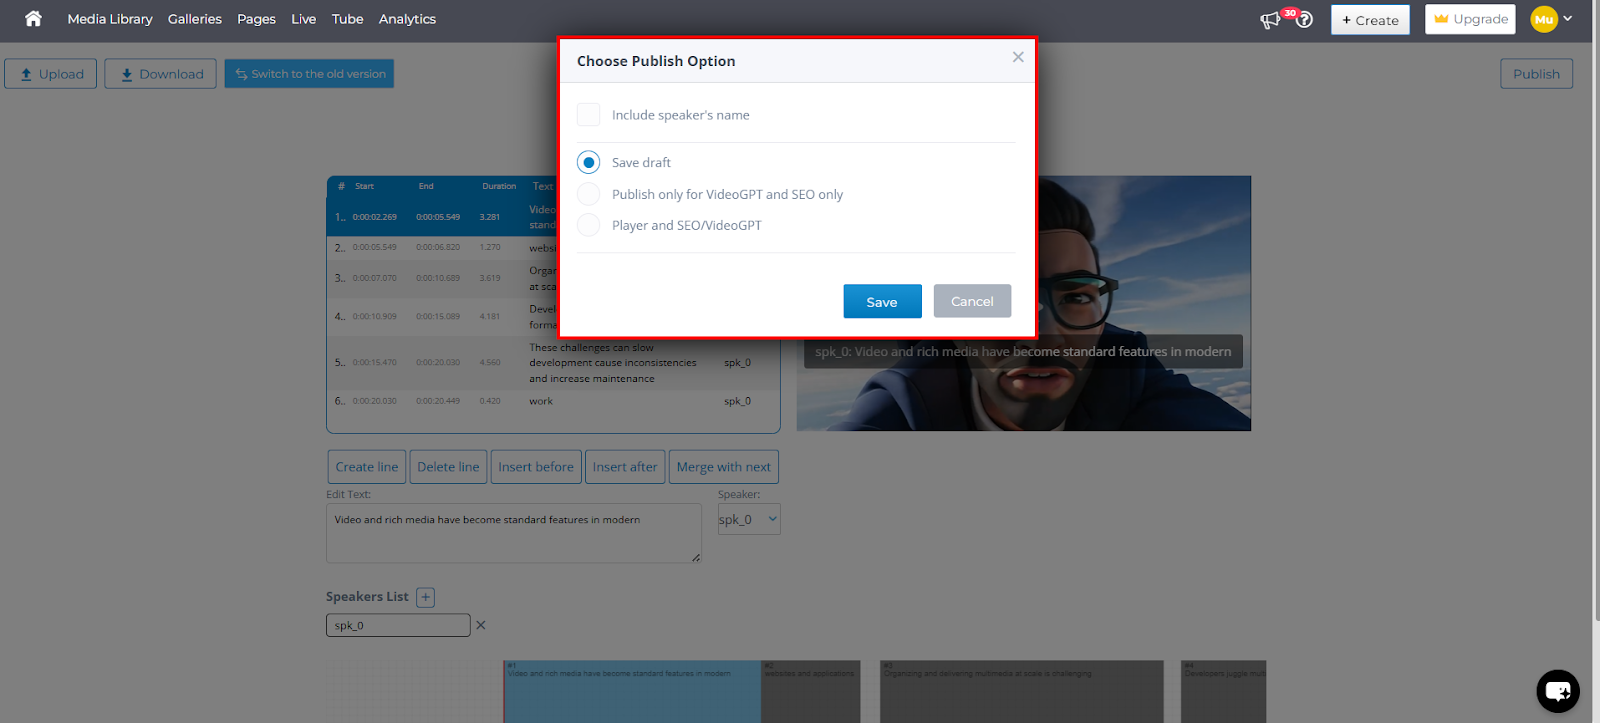
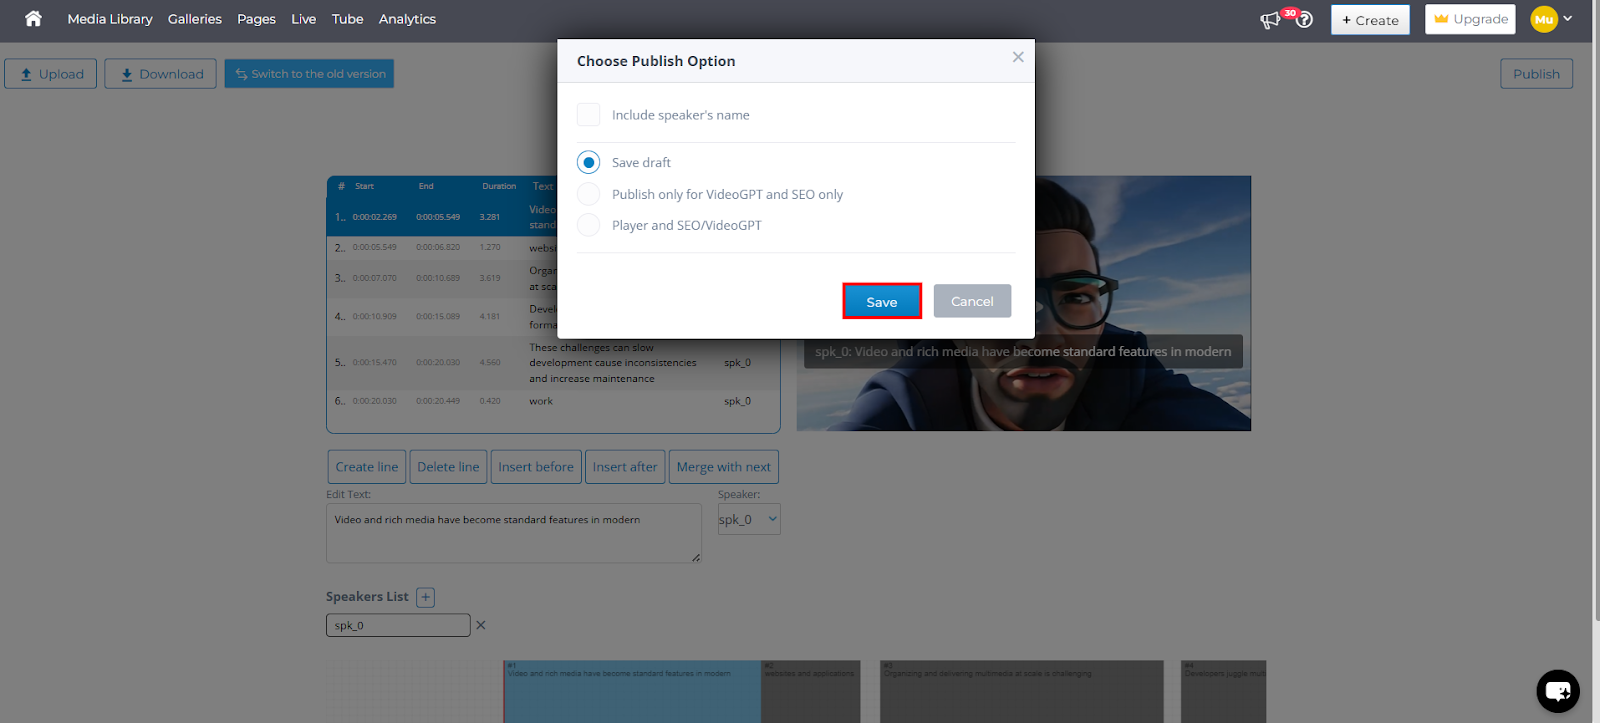
Step 8: After selecting the desired publish option, click the Save button to apply and publish the changes.
Additional options
Upload: Use this option to upload a transcript or caption file (such as an SRT file) from your local system. This is useful if you already have a prepared transcript and want to replace or update the existing one.
Download: This option allows you to download the current transcript file. You can use it for offline review, editing, or sharing with translators or reviewers.
Switch to the old version: Select this option to return to the previous transcript editing interface. This can be helpful if you are more familiar with the older workflow or need to access features that are not available in the new editor.
Note: Cincopa supports two ways to generate transcripts and captions.
|