This article explains how you can customize the invitation email that gets sent out when a user is invited to a channel.
Steps for customizing the invitation email:
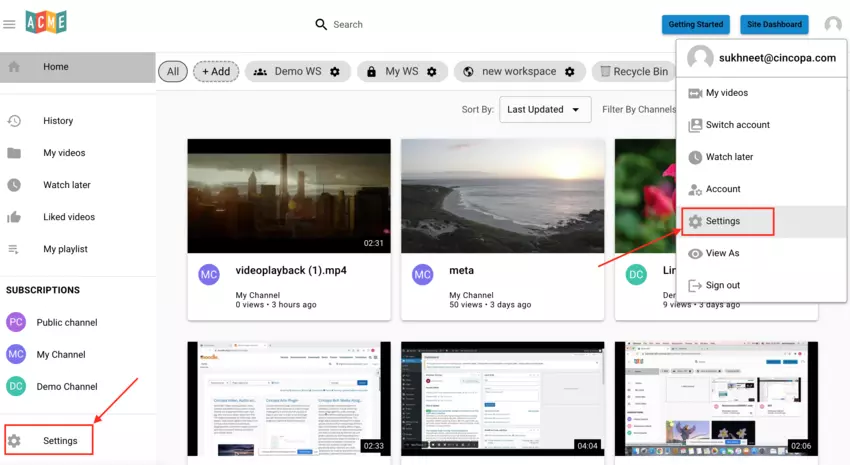
- Go to Tube Settings by clicking on the Settings option from the left side bar or click on your account thumbnail from the top-right menu and click on Settings.

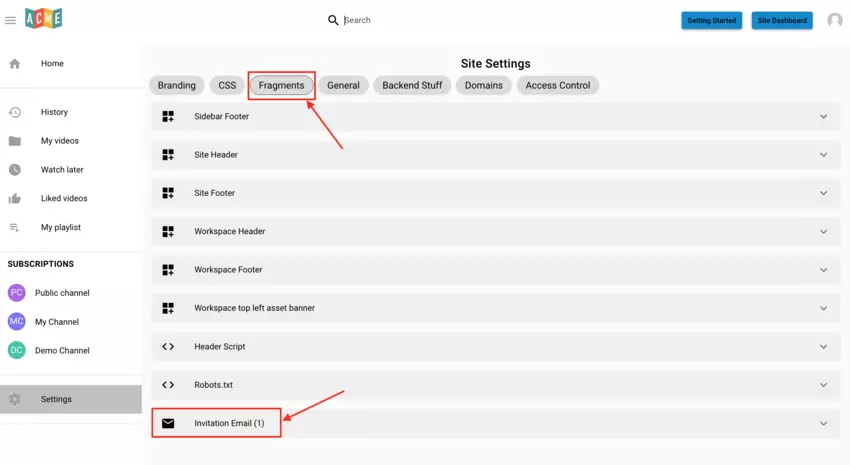
- Click on Fragments tab and then click on Invitation Email.

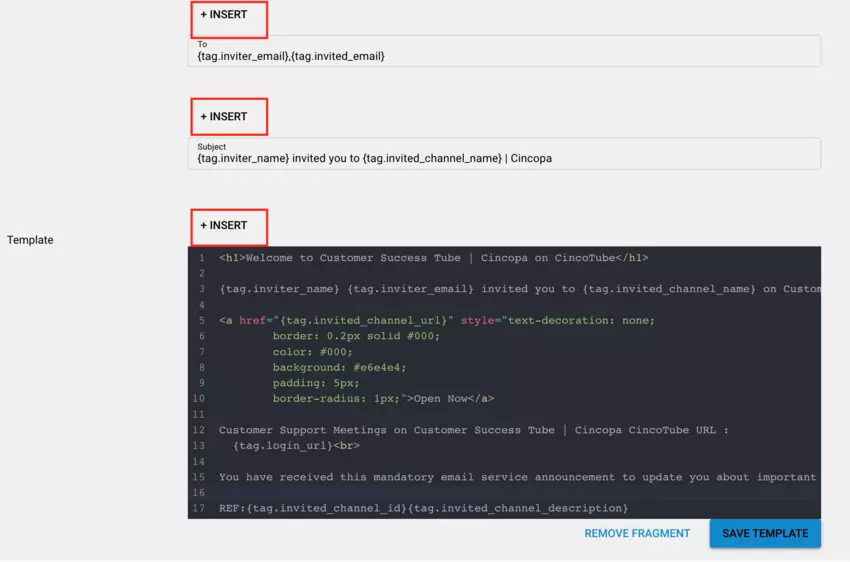
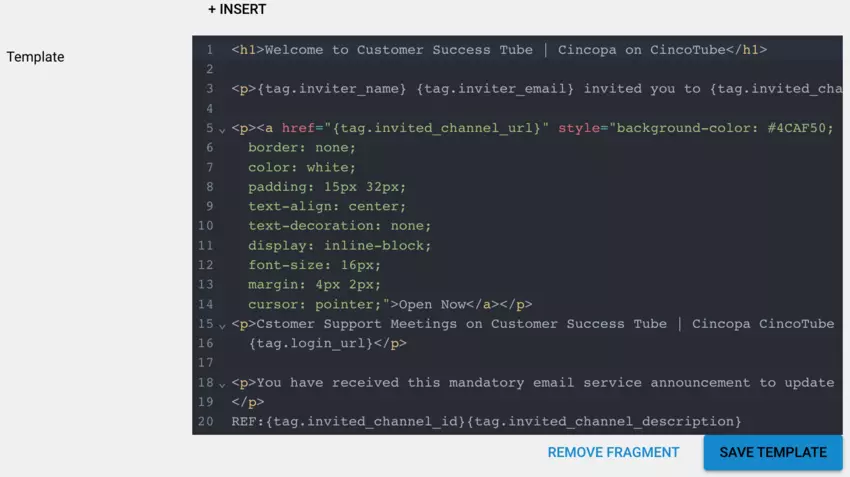
- Use the Insert option to insert tags. You can edit the ‘To’ field and enter multiple recipient email addresses separated by a comma, edit the Subject of the email and Body of the email.


The body template can be customized using html tags and plain text.

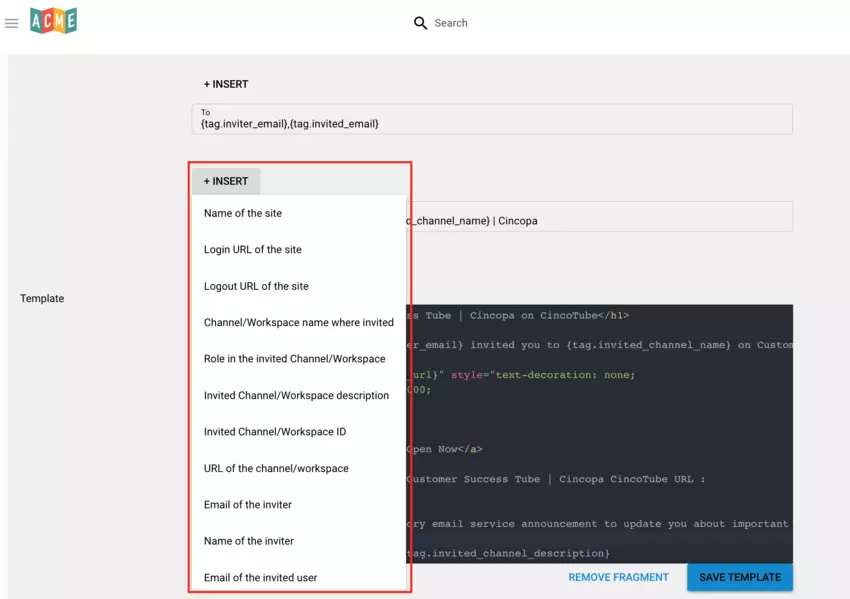
Tags available for use:
- Name of the site: Site name found under Settings > General

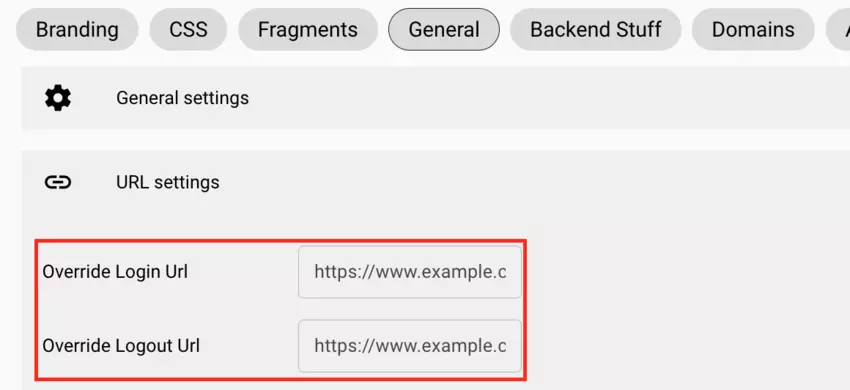
- Login URL of the site: Override Login URL under Settings > General > URL Settings
- Logout URL of the site: Override Logout URL under Settings > General > URL Settings

- Channel/Workspace name where invited: Name of the Channel or Workspace to which the user is invited
- Role in the invited Channel/Workspace: Role that was set for the user when invited to the channel
- Invited Channel/Workspace description: Description of the Channel or Workspace to which user is invited
- Invited Channel/Workspace ID: ID of the Channel or the Workspace to which user is invited
- URL of the Channel/Workspace: URL of the Channel or the Workspace to which user is invited
- Email of the inviter: Email address of the user who is inviting users to his channel
- Name of the inviter: Name of the user who is inviting users to his channel
- Email of the inited user: Email address of the user being invited
- Name of the invited user: Name of the user being invited


