The Global Settings section is where you configure platform-wide behavior for your Cincopa account. It allows you to control branding, player appearance, security, and feature-level settings that apply across all your media and galleries
These settings act as default configurations, helping you maintain consistency and avoid repetitive setup at the individual asset or gallery level.
How to Access Global Settings
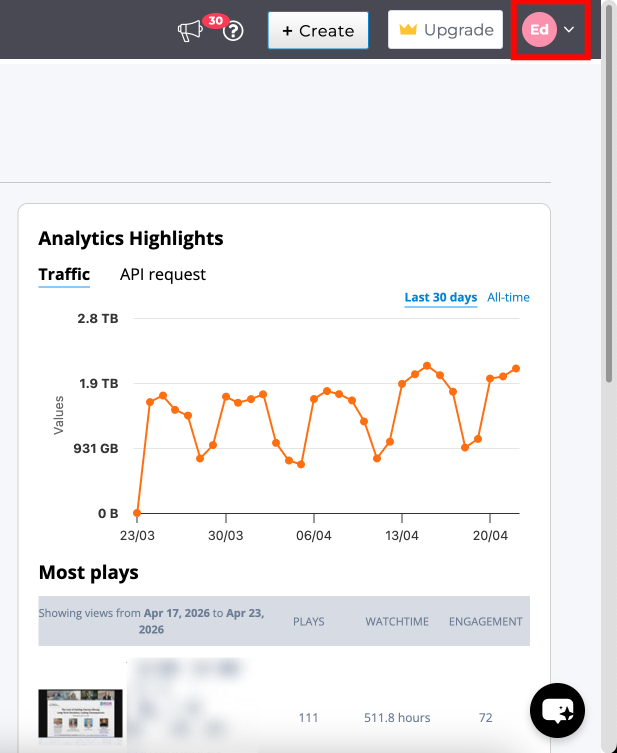
Step 1: From dashboard click your profile icon in the top-right corner
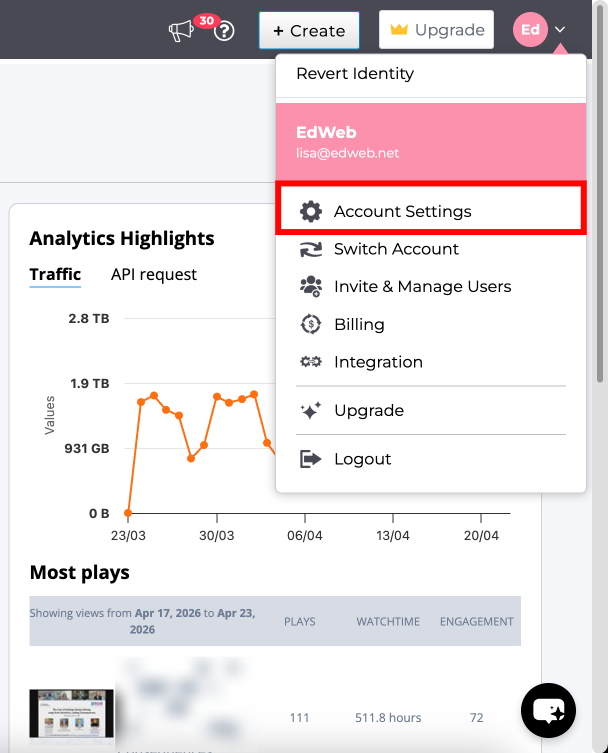
Step 2: Select Account Settings from dropdown menu
Step 3: The Overview page will open by default
Step 4: From the left-hand sidebar, click Global Settings

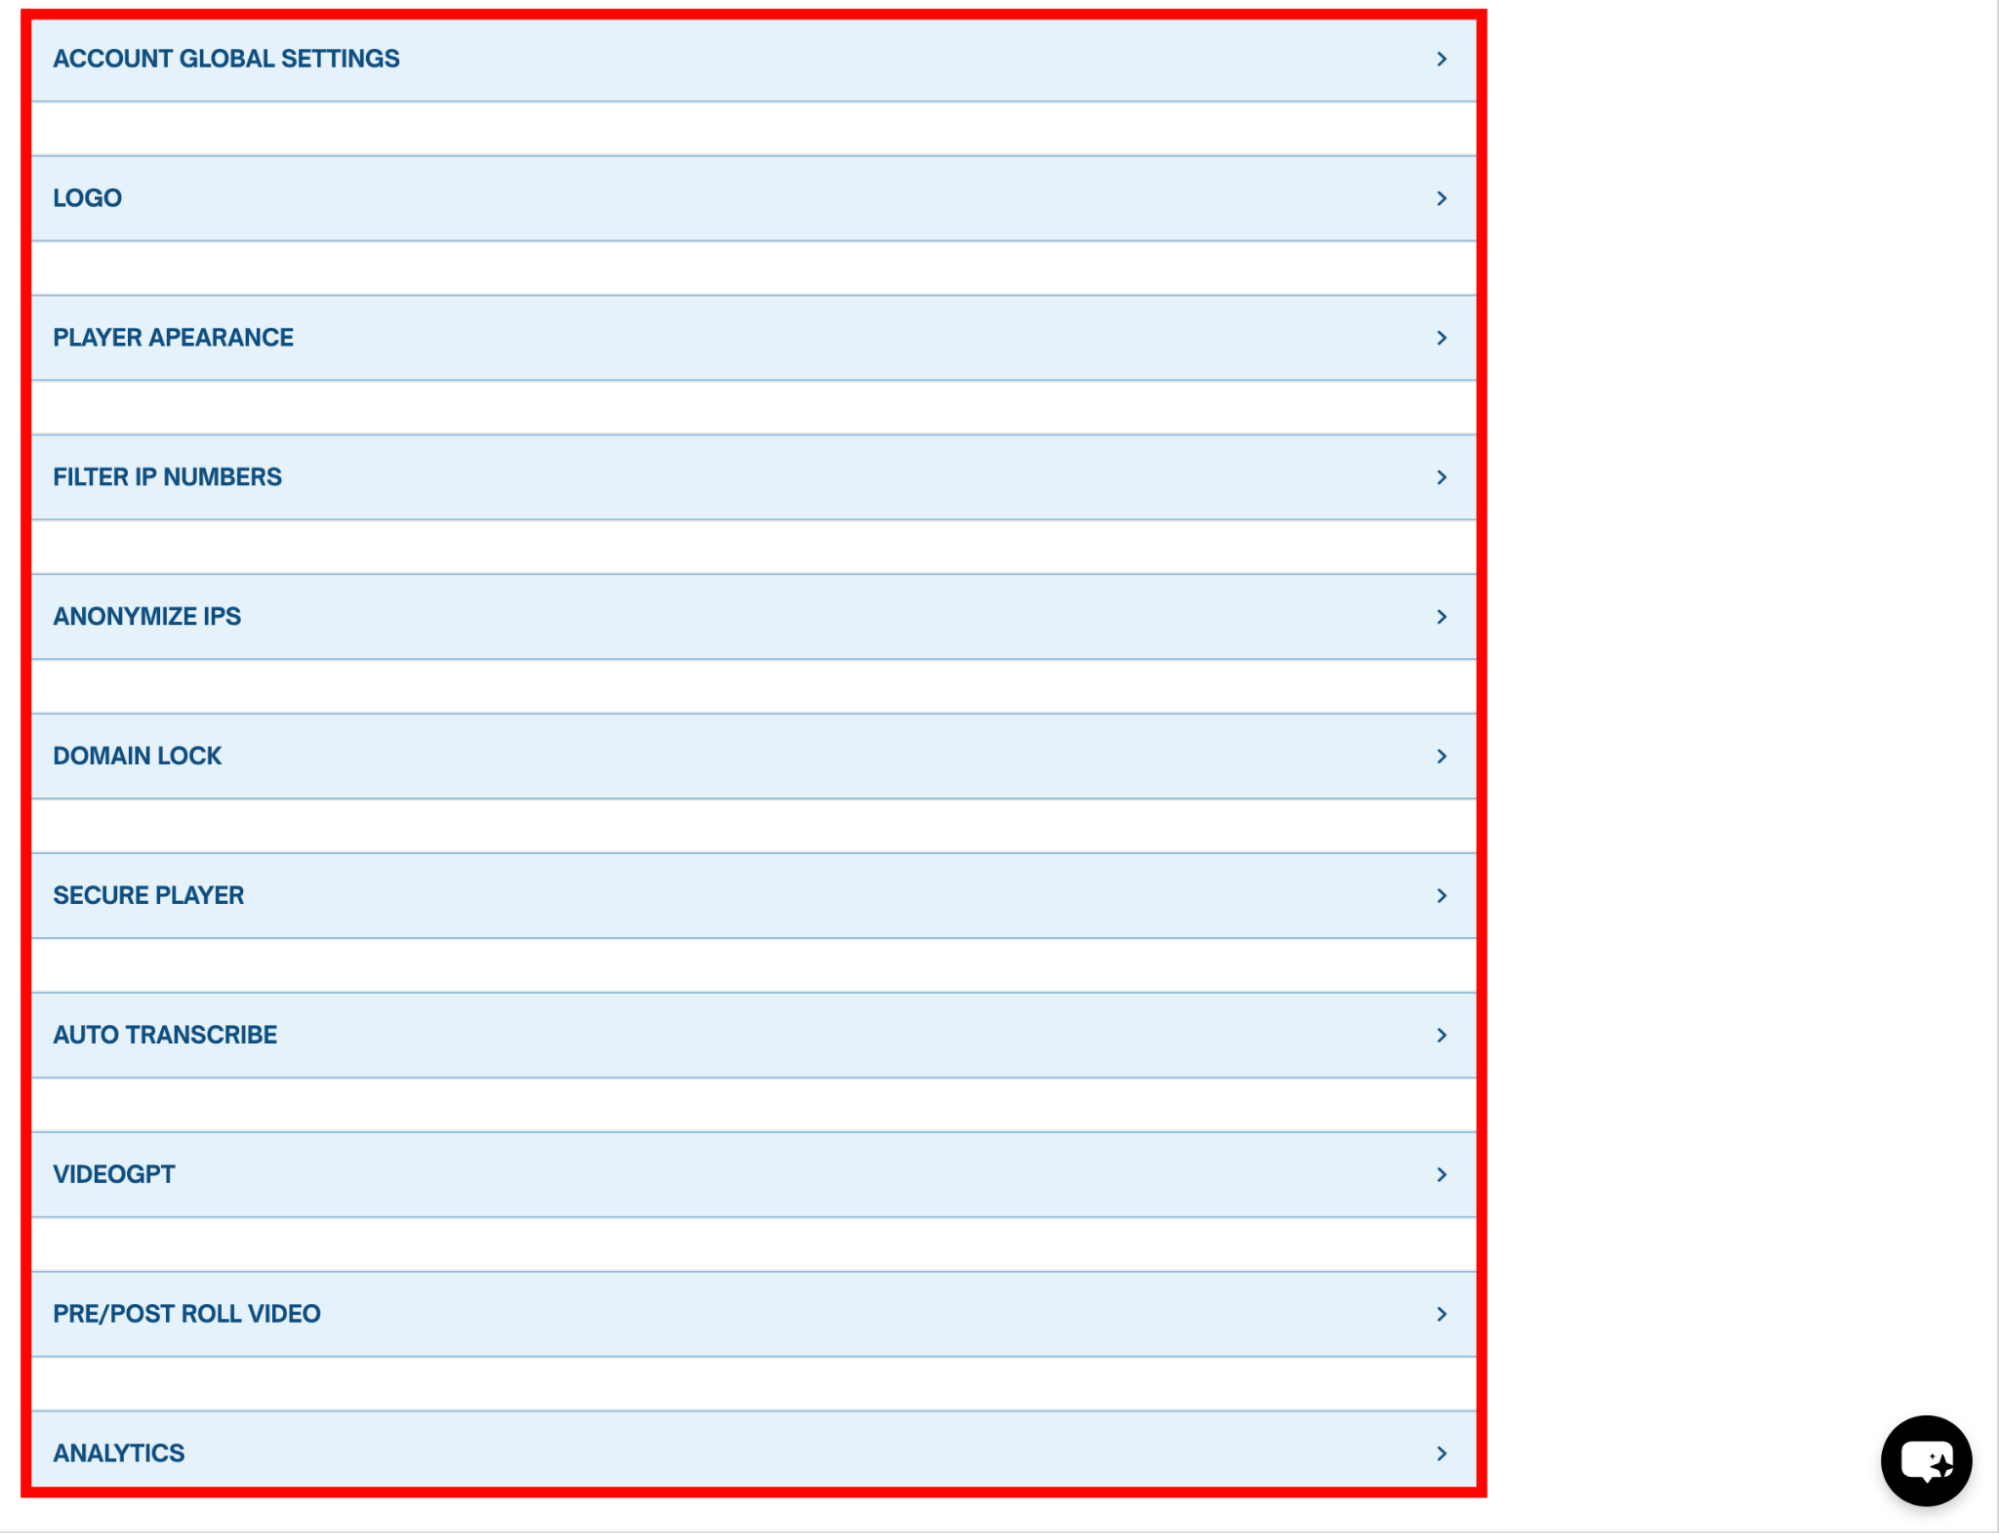
Global Settings Sections
Global Settings is organized into multiple sections such as Account Settings, Logo, Player Appearance, Security controls, Transcription, Monetization, and Analytics.
Each section can be expanded and configured individually.
In the following sections, we will go through each configuration in detail.

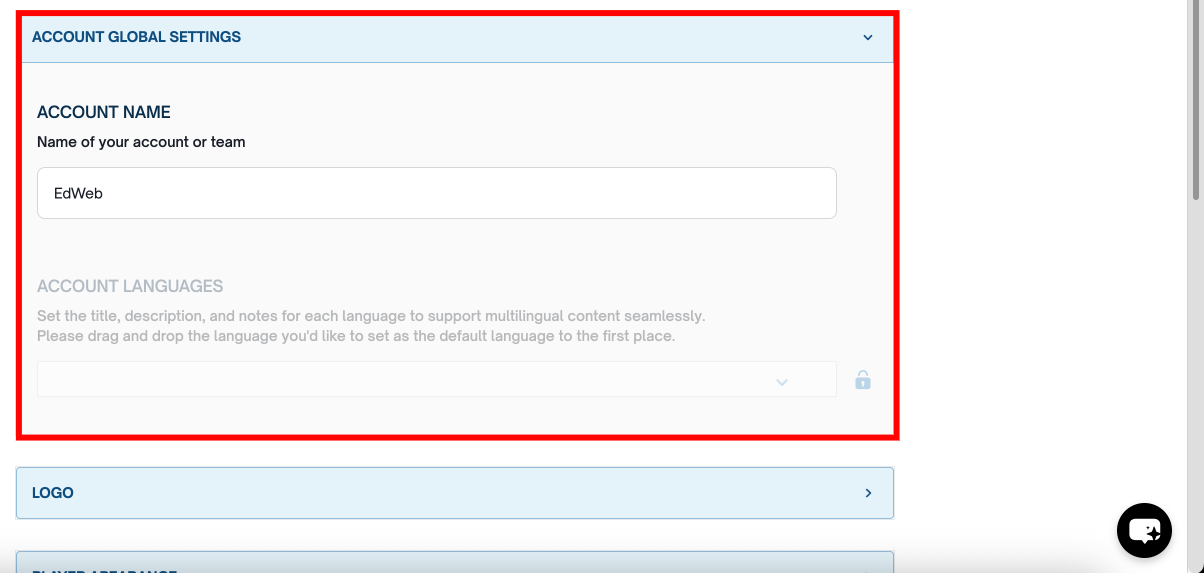
Account Global Settings
The Account Global Settings section allows you to configure basic account-level preferences that apply across your entire workspace.
You can update your Account Name, which represents your account or team across the platform and is used for identification and branding.
This section also includes Account Languages, where you can manage language preferences and set a default language for multilingual content support.
After making changes, click Save Settings to apply them.
Logo
The Logo section allows you to add and manage branding across your videos, galleries, and players.
You can upload your company logo and control how it appears on the player. The logo can be positioned in different areas such as top, bottom, or center, or disabled if not required.
Supported formats include PNG, JPG, GIF, and BMP. For best results, use a transparent image with recommended dimensions for proper visibility across players.
You can also configure a logo click URL, which defines where users are redirected when they click on the logo. This is typically used to link back to your website or homepage.
Once enabled, this logo becomes the default branding across your media unless overridden at the individual asset level.
After making changes, click Save Settings to apply them.
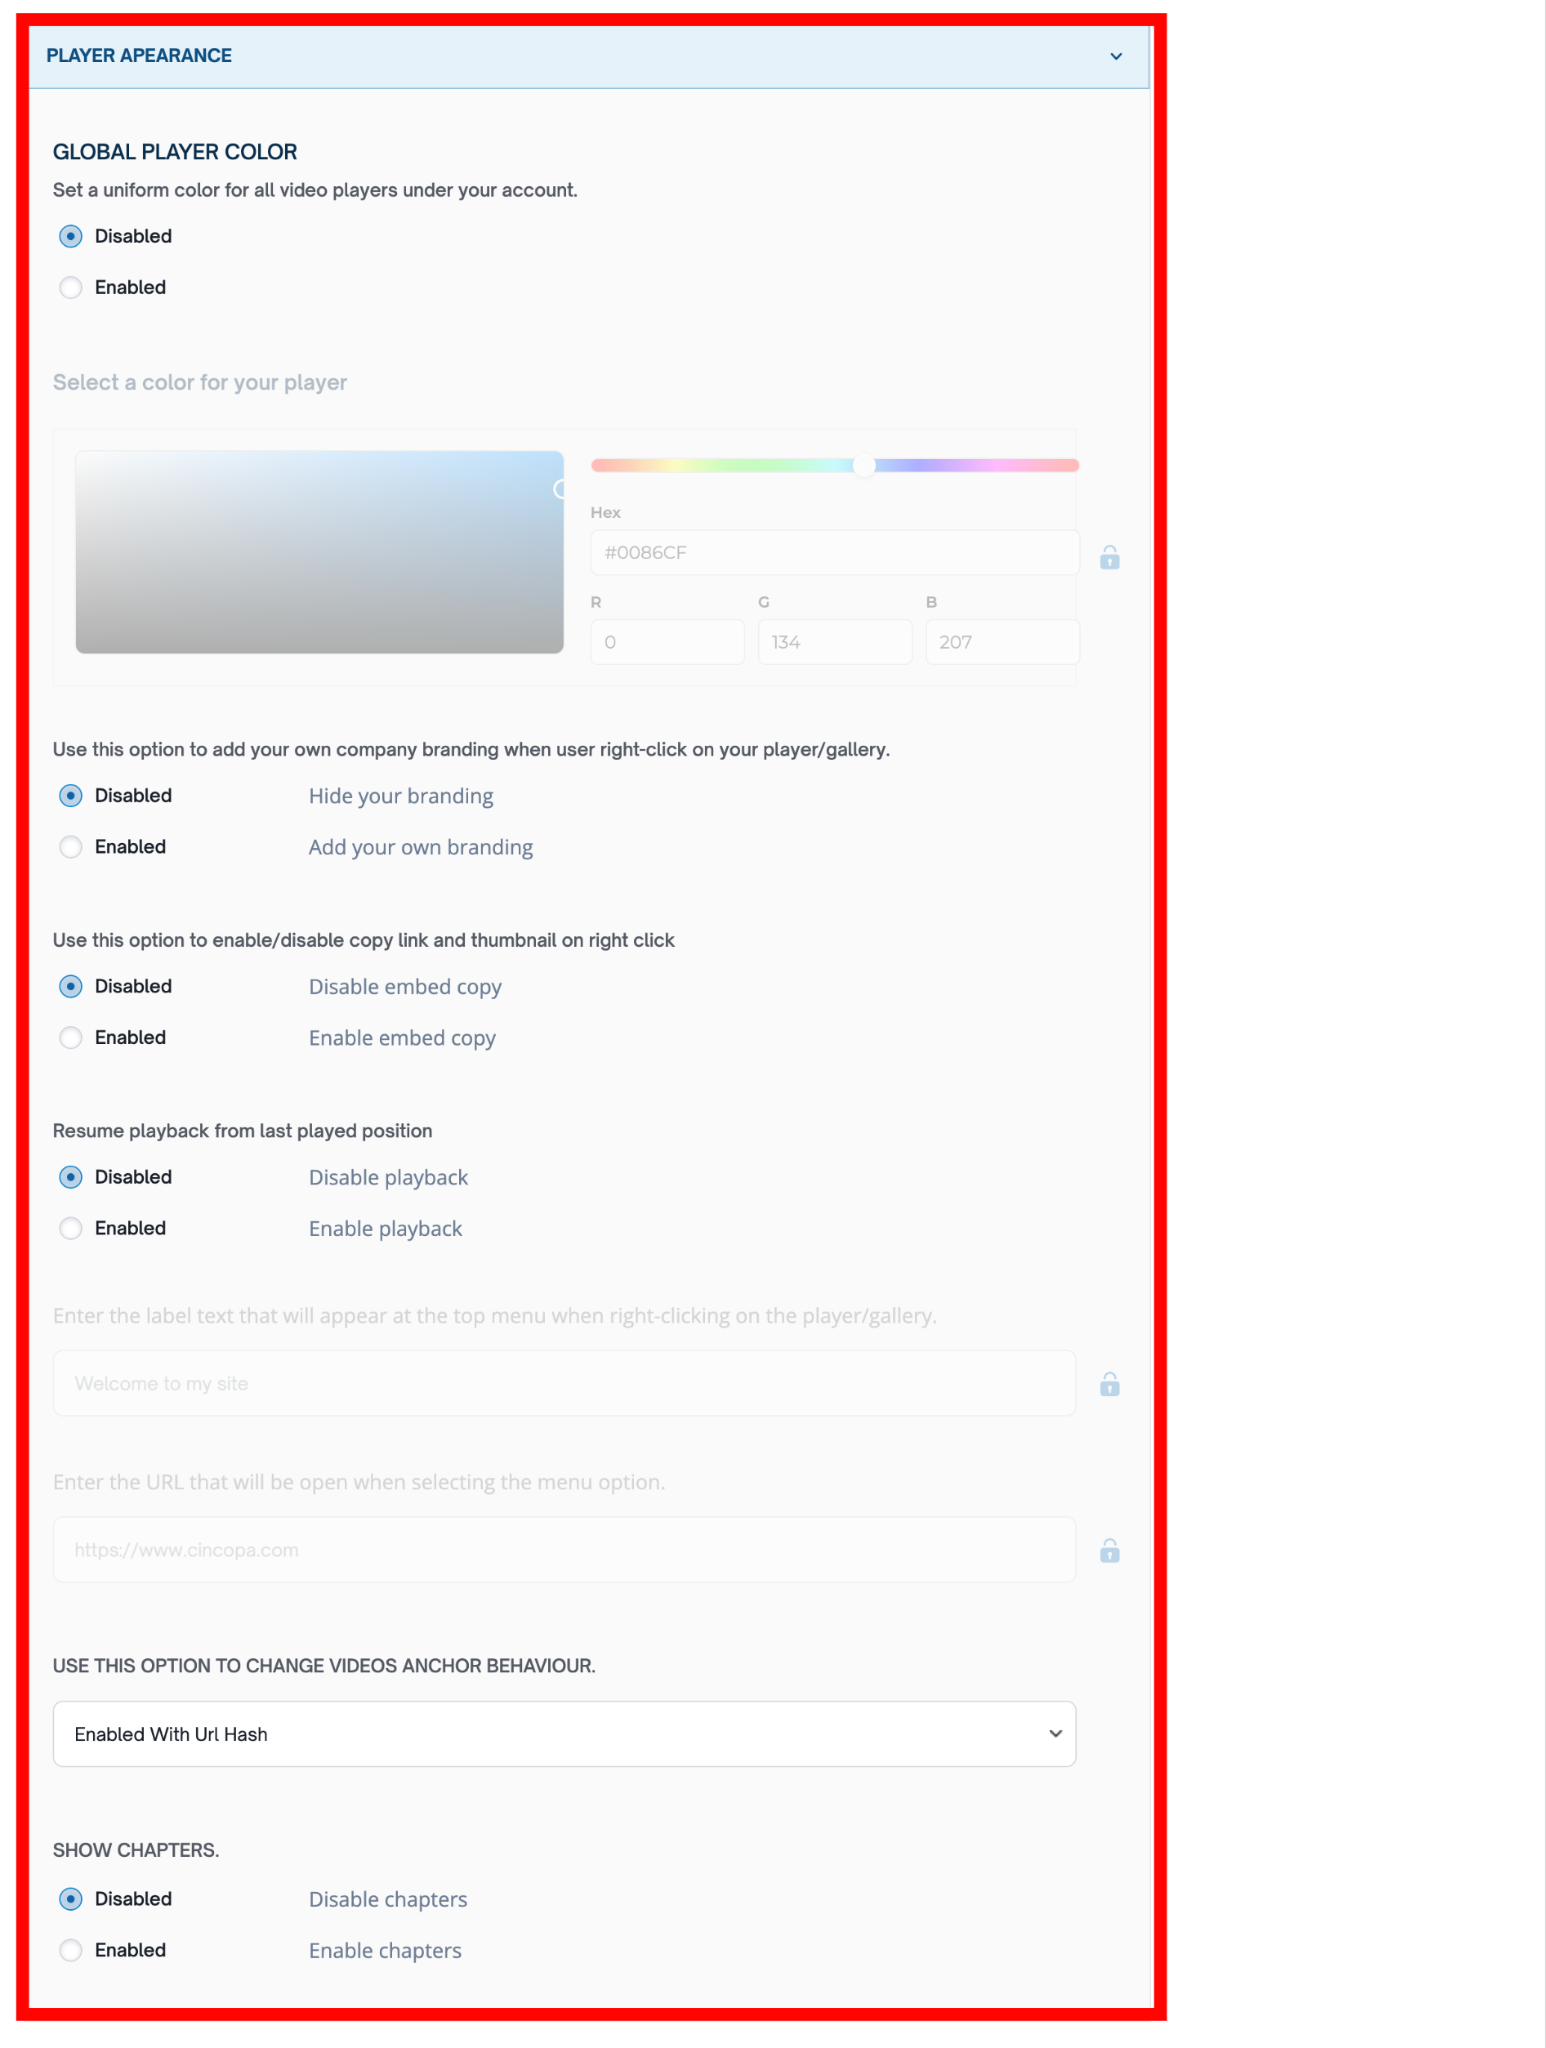
Player Appearance

The Player Appearance section allows you to control the visual styling and behavior of your video player across all media.
You can enable a Global Player Color to apply a consistent color across all video players. This helps maintain brand consistency. Once enabled, you can select a color using the picker or enter a HEX/RGB value.
This section also includes options to customize player behavior and user interaction:
- Add custom branding to the right-click menu on the player
- Enable or disable copy link and thumbnail options on right-click
- Allow users to resume playback from the last watched position
- Define custom label text and URL for right-click menu actions.
Additionally, you can control playback and navigation features such as:
- Video anchor behavior (how videos behave when accessed via URL)
- Enable or disable chapters for structured video navigation
These settings apply globally to all players unless overridden at the individual gallery or asset level.
After making changes, click Save Settings to apply them.
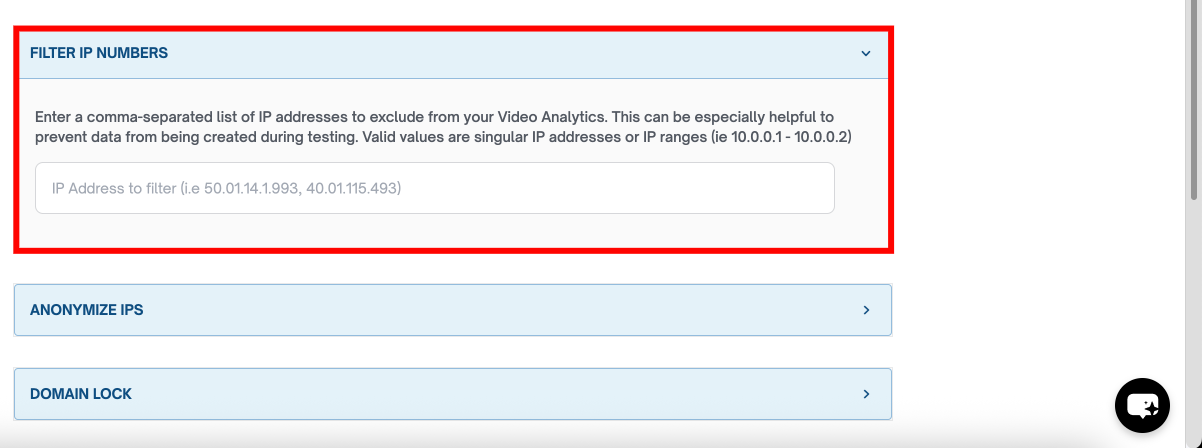
Filter IP Numbers
The Filter IP Numbers section allows you to exclude specific IP addresses from being tracked in your video analytics. This is useful when you want to prevent internal traffic, such as testing or team activity, from affecting your analytics data.
You can enter one or multiple IP addresses in a comma-separated format. The platform also supports IP ranges, allowing you to exclude a broader set of addresses if needed.
Once configured, any activity from the specified IP addresses will not be counted in analytics reports, helping you maintain more accurate data.
After making changes, click Save Settings to apply them.
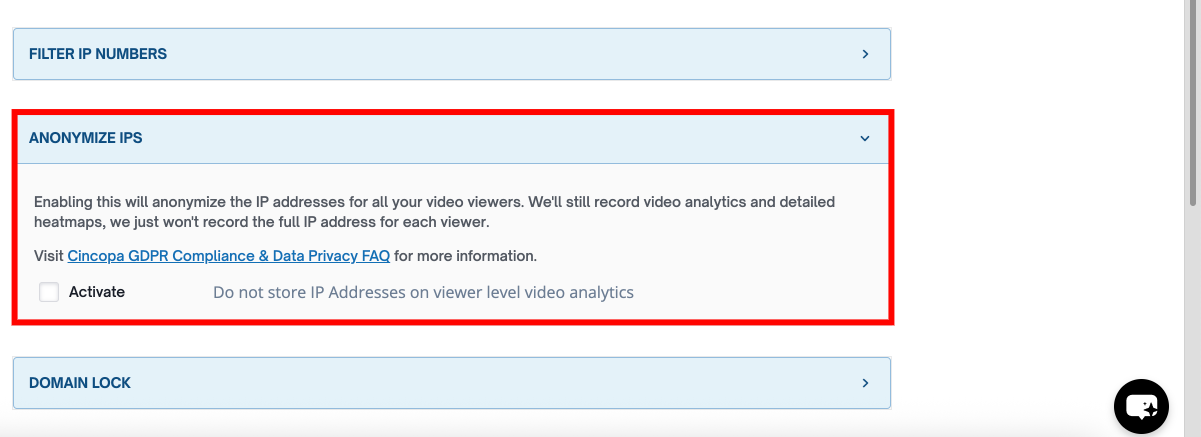
Anonymize IPs
The Anonymize IPs section allows you to enhance user privacy by preventing full IP addresses from being stored in your analytics data.
When enabled, the platform continues to collect video analytics and generate insights such as views and heatmaps, but it does not store complete IP address information for individual viewers.
This is particularly useful for complying with privacy regulations and internal data protection policies.
To enable this setting, simply activate the checkbox. Once enabled, IP addresses will be anonymized across all analytics data.
After making changes, click Save Settings to apply them.
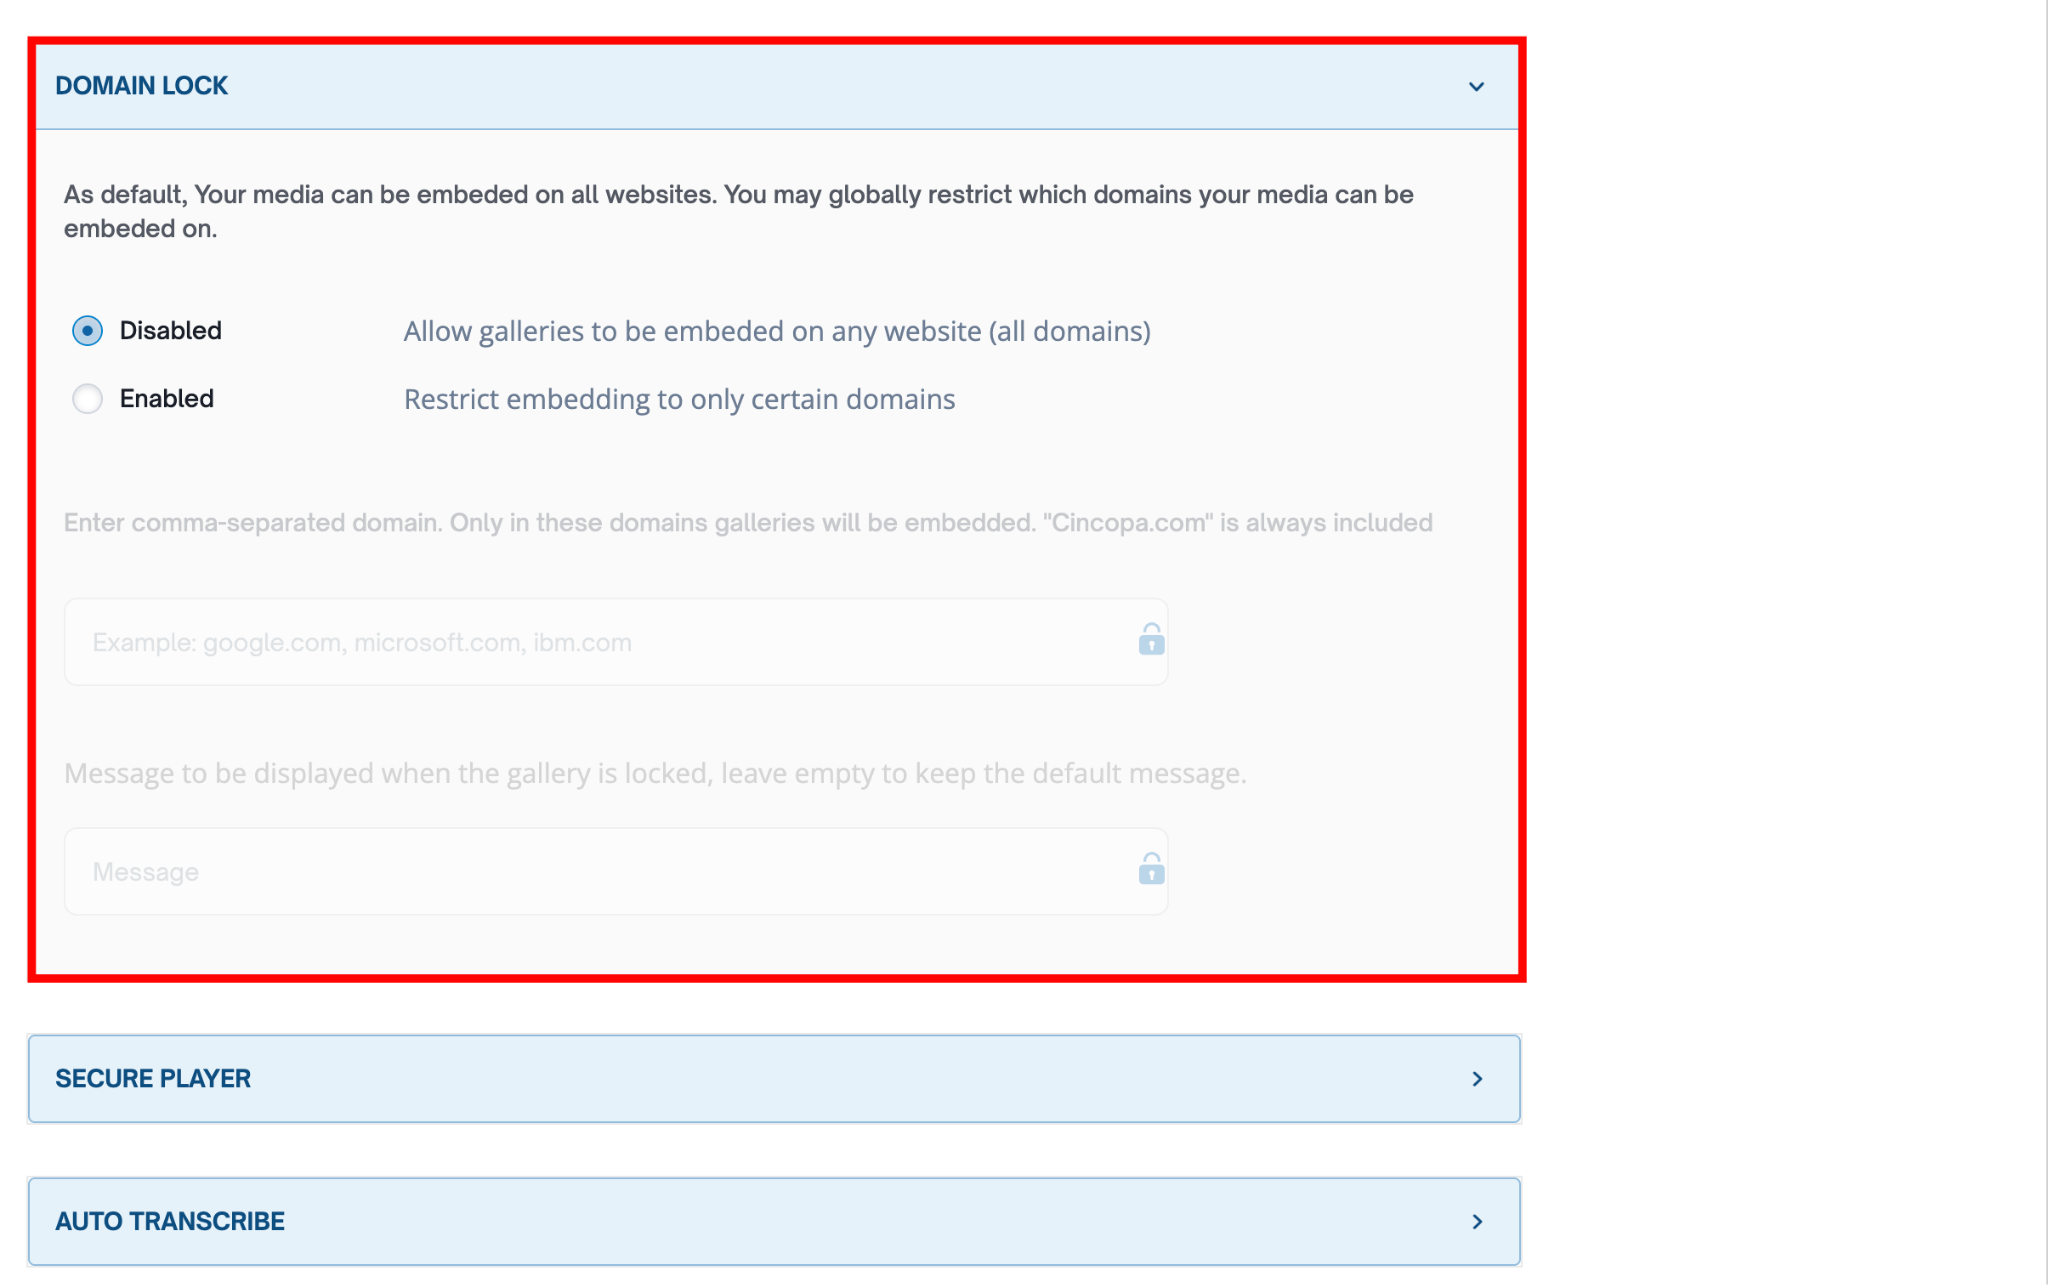
Domain Lock
The Domain Lock section allows you to control where your media can be embedded. By default, your videos and galleries can be embedded on any website. This setting lets you restrict embedding to specific domains.
When set to Disabled, your media can be embedded across all domains without restriction.
When Enabled, you can define a list of allowed domains. Only the domains you specify will be able to embed your media. You need to enter domain names in a comma-separated format.
You can also configure a custom message that will be displayed when someone tries to access or embed your media from a restricted domain. If left empty, the default message will be shown.
This helps protect your content and ensures it is only used on approved websites.
After making changes, click Save Settings to apply them.
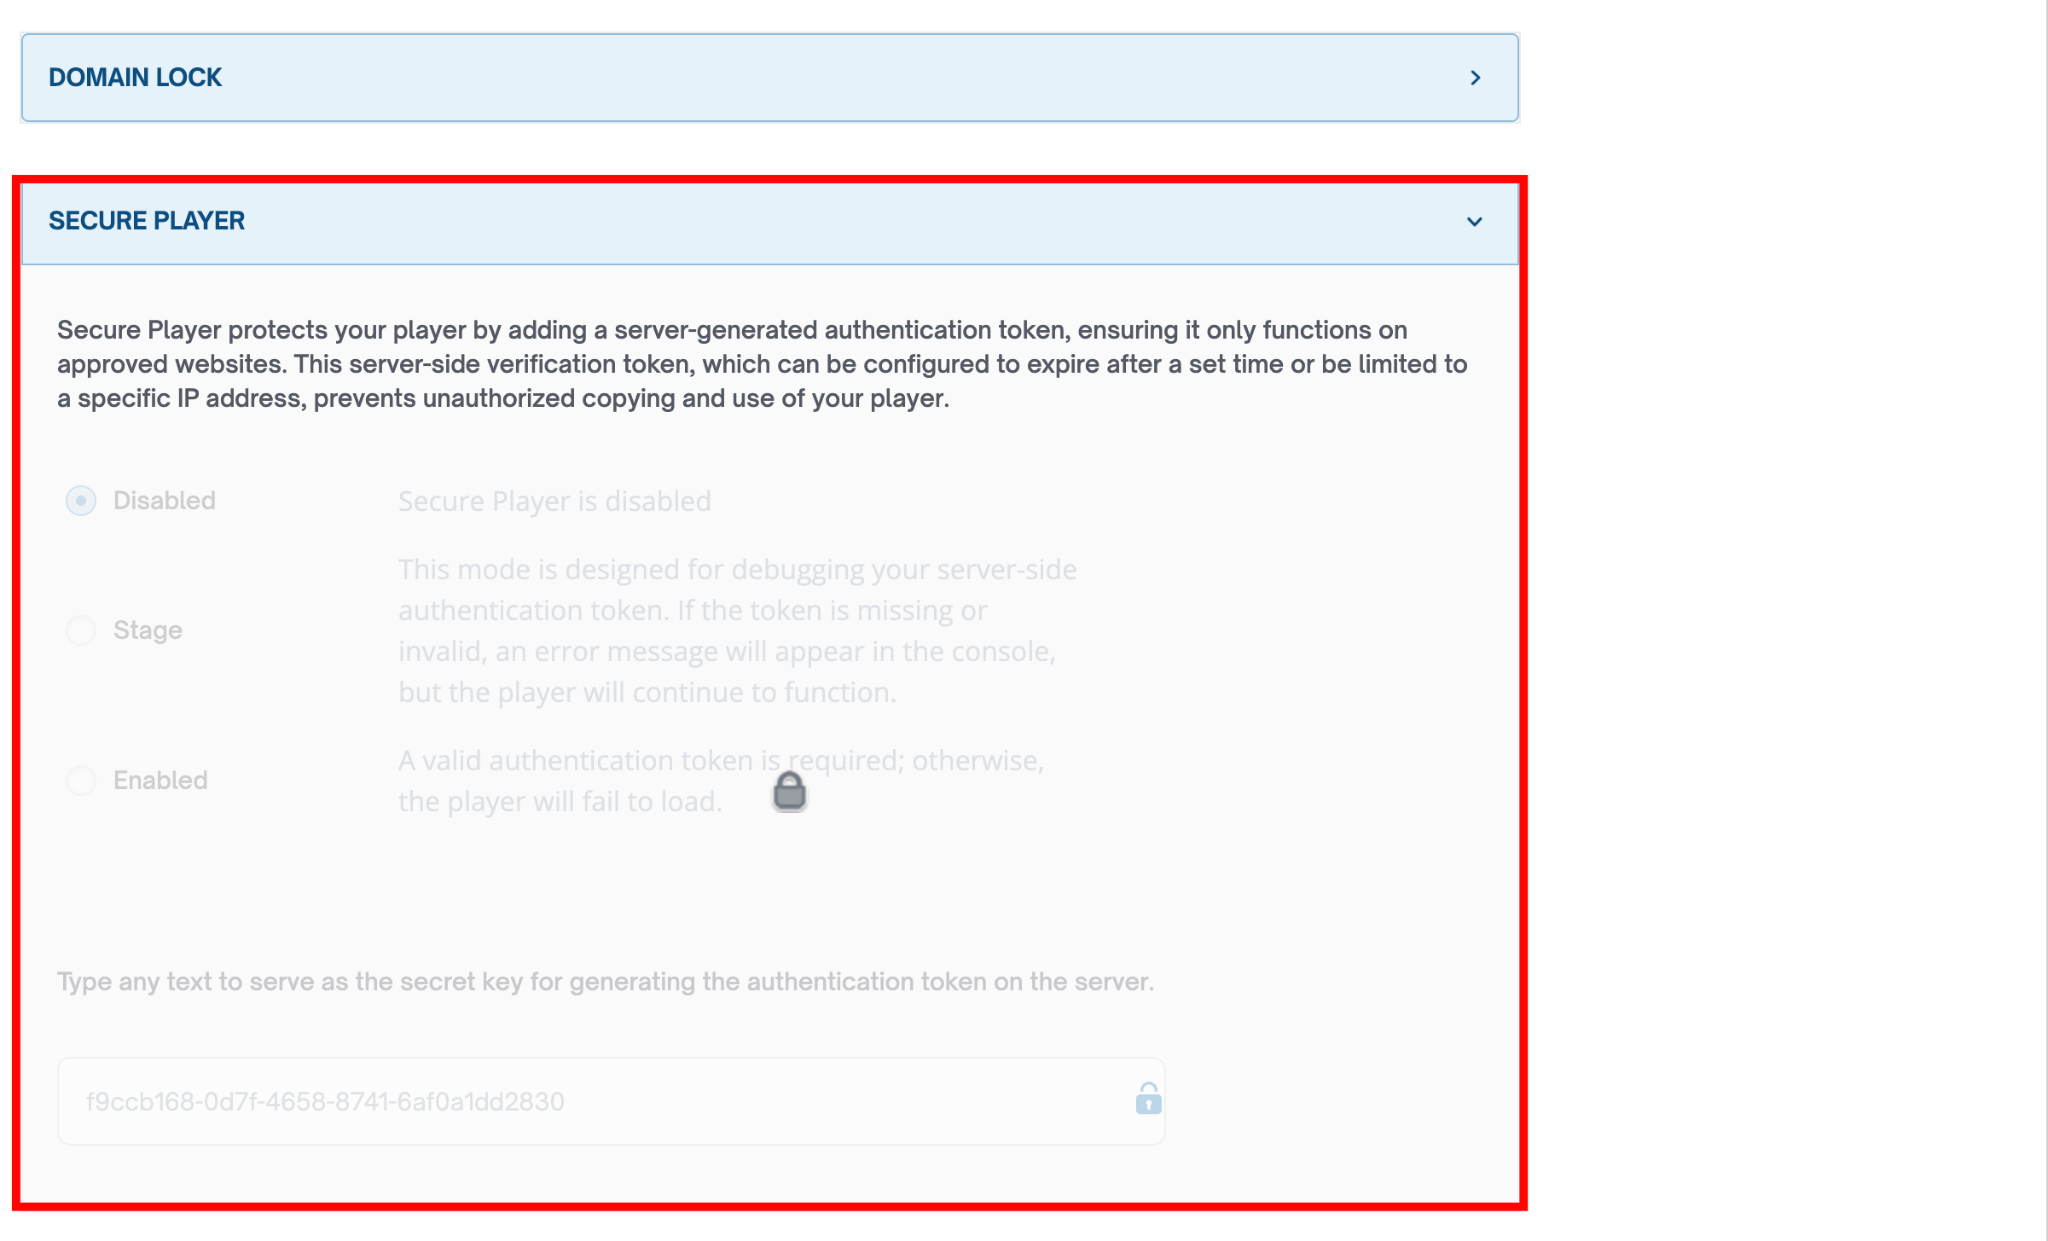
Secure Player
The Secure Player section adds an additional layer of protection to your media by using a server-generated authentication token. This ensures that your player only works on approved environments and prevents unauthorized access, copying, or embedding.
When enabled, the player requires a valid authentication token generated from your server. You can configure this token to expire after a specific time or restrict it to a particular IP address, making access more secure.
This section provides multiple modes:
- Disabled: The player works normally without any authentication
- Stage: Used for testing; invalid or missing tokens will show errors but the player will still function
- Enabled: A valid authentication token is required; otherwise, the player will not load
You can also define a secret key, which is used on your server to generate the authentication tokens.
After making changes (if available), click Save Settings to apply them.
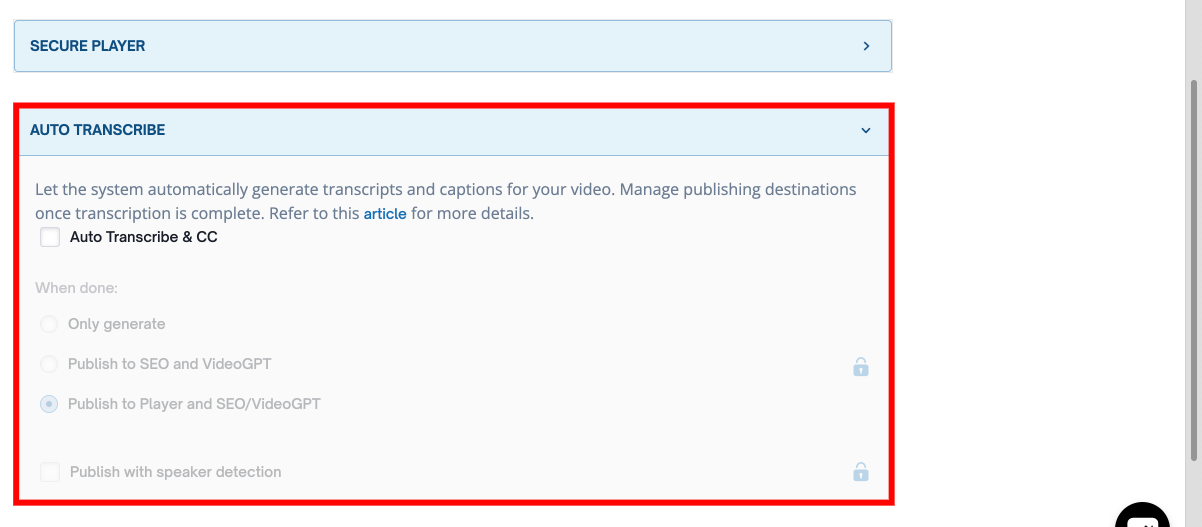
Auto Transcribe
The Auto Transcribe section allows you to automatically generate transcripts and captions for your videos. This helps improve accessibility, searchability, and overall content usability without requiring manual transcription.
When enabled, the system will process your videos and generate transcripts once the upload is complete. You can then choose how these transcripts are used and published.
You can configure the following options:
- Generate transcripts only without publishing
- Publish transcripts to SEO and VideoGPT
- Publish transcripts directly to the player along with SEO/VideoGPT
Additional options such as speaker detection may also be available depending on your plan.
Some publishing options in this section are locked and may not be available under your current plan.
After making changes, click Save Settings to apply them.
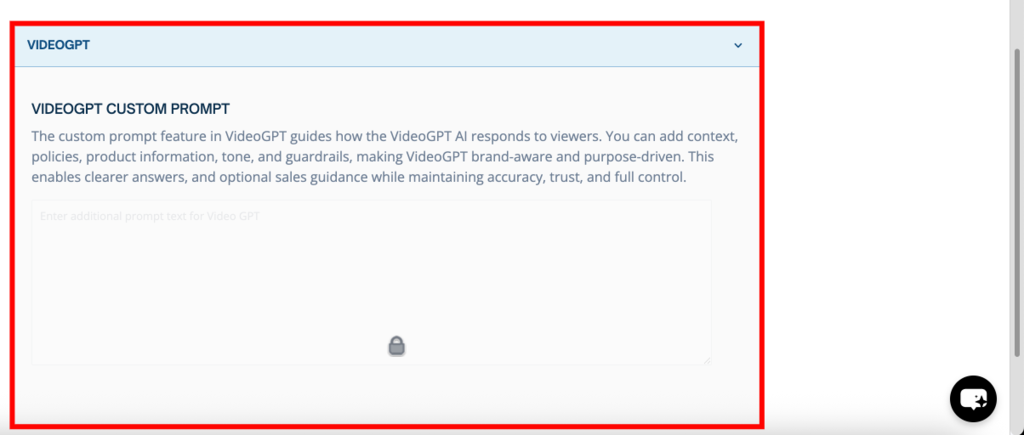
VideoGPT
The VideoGPT section allows you to customize how the AI interacts with viewers by defining a custom prompt.
This prompt helps guide the AI’s responses by providing context such as your product information, tone, policies, and specific instructions. By configuring this, you can make VideoGPT more aligned with your brand and ensure that responses are accurate and relevant.
You can use this section to control how the AI answers questions, provides guidance, or presents information to users interacting with your videos.
After making changes (if available), click Save Settings to apply them.
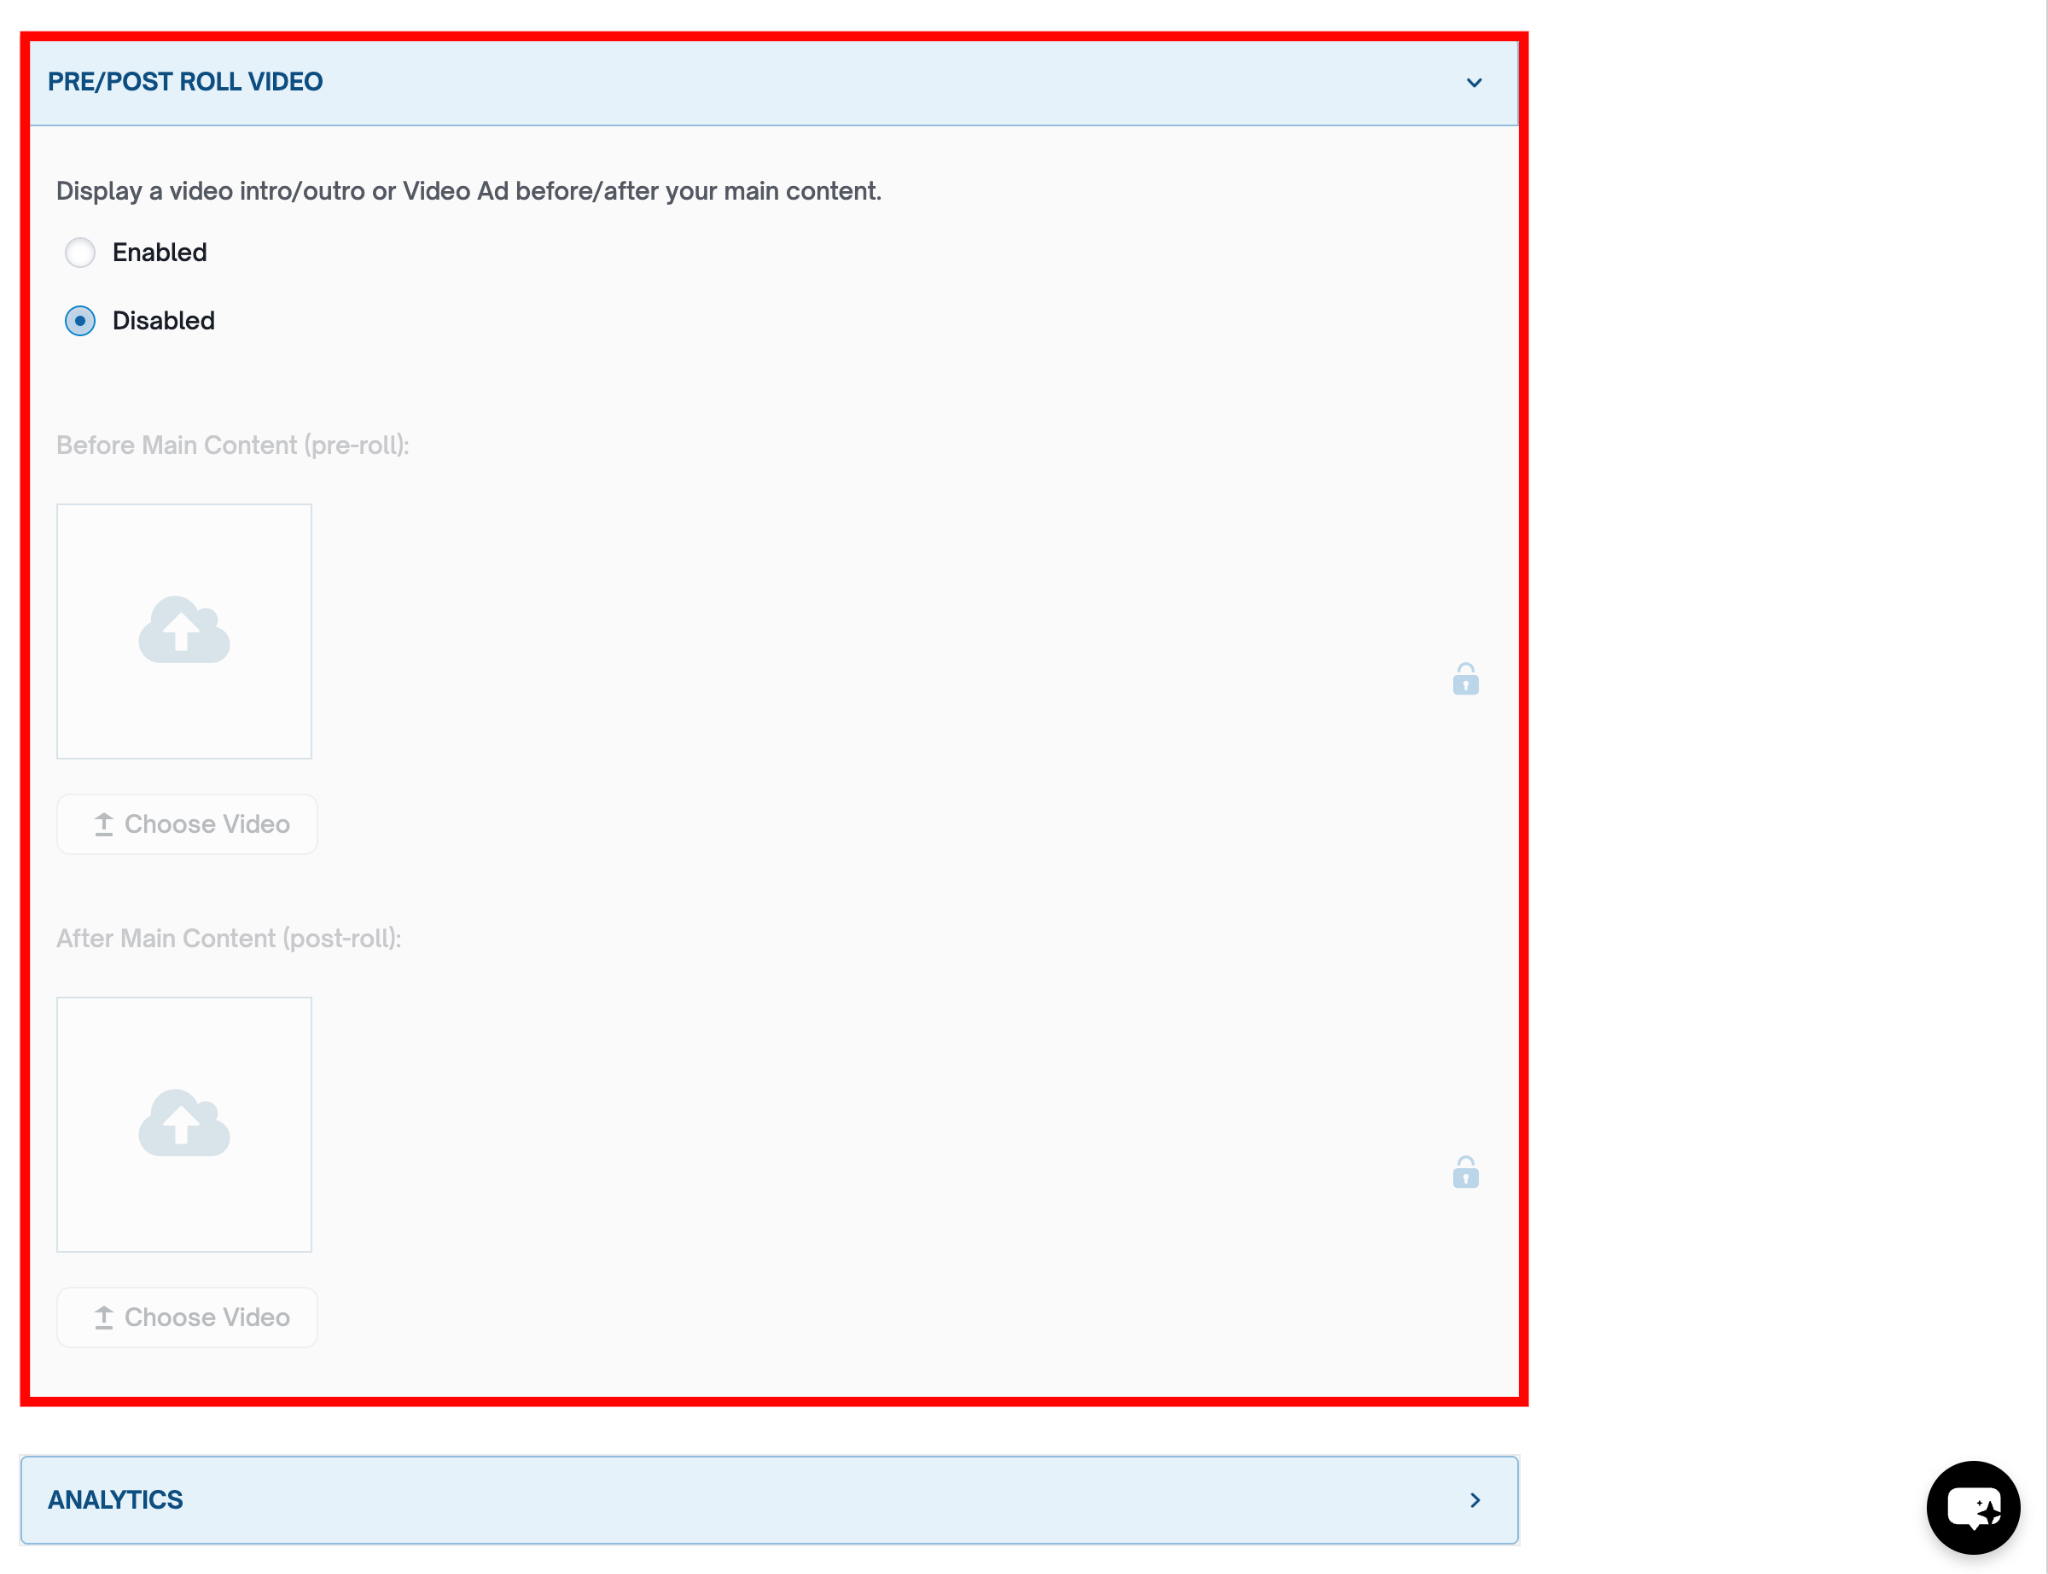
Pre/Post Roll Video
The Pre/Post Roll Video section allows you to add intro or outro videos that play before or after your main video content. This is useful for branding, announcements, or displaying promotional content across all your media.
You can enable this feature to automatically play a selected video before the main content (pre-roll) or after it ends (post-roll). This ensures a consistent viewing experience without needing to configure each video individually.
When enabled, you can upload or select videos to be used as:
- Pre-roll: Plays before the main video starts
- Post-roll: Plays after the main video finishes
These videos act as global defaults and will be applied across your players unless overridden at the individual gallery or asset level.
After making changes, click Save Settings to apply them.
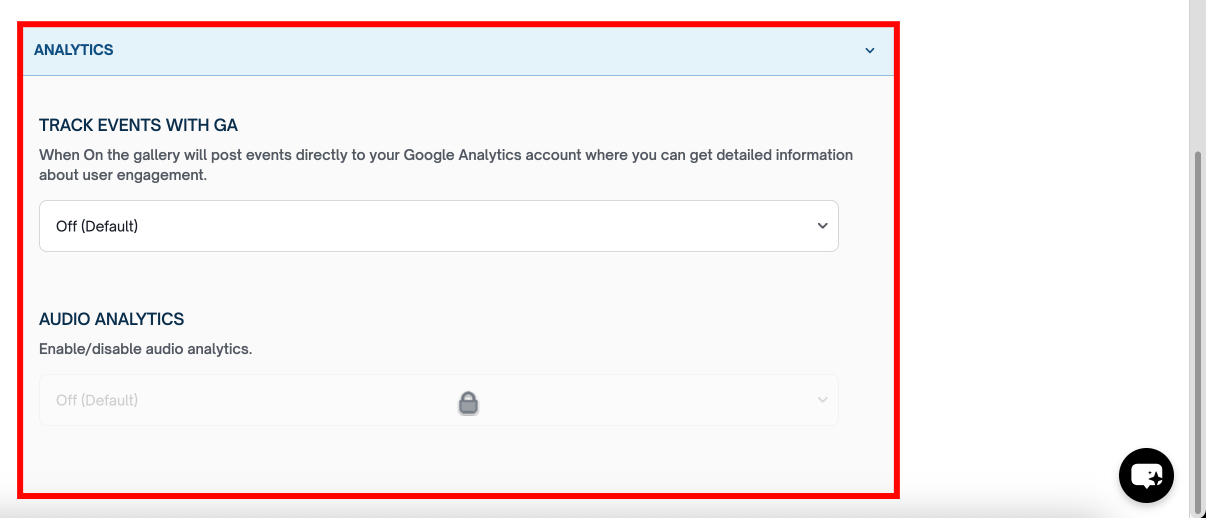
Analytics
The Analytics section allows you to control how user interaction data is tracked and integrated with external analytics tools. These settings help you monitor engagement and gather insights about how viewers interact with your media.
The Track Events with GA option enables integration with Google Analytics. When turned on, gallery and player events are sent directly to your Google Analytics account, allowing you to analyze user behavior, engagement patterns, and performance metrics alongside your existing analytics data.
The Audio Analytics option allows you to track engagement specifically for audio content. This includes insights into how users interact with audio media across your account.
After configuring your preferences, click Save Settings to apply the changes.