If you would like to use Cincopa with WordPress’ Elementor Website Builder, you can install the ‘Elementor Addon – Cincopa video and media plugin’. Cincopa’s Elementor addon plugin allows you to easily insert video players, slideshow albums, photo galleries and music/podcast playlists from your Cincopa account into your site.
Please note that the Elementor plugin must already be installed so that Cincopa’s Elementor addon is then displayed as a recommended plugin.
Steps for installing and activating Elementor Addon – Cincopa video and media plugin:
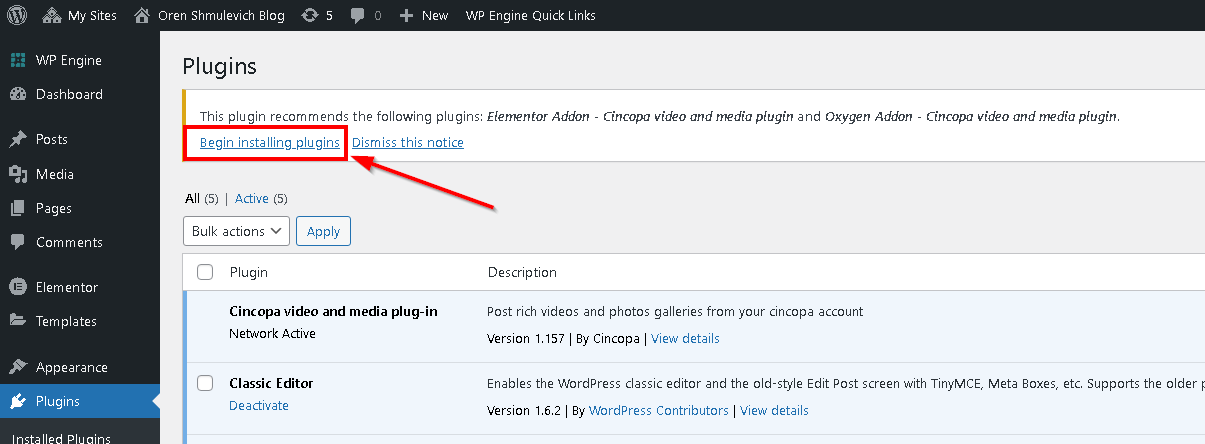
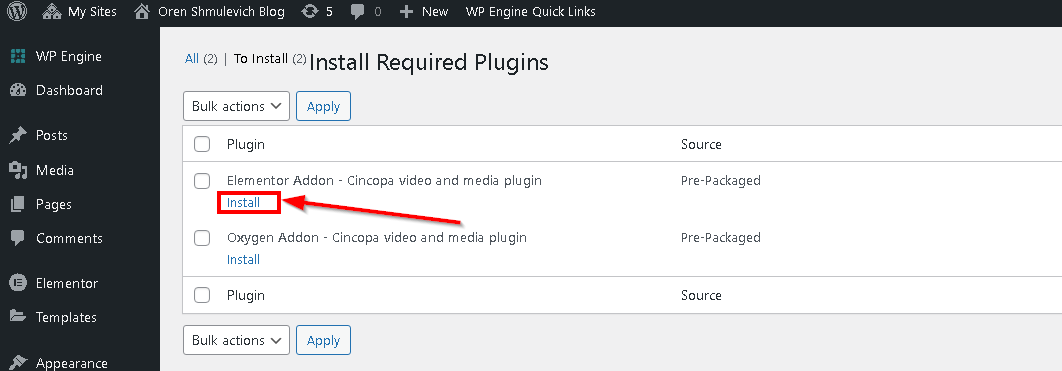
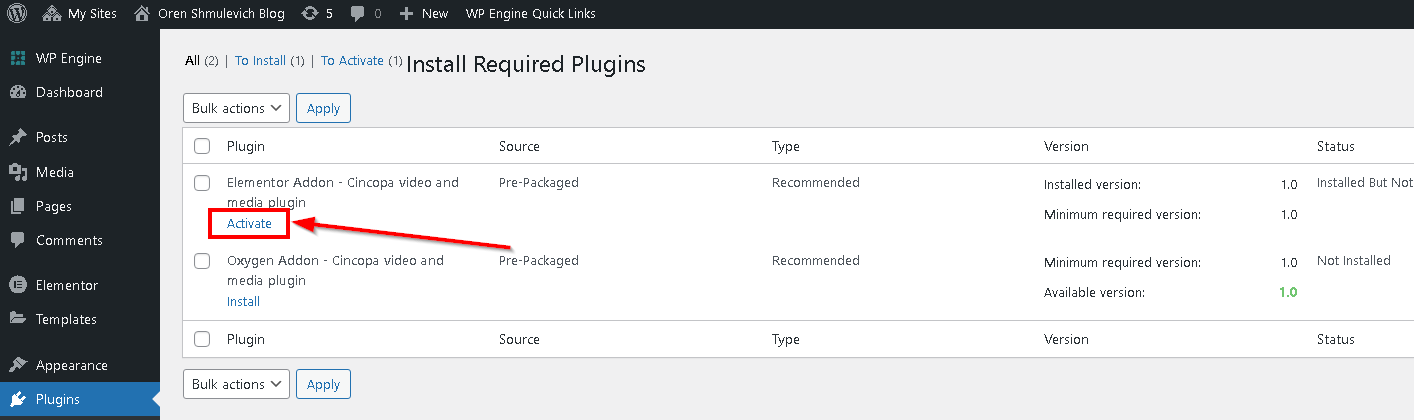
Go to the Plugins page and within the Recommended plugins notice, click on the Begin Installing plugins link as shown below to install Cincopa Elementor addon plugin and then click on Install to install the addon plugin. Once it’s installed click on the Activate link to activate it.
You can also download the Cincopa Elementor addon plugin and manually install it using steps provided below.
- Download the Cincopa Elementor addon plugin zip file and save it on your computer.
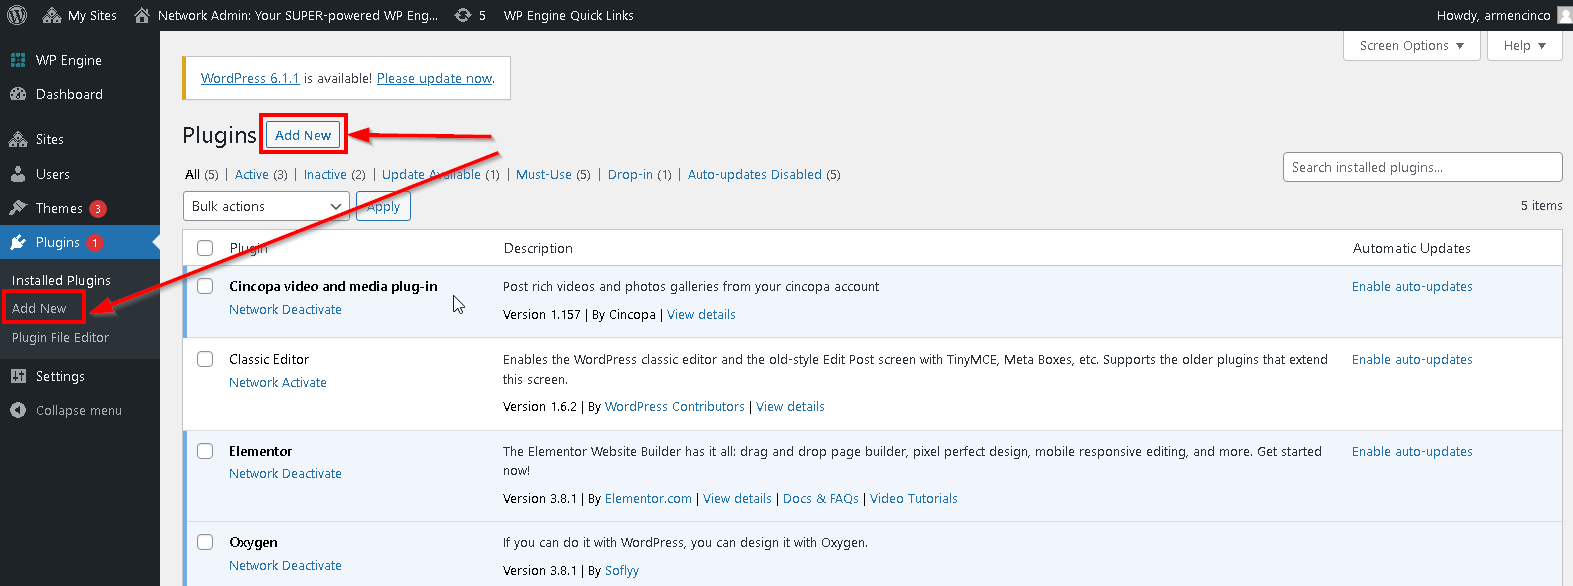
- Go to Plugins and click on Add New.

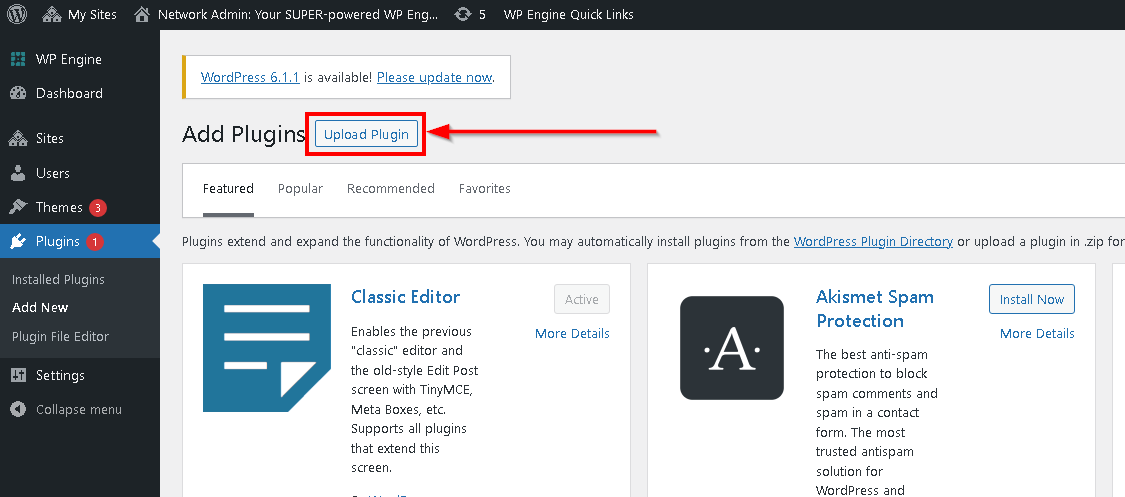
- Click on Upload Plugin button.
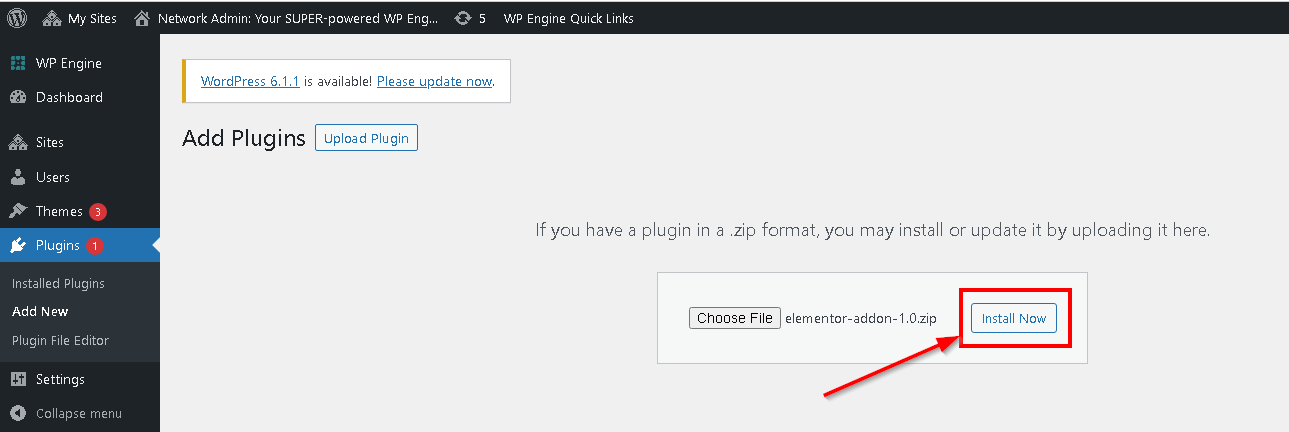
- Select the plugin file you downloaded earlier to your computer and then click on Install Now.
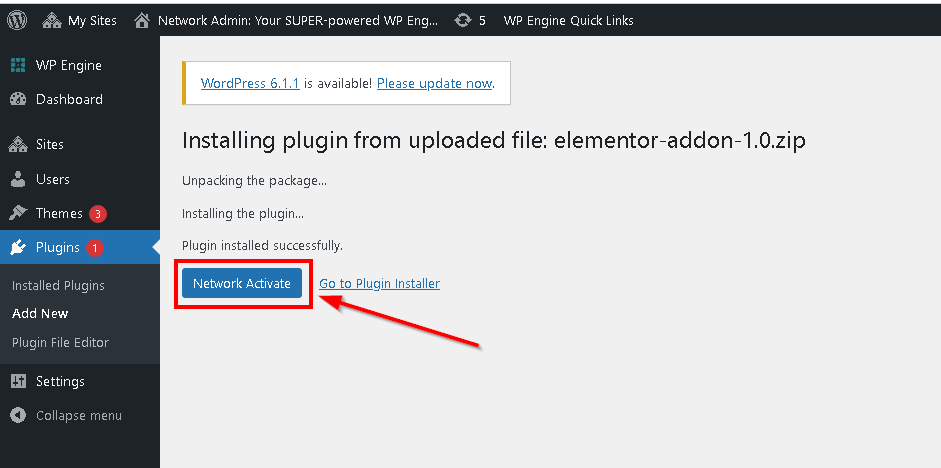
- Once the plugin is installed, click on Network Activate button to activate it.
Steps for inserting assets from your Cincopa account using Elementor editor:
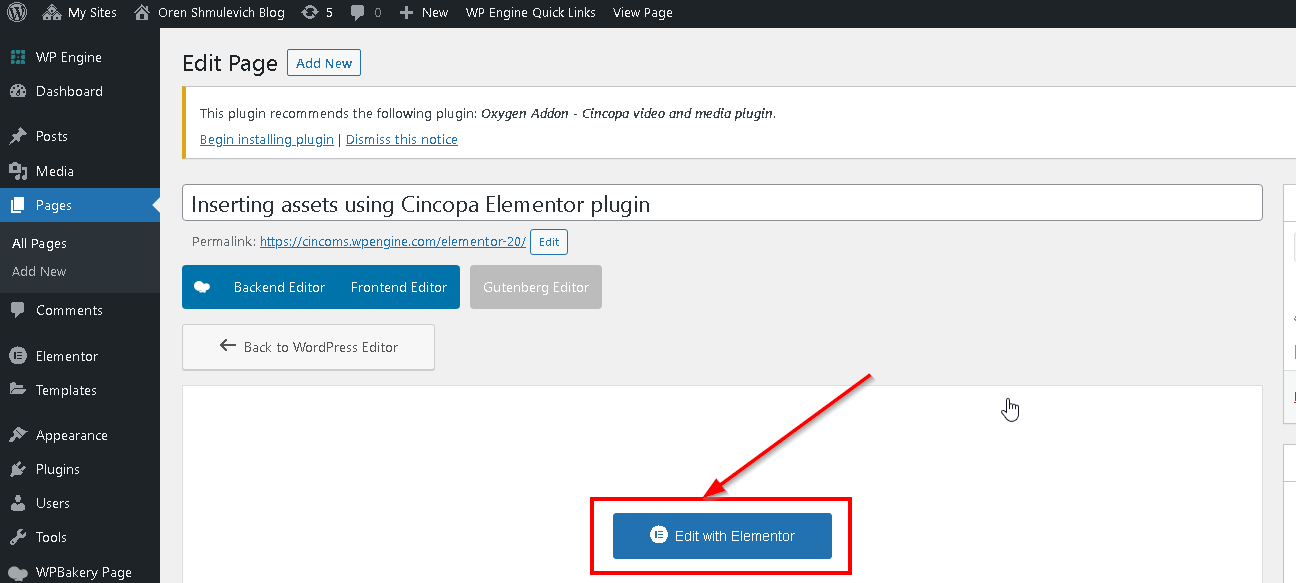
- Open your site page in edit mode using the Edit with Elementor edit option.
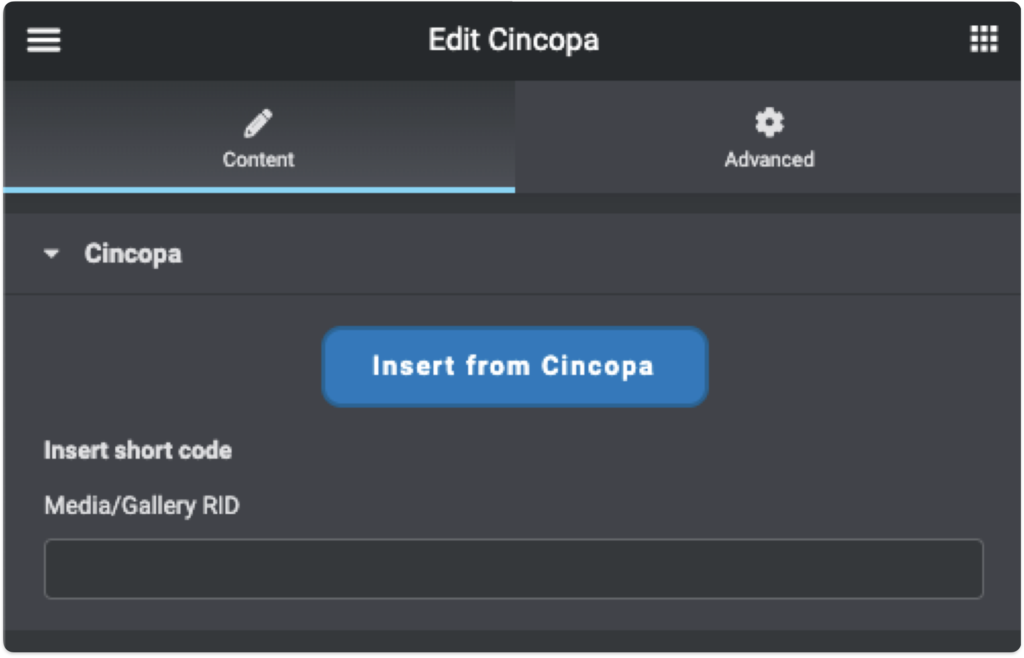
- Under Widgets, search for Cincopa and then drag and drop it to the right side on your page.
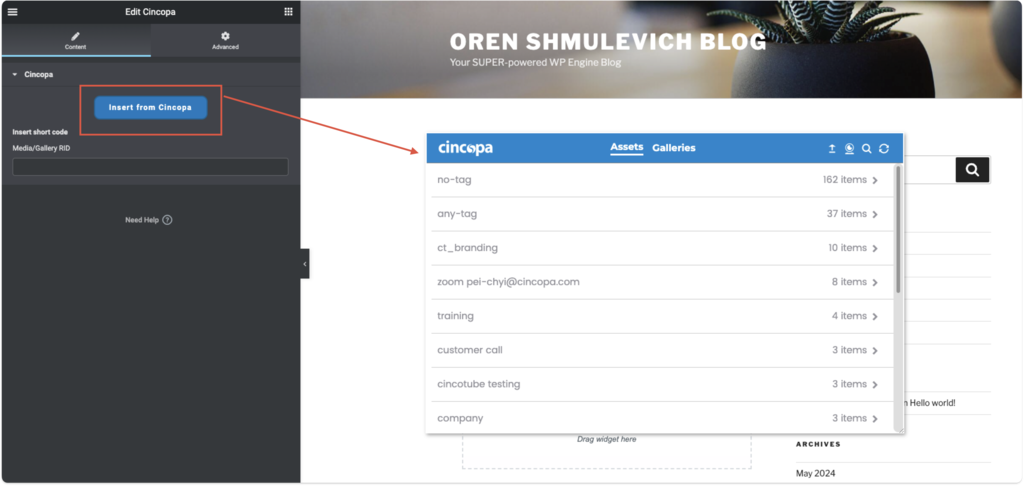
- Enter the ID of the gallery you would like to insert if you have it or click on the Insert from Cincopa button to look up assets from your Cincopa account.
- Assets are displayed based on the tags. Select a tag and then select an asset within the list.
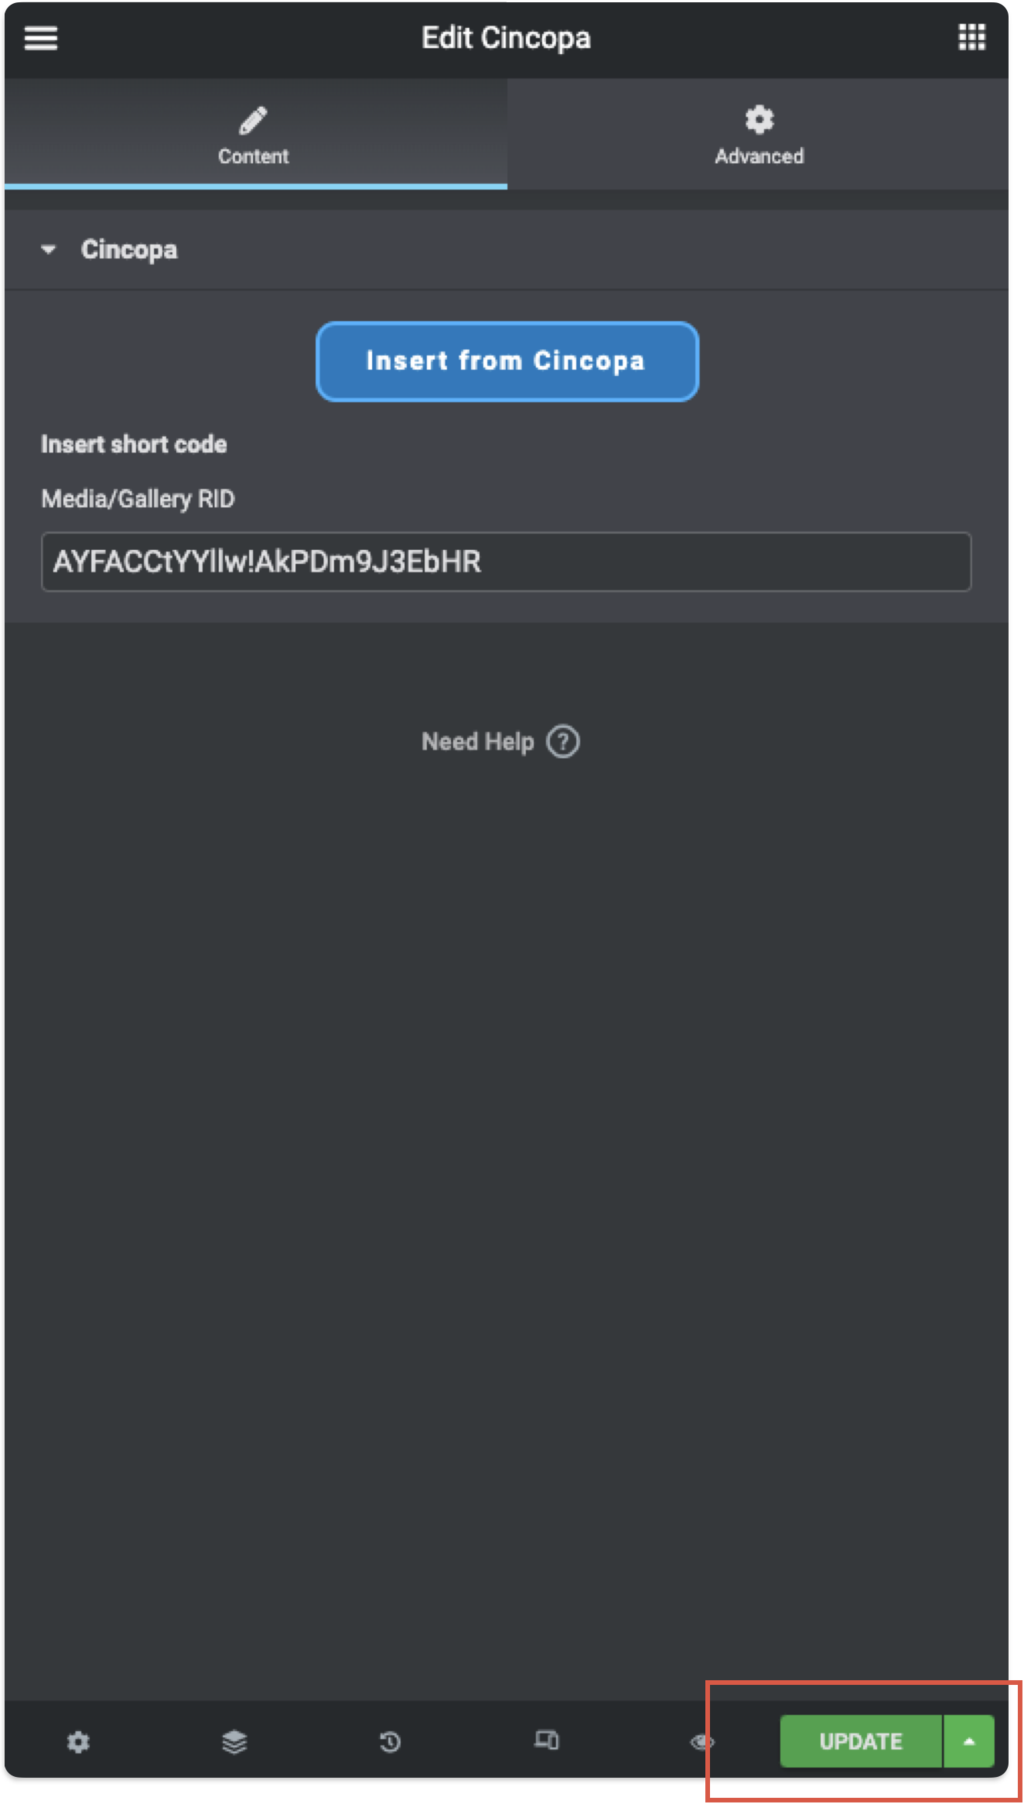
- Click on the Asset and then click on the Insert Media option.
- Once it’s added, save all the changes.