This article explains how you can enable, create and implement anchors on a video asset. Anchoring is a great way to divide your video asset into various sections and link each section with HTML code on your webpage.
Steps for enabling Anchor Option:
-
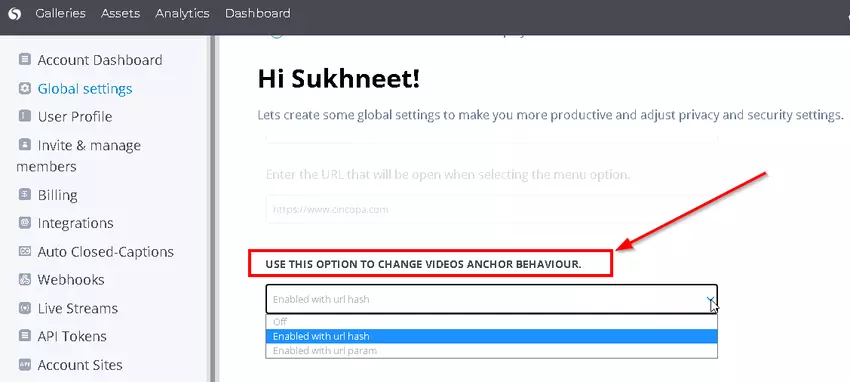
Go to Dashboard and then click on Global settings from the left hand side menu.

-
Scroll down to the option called “USE THIS OPTION TO CHANGE VIDEOS ANCHOR BEHAVIOUR” and choose Anchor behavior from the drop-down menu.

Steps for creating Anchors in Video Assets using Chapters:
To create anchor points in a video asset; you must first set up chapters for the Chapters for the video (under on-asset options).
Here are the steps for creating chapters for video assets:
-
Click on Assets option from the top left menu to go to the assets page.
-
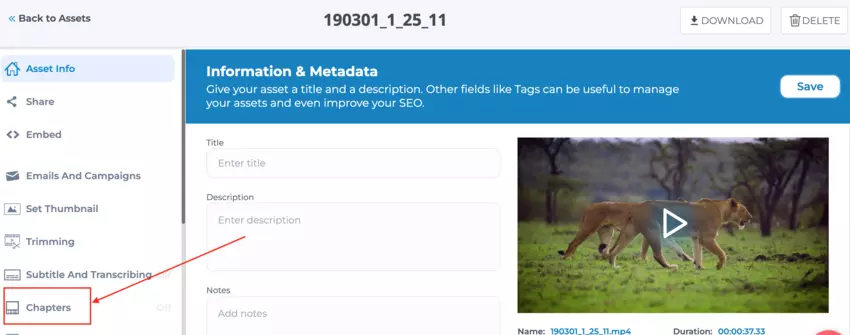
Click on the Video Asset for which you would like to create chapterS/anchor-points.

-
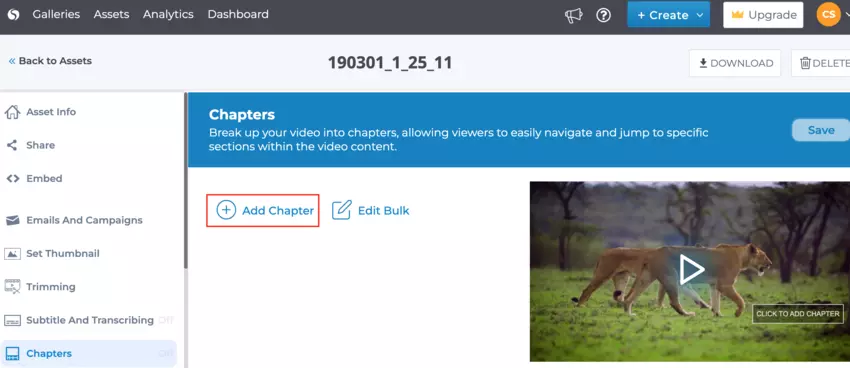
Click on Chapters and then click on Add chapters link.


-
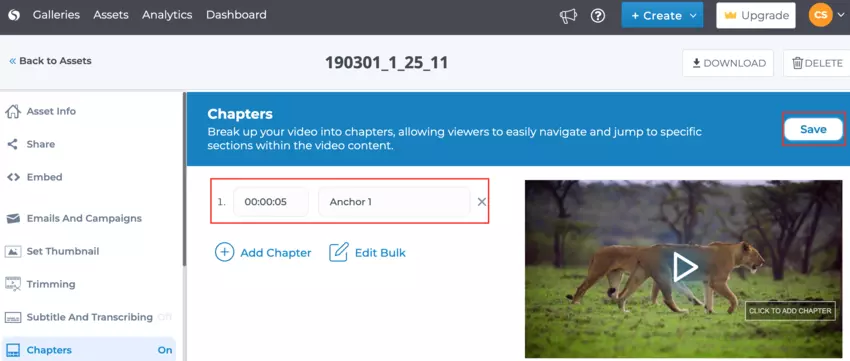
Enter the time and title for the chapter/anchor and click Save.

Steps for copying anchor URL for HTML link:
Now that the video asset has been customized with chapters, you can now use the anchor link to create an html link. If you would like to send users to a specific chapter (specific point in a video), you can copy the anchor link and then use that for your html link.
To get the Anchor link please follow the steps below:
-
Go to the Video Asset with chapters via the Gallery Account site.
-
Click on the Chapter (the desired anchor in the video).
-
Copy the Anchor URL from the browser’s address bar.

Example of how the html link for creating an anchor would look like:
Replace the link within href tag with the link to your video chapter/anchor.
<p>Click <a href="https://sukhneet.cincopa.com/watch/A4HAcLOLOO68!A8HDo4VjU2rN#cprtstatus=_cp_0!channel!A8HDo4VjU2rN!chapter-3">here</a> to watch Chapter 3</p>
Click here to watch Chapter 3

Code snippet
<script>
cincopa.registeredFunctions.push({
func: function (name, data, gallery) {
cincopa.getGalleryById("cp_widget").playerAPI.goTo(2);
}, filter: "api.ready" });
</script>


