Cincopa has developed a family of elegant, pre-designed, and customizable player templates that are easy to personalize and embed into any website.
After creating a gallery and uploading multimedia content, you have the option to try different customizations and pick the one that best fits your vision.
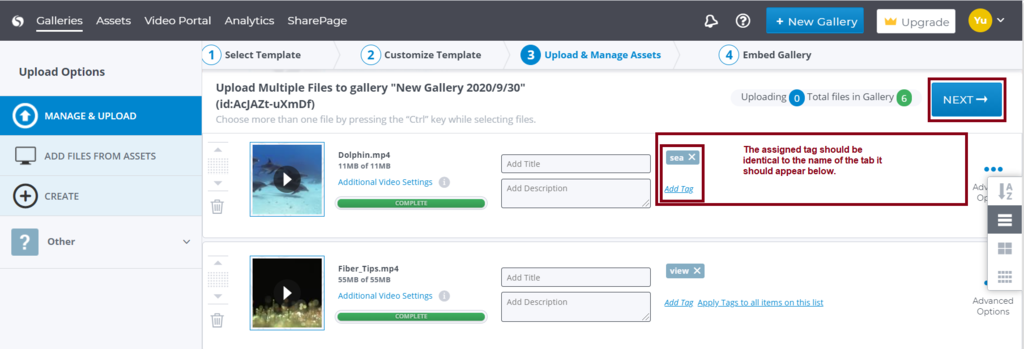
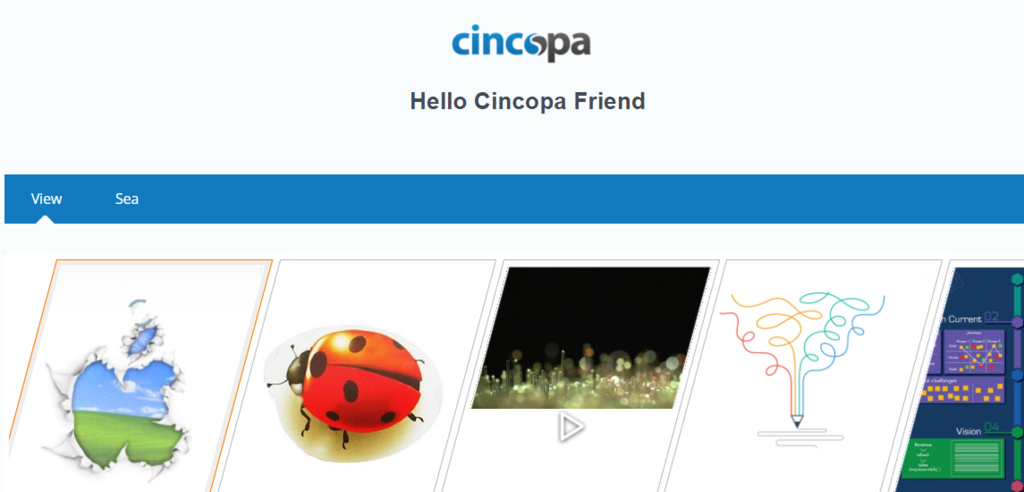
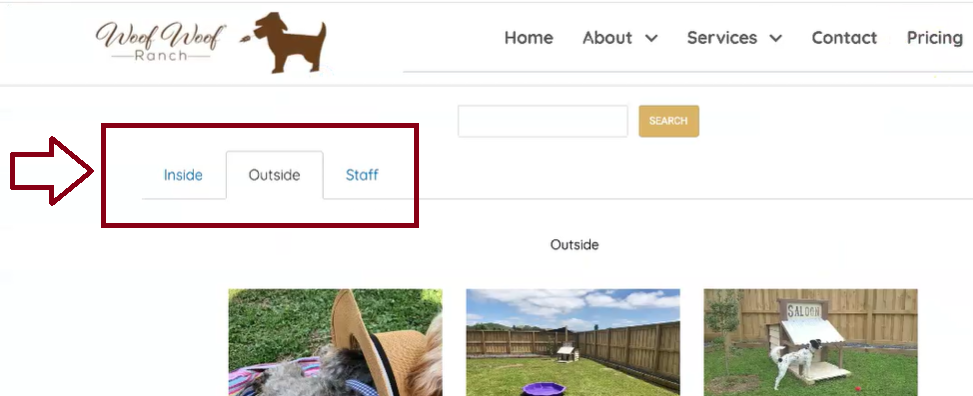
One of our key features that assists you in organizing a large amount of multimedia content in a single gallery, is our TAB system.
A tab is a graphical control element that allows multimedia assets to be contained within a single window. You can use tabs as a navigational widget for switching between sets of assets.
Step by Step guide on how to add tabs to your galley
Log into your Cincopa Account or Sign up for a new Cincopa Account
If you have not yet created a gallery, follow this link for information on how to create a Cincopa Gallery
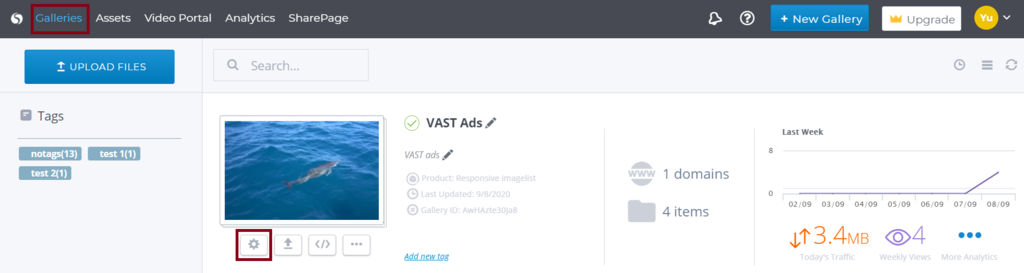
Go to the Gallery tab and select the settings icon below the Gallery thumbnail.
Note: not all gallery templates support tabs.
In the Customize Template options, open the Misc menu on the left hand side and scroll down to the Tabs section. To start using the Tabs functionality turn the Tabs slider to the ON position.
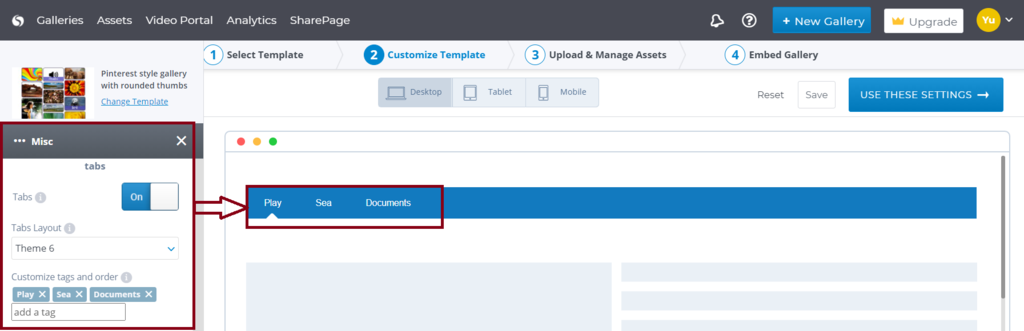
Tabs Layout – you can choose from a variety of Tab styles.