A paywall is an efficient way of restricting content access (be it complete or partial), and enabling only paying subscribers to be able to see it. This can prove lucrative to content creators.
It is important to note that paywalls determine the amount of content access both search engines and site visitors are granted, in addition to your premium security’s level of security.
Let’s take a look at how all of this works.
Most paywalls are designed to allow access to limited content before a pop-up blocks the viewer from being able to scroll down further. This way you can draw people towards your content without being too restrictive. Of course, a paywall can also be implemented right away.
This is more useful and applicable in regard to video content.
Paywalls have become increasingly pervasive. You are more likely to have limited (if not flat out restricted) access to content on most newspapers’ sites.

Implementing a paywall will invariably have your audience approach your site differently.
Make sure you absolutely trust that implementing paywalls will not result in turning off your customer base.
Before explaining how a typical paywall works we need to understand the basics of how a browser works.
Which browser your site visitors use to reach your website is inconsequential; they will all lead them to your site. When a user clicks in a browser, a message is triggered and sent to the server the hosts the websites involved.
Collecting relevant information, the server is able to determine who you are. Then, it uses this information to work out where to route you to. Once a user accesses the page, applications such as JavaScript and Flash are prompted into action.
Which Paywall Is the Best?
There is not a straightforward answer to this question as it can depend on individual needs. There are some questions you may want to consider before you make up your mind:
How important is it that you are fully indexed by search engines?
Do you want some of your content to be free to view?
Do you want to cater exclusively to subscribers and block everyone else including search engines?
How you answer these questions will determine the type of paywall best-fits your needs.
When choosing between paywall vendors, the level of architectural control you are given is of critical importance. You want to be given extended capabilities in terms of setting up, creating, changing, and monitoring paywall campaigns.
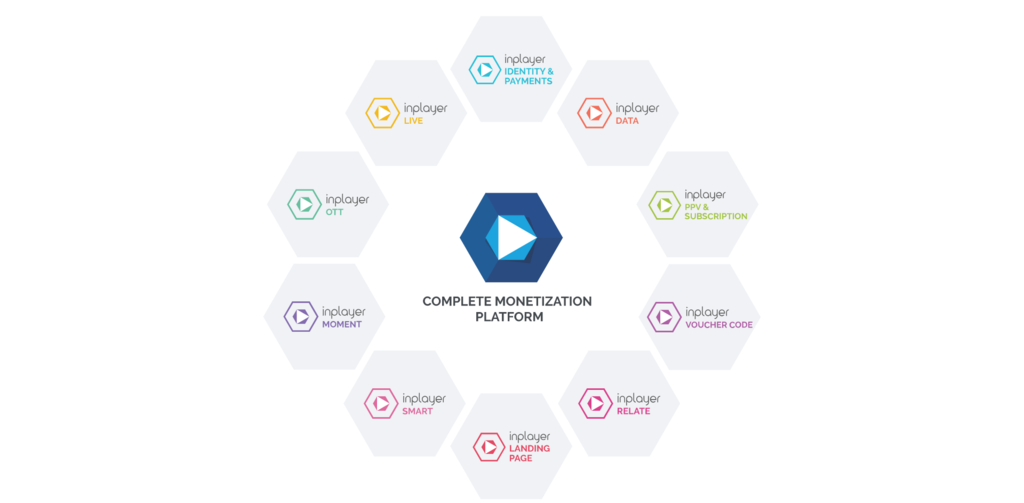
InPlayer is a paywall solution that grants complete access to its paywall capabilities. These solutions enable you to develop campaigns, segment audiences, control metric settings and much more.
Hence, Cincopa suggests you use InPlayer as a Paywall solution to your Cincopa Videos.
How to monetize your video using Paywall
As mentioned earlier, we recommend using InPlayer as a Paywall solution.
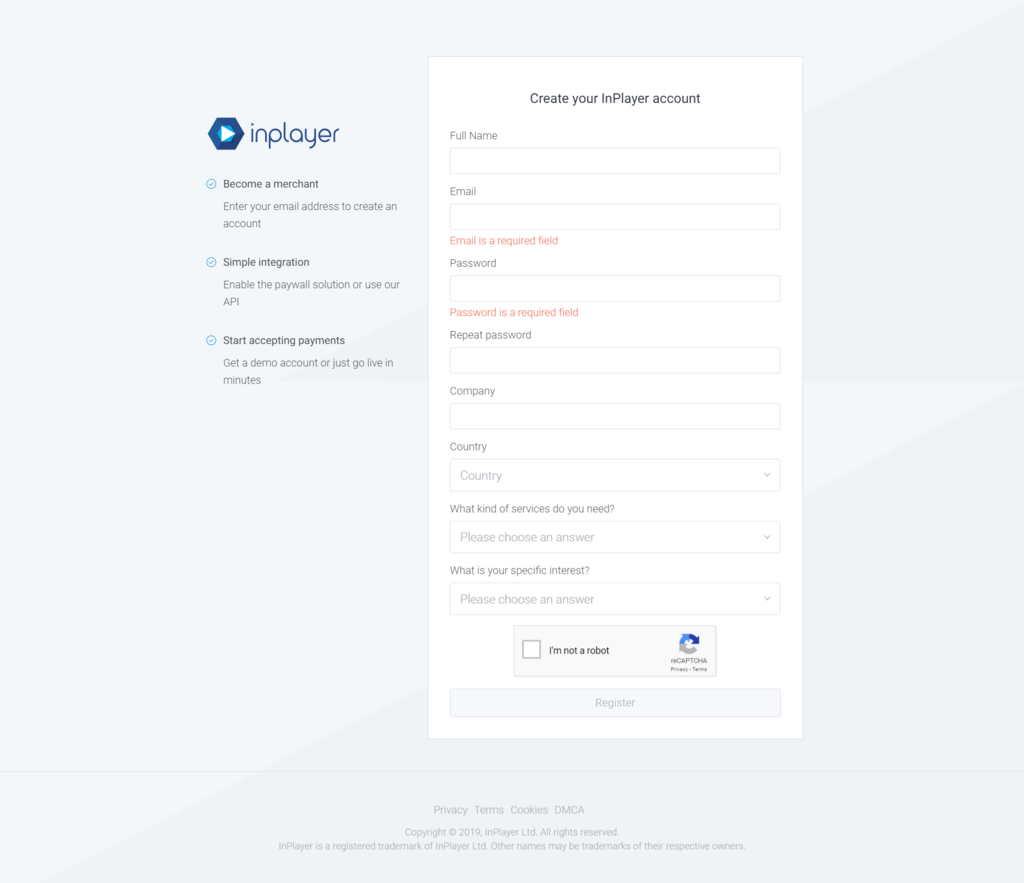
To start off, let’s create an account with InPlayer. To do so, please visit the URL: https://inplayer.com/ and then click on REGISTER

Next, fill in the registration details and hit Register
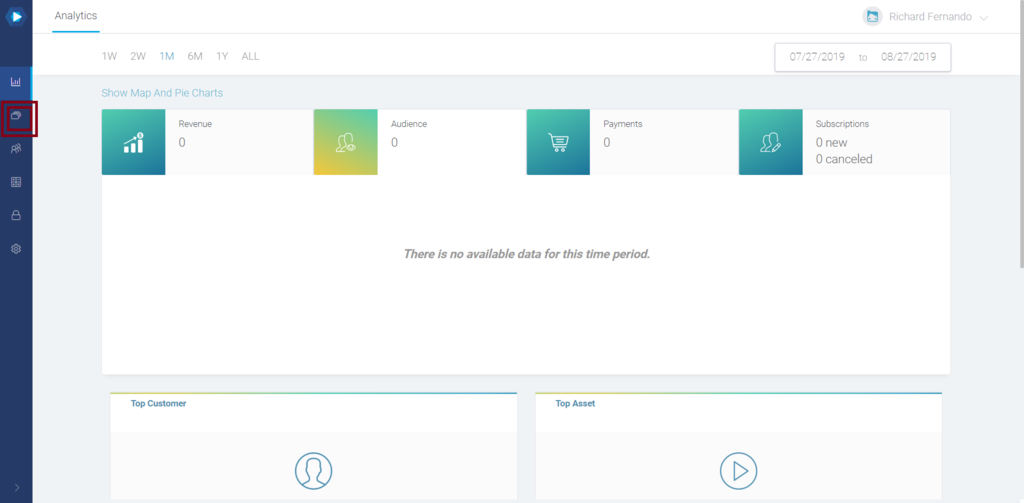
Once registered, you will be taken to the InPlayer Dashboard.
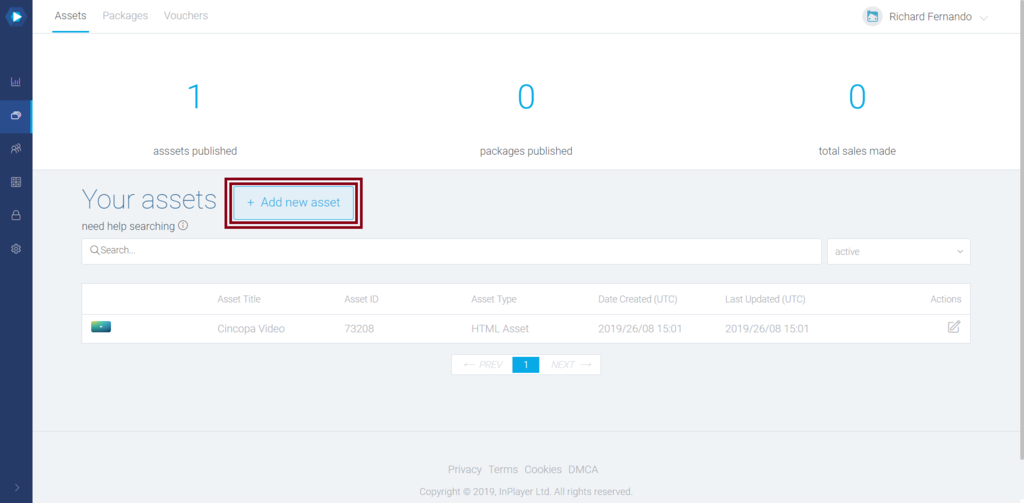
Next, we have to add Cincopa Videos by adding a new asset in Inplayer.
To do that, first click on the Asset icon as shown in the screenshot below.
Next, you will see your previously-created assets, and create a new asset by clicking on + Add New Asset
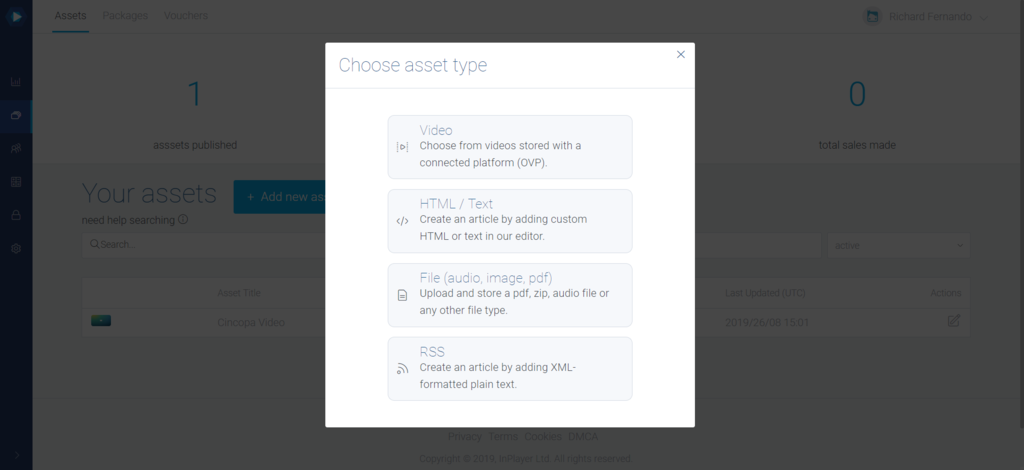
In order to add Cincopa Assets in here, use the HTML/Text option and paste the Cincopa Embed Code.
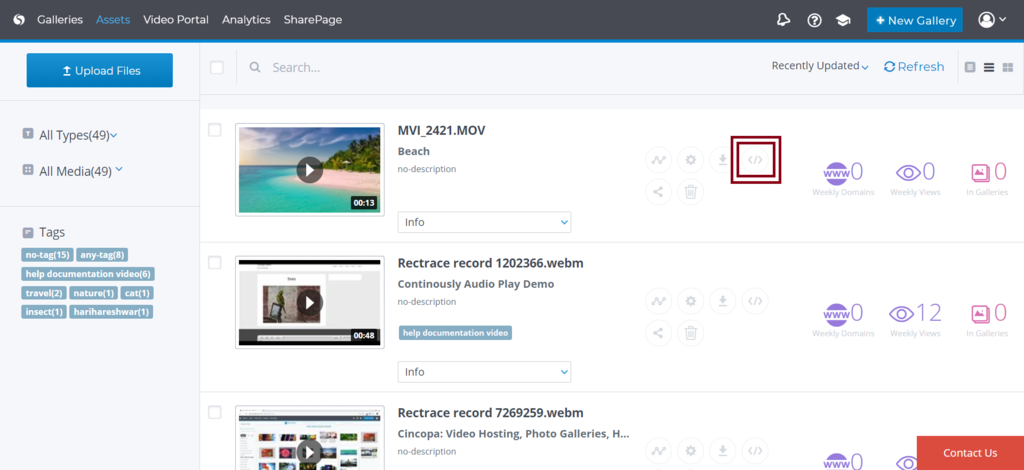
In order to copy the HTML code of a video from Cincopa, follow these steps in another browser tab/window.
Log in to your Cincopa Account and click on Assets

Now, click on the Embed icon as shown in the screenshot below.
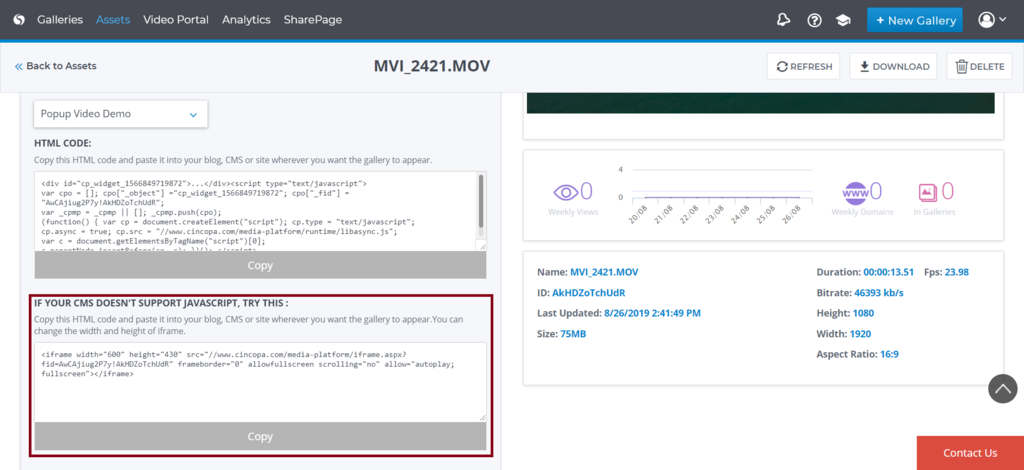
Now, select a template for the asset.

Once a template is selected, you will see two kinds of HTML code. You can use the iframe code as shown in the screenshot. To use the code, simply click on Copy.
Now, click on the name and enter the title of the Assets.
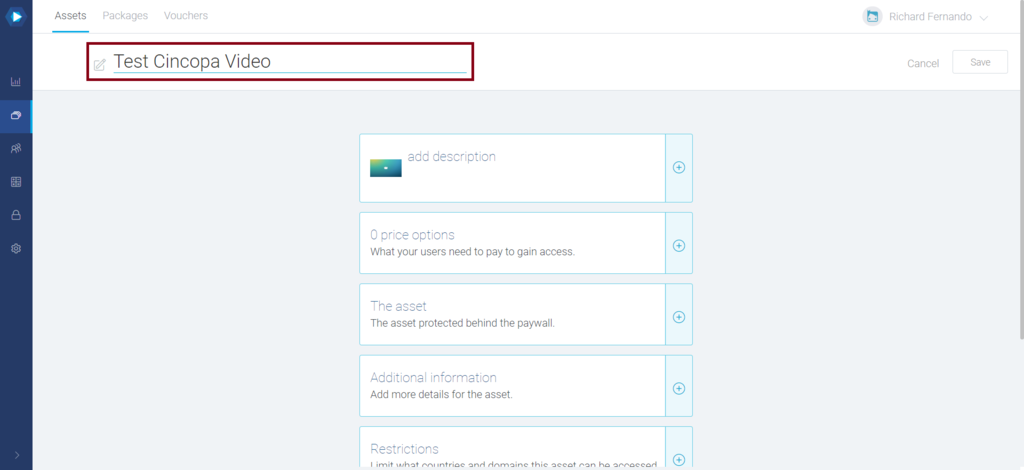
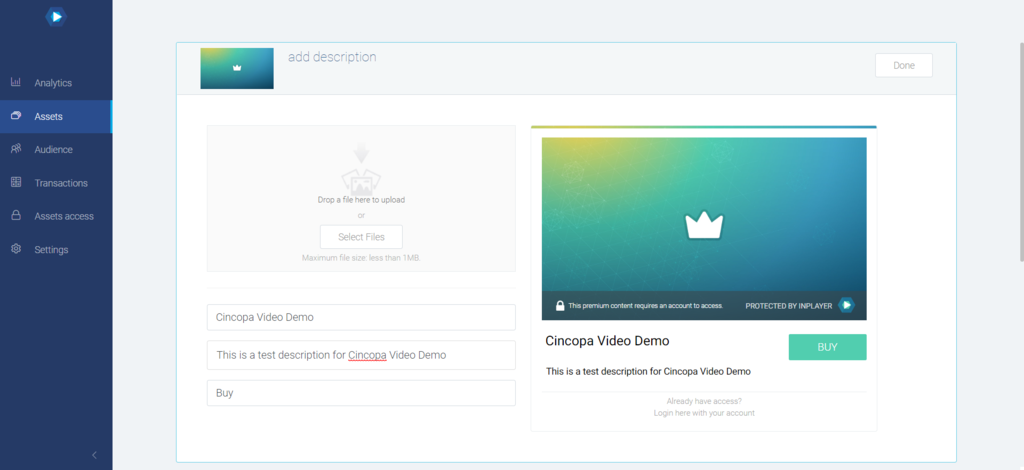
Next, click on Add Description and enter all the required description.
Finally, click on Done.
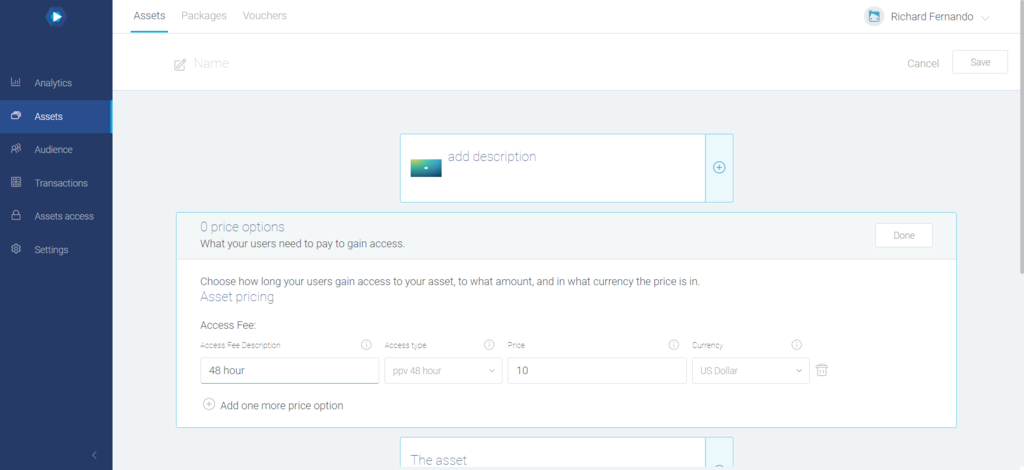
Next, enter the pricing options you would like to show in your video. In this example, we’ve added one pricing option; you can add more if you wish to.
Next, we have to add the asset HTML code that we copied from the Cincopa Embed option, and then click on Done.

Next, you can add some additional information to show more features ,and then click on Done.

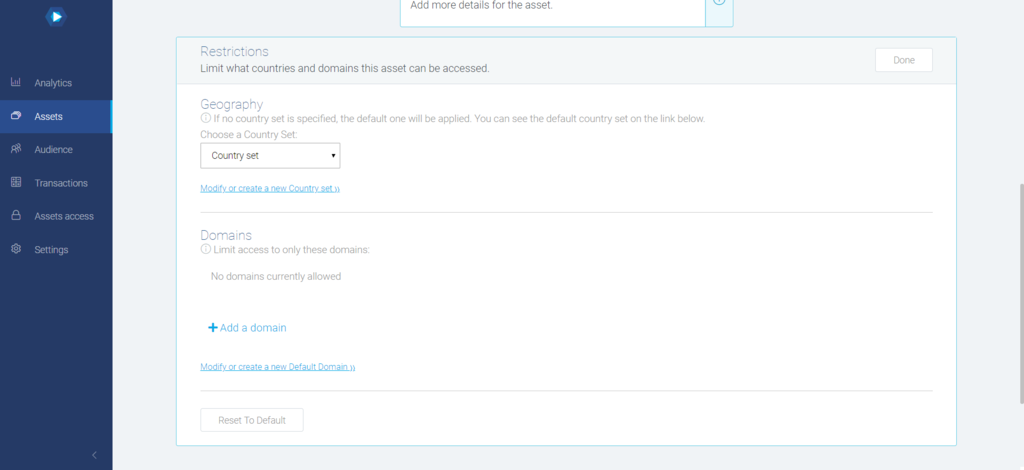
You can also add some restrictions, as shown in the screenshot below, and click on Done.
Once all the changes are added, simply click on Save.
Yow will now see this message: Asset Successfully Added.
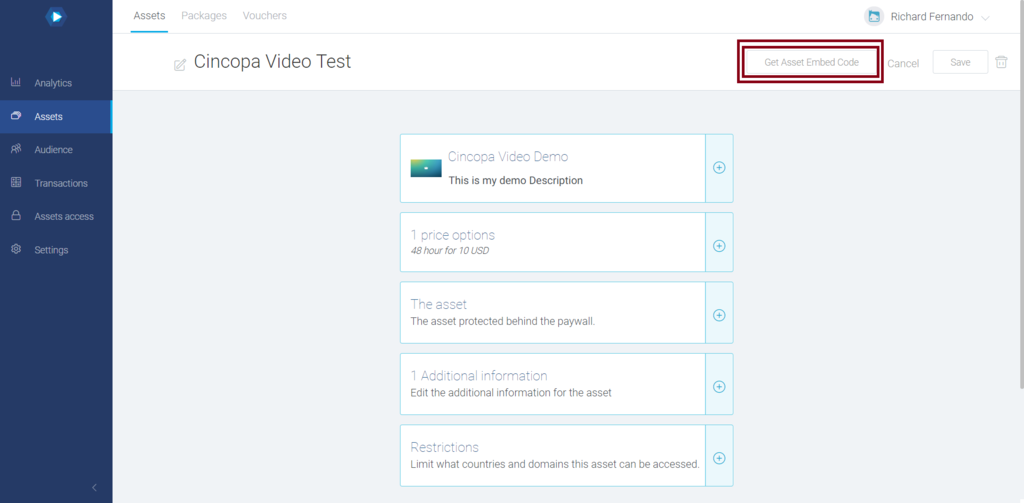
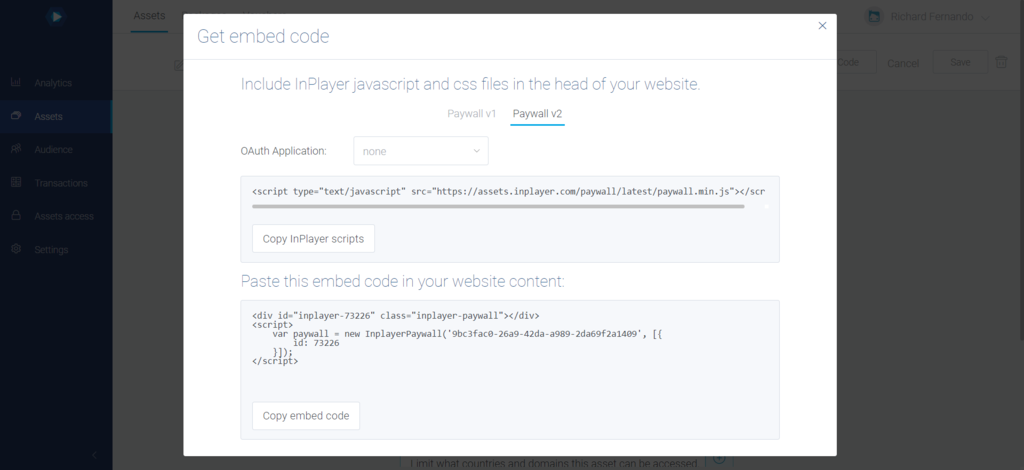
Next, click on Get Asset Embedded Code.
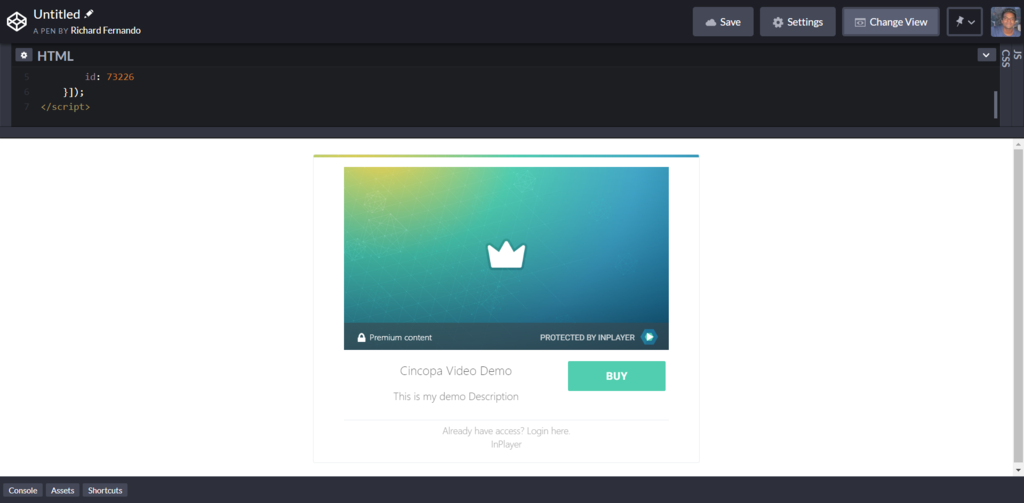
Now, copy this HTML and Javascript code and paste it on your website.
In this example, we tried adding this HTML and JS code in a codepen page,
As you can see in the screenshot below: