This article explains how students and teachers can use Cincopa’s plugins with Moodle LMS. If you would like to learn about installing the plugins and understand what each plugin does, please refer to this article.
How to use Cincopa Video, Audio and Images Filter?
Once the Cincopa Media Plugin is installed and enabled, you can now start using it with Moodle.
Simply access your Moodle Dashboard and try to edit/add a new post/course, and in the body, you can add the cincopa gallery/asset as shown below by using the short embed code. Click here for step by step instructions on how you can copy the short code for your asset/gallery.


Now once you save the changes and view your post/course, you will see your Cincopa Gallery/Asset.

How to use Cincopa Rich Media Assignment Submission?
A teacher can now create an assignment and enable Cincopa within it.
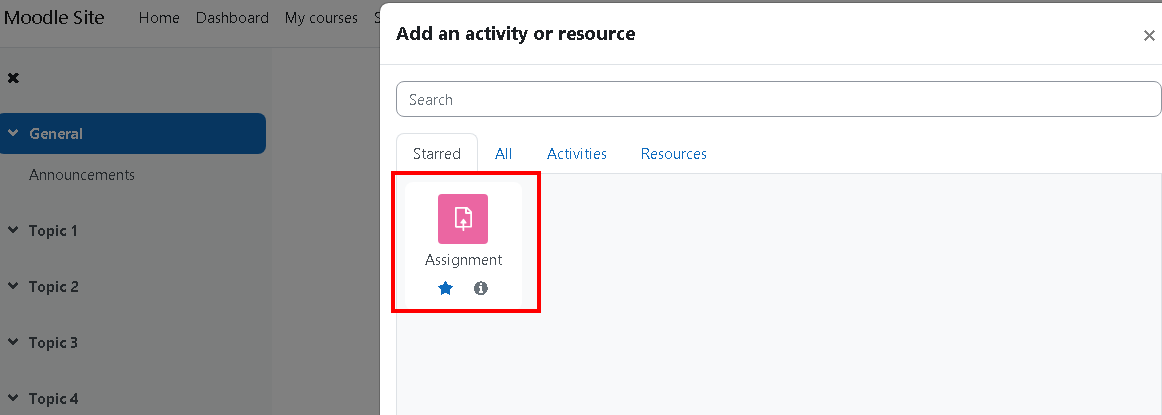
To create an assignment, simply add an activity in the course section and then choose an assignment there.
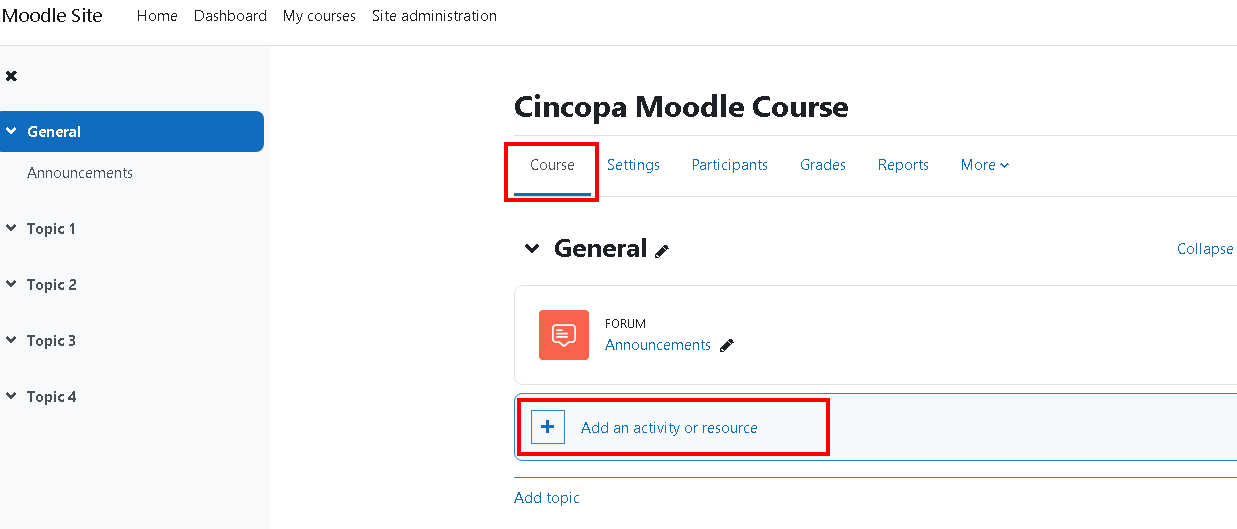
Now select Assignment to create an assignment
Enter the Assignment details like Title and Description >> Scroll Down >> Check the checkbox Cincopa submissions and Save the changes.

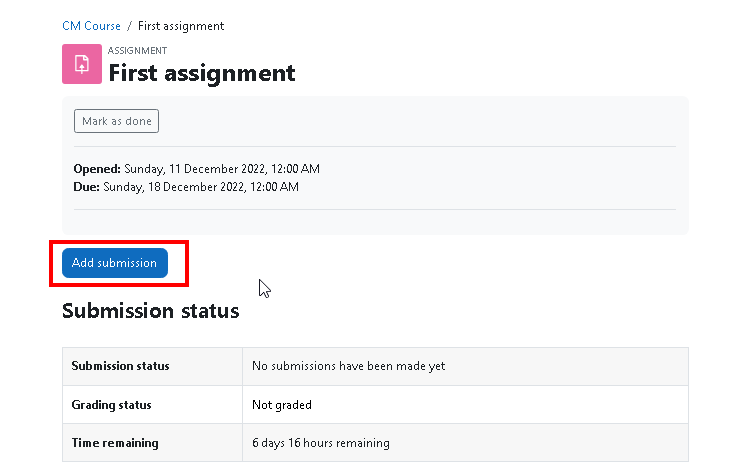
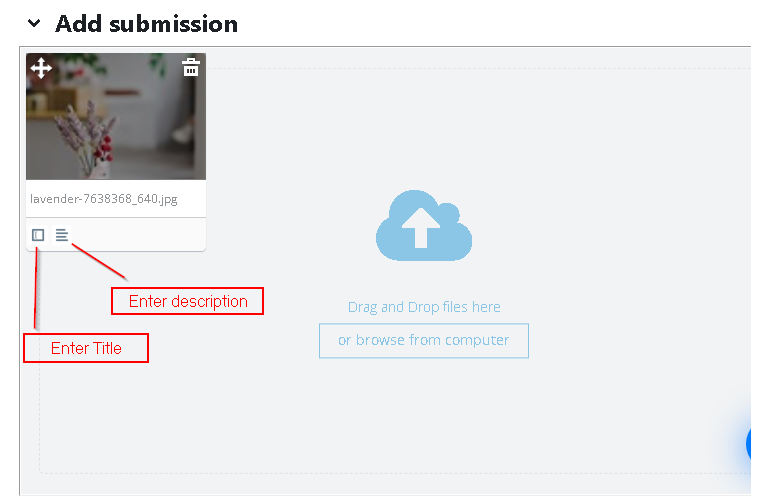
Now when students try to access the assignment. They will see the assignment you created and they must click on Add Submissions to submit their assignments.
Now the students can drag and drop or click on upload to add their media files with their submissions.
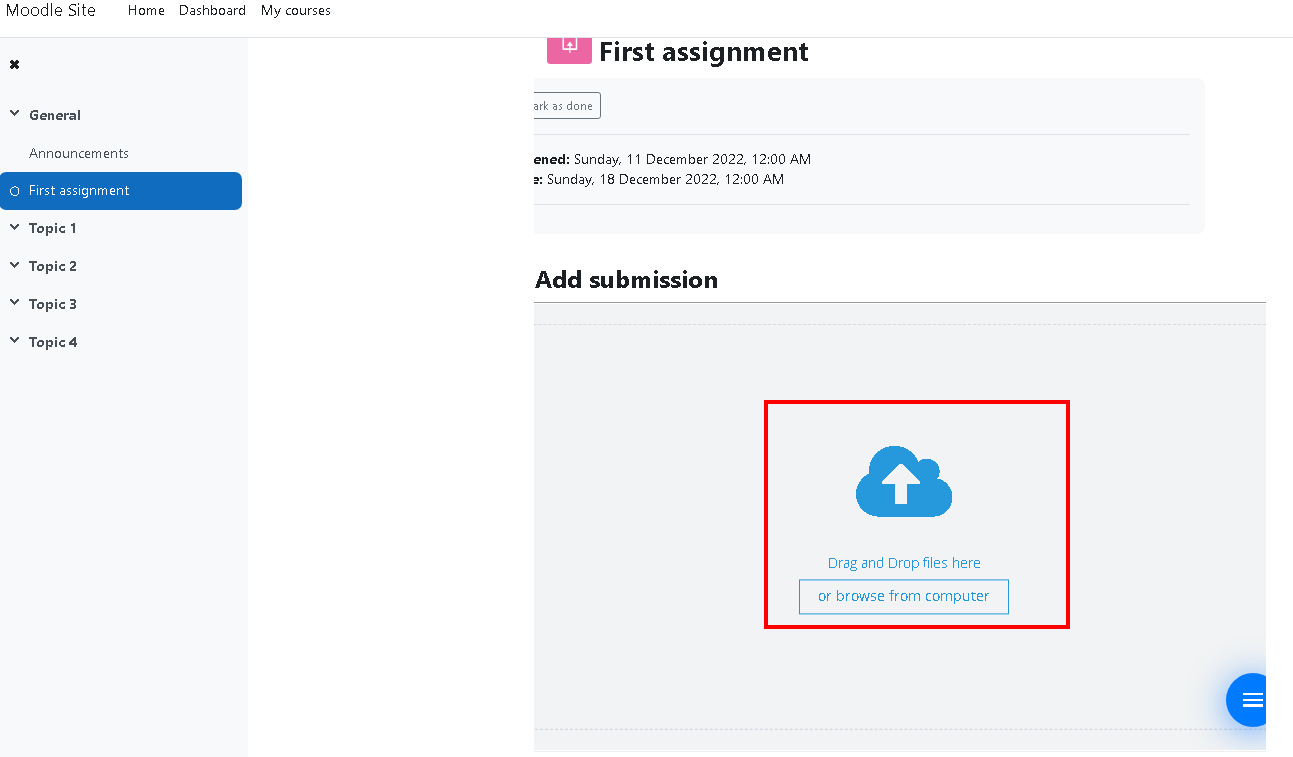
Once the media is added simply click on save and the added media will be added to the connected Cincopa account and will be accessible by the teacher.
How to use Cincopa Atto plugin?
Once the Cincopa Atto Plugin is installed and enabled, you can now start using it with Moodle. Simply open any text editor in Moodle and you will see Cincopa icon.
After you click on the Cincopa icon, the following screen will show up.

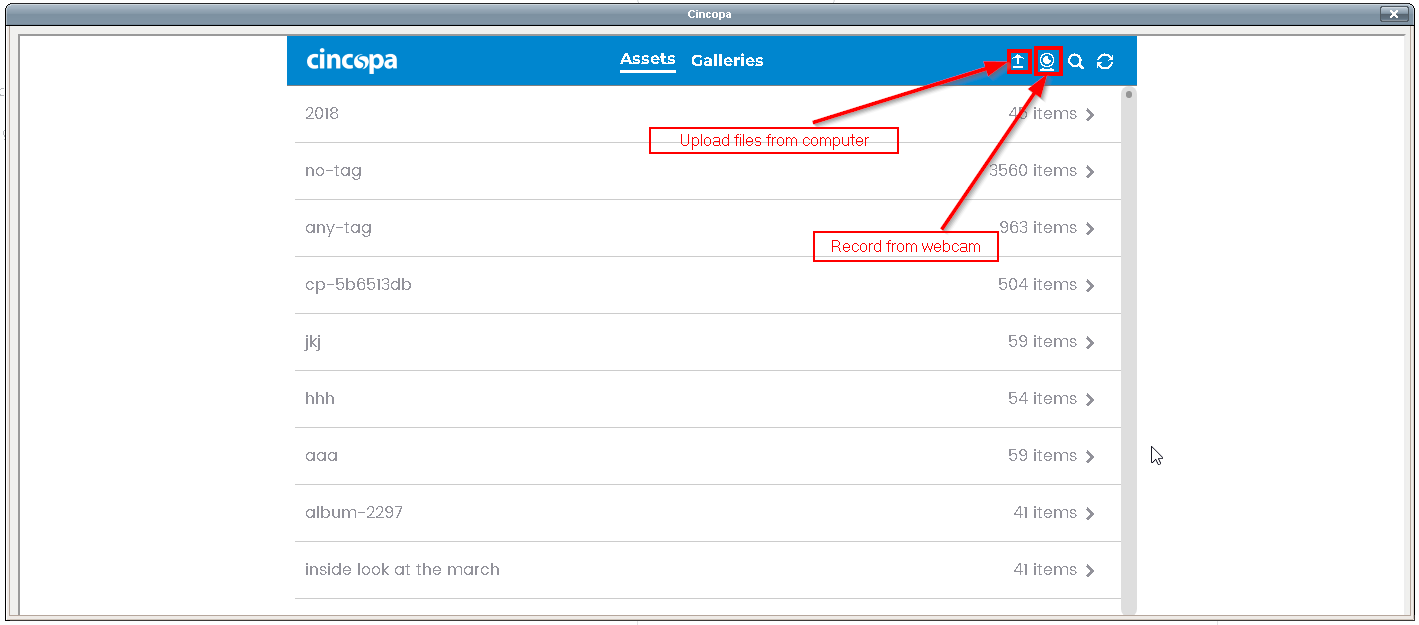
- You can select assets/galleries using tags. Click on a tag and then select the asset you would like to insert.


- Click on the upload icon to upload files from your computer.

- Click on the Record icon to record from your webcam or use Cincopa’s rectrace extension to record.

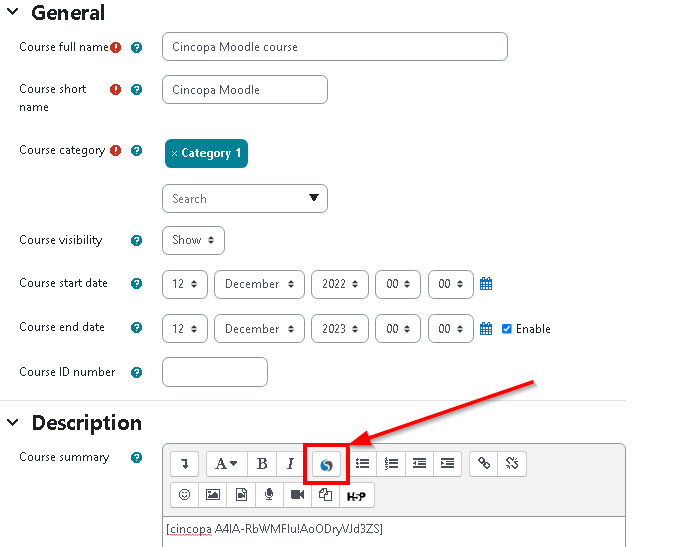
How to use Cincopa TinyMCE plugin?
Once the Cincopa TinyMCE Plugin is installed and enabled, you can now start using it with Moodle. Simply open any text editor in Moodle and you will see Cincopa icon.
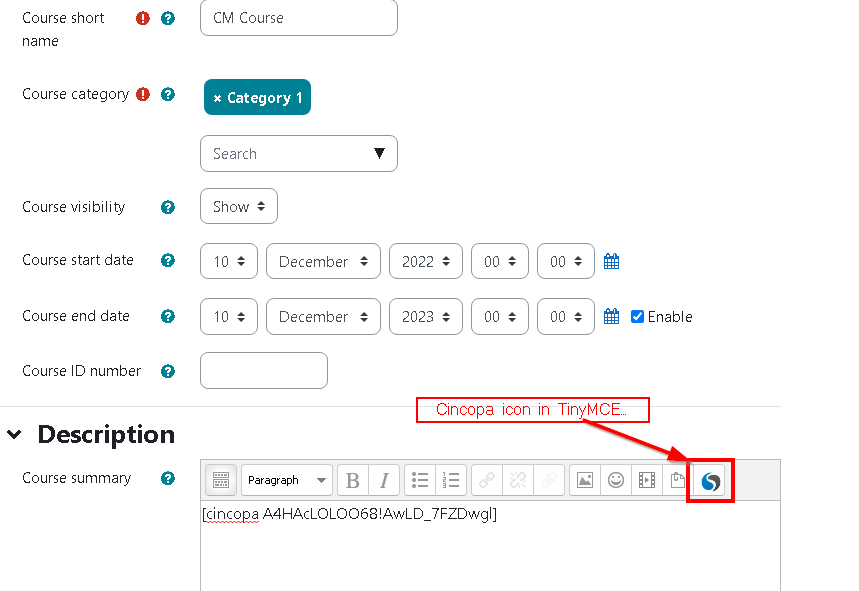
After you click on the Cincopa icon, the following screen will show up.
- You can select assets/galleries using tags. Click on a tag and then select the asset you would like to insert.
- Click on the upload icon to upload files from your computer.
- Click on the Record icon to record from your webcam or use Cincopa’s rectrace extension to record.
Working with Rectrace and Moodle?
RecTrace is a webcam and screen recording tool for sales professionals to create personalized videos, share them with prospects and turn leads into customers.
Moodle is an LMS which allows users to create educational courses.
Rectrace can be very helpful with Moodle as it can help the users to record a screencast. Screencasts make it really easy for the teachers/trainer to teach certain concepts and hence it is very helpful to use Cincopa’s Rectrace with Moodle.
How To Use
To access the plugin you must already have a registered Cincopa account. Users can register an account here: https://www.cincopa.com and setup their gallery/profile.
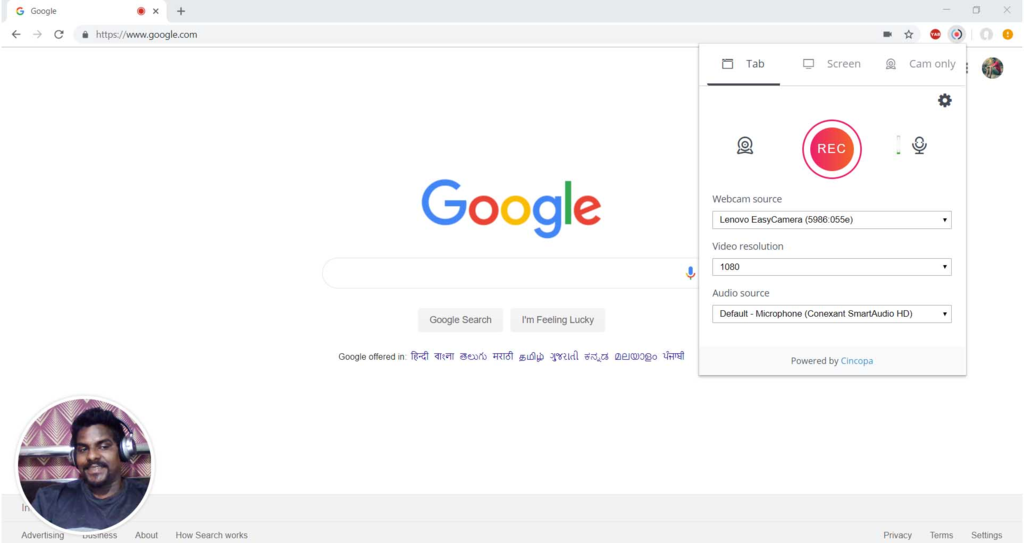
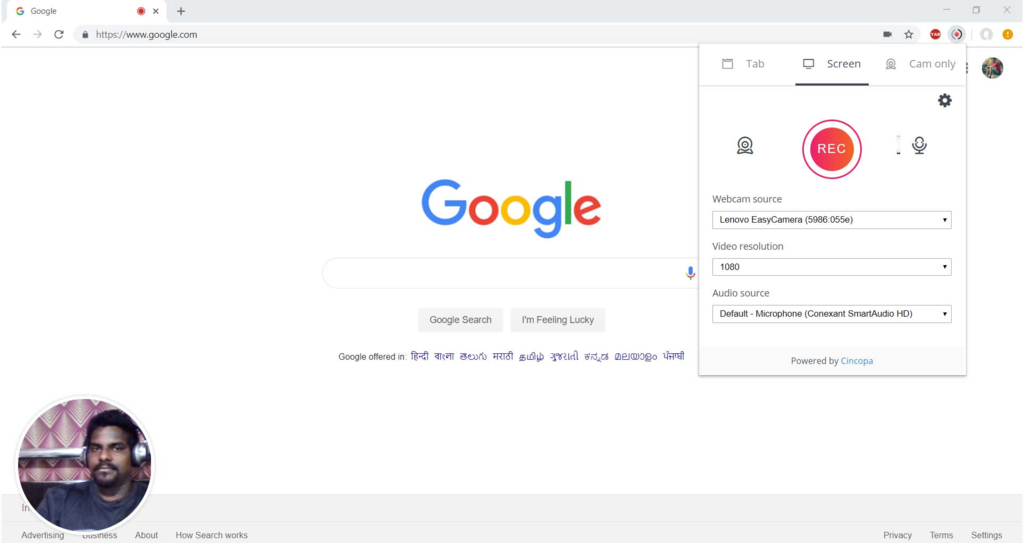
Once you have an account registered with Cincopa and have installed the Cincopa RecTrace plugin, you must click on the Cincopa RecTrace icon on the top right corner of your chrome browser.
Now a new window will appear with different features that the plugin offers.
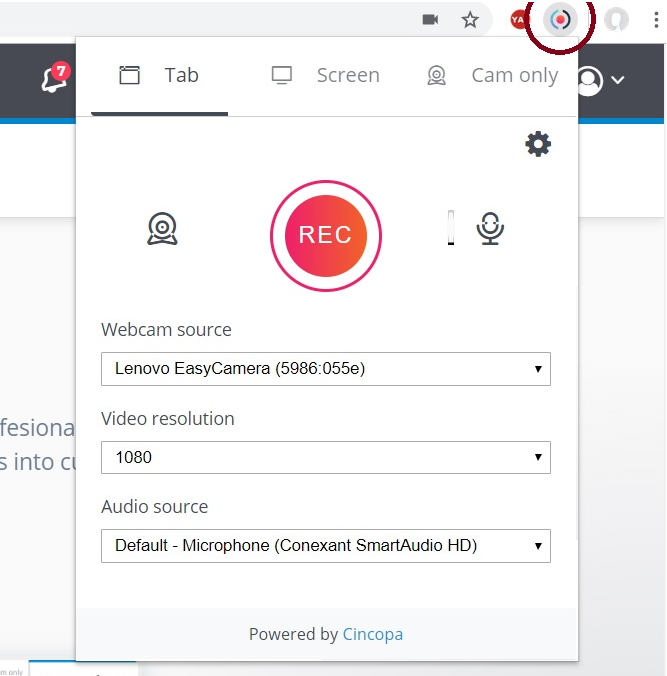
The plugin offers various types of options the users can choose to record their screencasts. Here are the different features provided by the plugin:
1. Tab
This option allows you to record only the tab which you are currently using. Once the user clicks on this type, all the settings will be applied just to the current tab.
2. Screen
This option allows you to record the entire screen of your computer. Once the users click on this type, all the settings will be applied to the entire screen.
3. Cam only
This option allows you to record just a video capture using your computer camera. Once the user clicks on this type, all the settings will be applied to video capture mode.

Once the videos are recorded, the recorded media will be saved in your Cincopa account which can then be used with Moodle.