RecTrace is a webcam and screen recording tool, both can be combined during the recording. The RecTrace gives you an easy way to create personalized videos without the need for professional editing. Videos created with a RecTrace can be used for training, marketing, and conferences. These videos are easy to share via websites, emails, and any type of social media, with the hight impact of engaging your audience
In this article, we will cover :
- Introduction & Use Cases
- How to install RecTrace
- RecTrace recording components & configuration
- RecTrace Library tab
- Embed a RecTrace recorded video on your website
RecTrace – Introduction & Use Cases
RecTrace can be used anywhere you might need to record your screen. Equipped with multiple sets of options, RecTrace allows users to capture videos using a webcam and to share them using Cincopa tools. RecTrace is easy to integrate with a variety of websites, social media platforms, emails, etc.
Here are a few scenarios in which RecTrace really shines through:
Software Testers:
Software Testers can use RecTrace to record a bug that they found on their software/website/platform and share it with their development team.
Support Engineers/Tech Support:
RecTrace can be used by Support Engineers/Tech Support to guide their customers to solve their technical issues or queries. Recording a screencast is an effective medium to explain difficult technical concepts in an easier, much more comprehensible way.
Sales Representatives:
RecTrace can be used by sales representatives of a web/software company to explain their prospective clients about their product/website.
Internal Training:
RecTrace can be used to create training documents and videos for new/existing employees. Users can create training modules with an explanation using a webcam.
Product Teams & Tutorials:
A web/software company can create product tutorials for their customers using RecTrace. The tutorials can be used to create Getting Started and How-To Videos.
Installing RecTrace
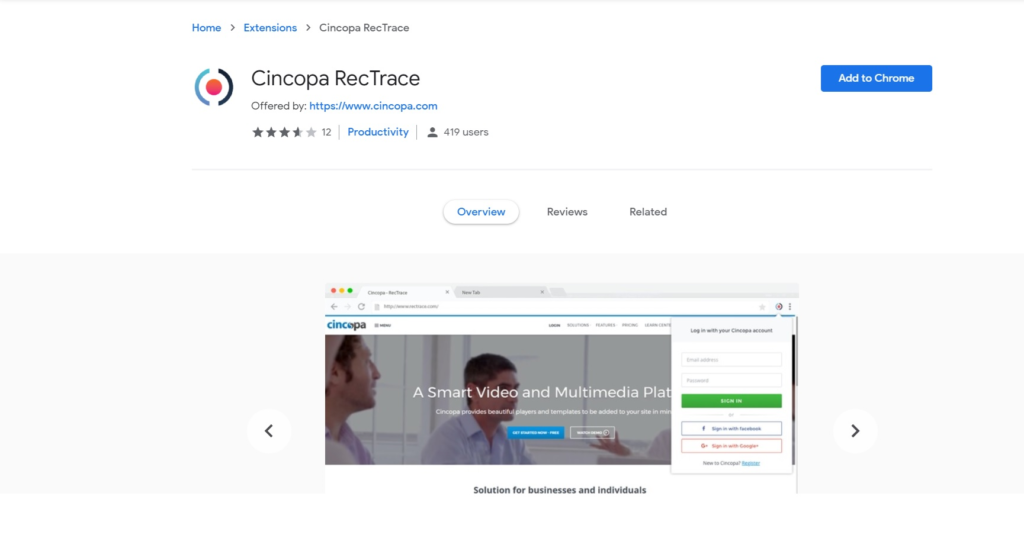
To get started, navigate to https://chrome.google.com/webstore/search/rectrace on the Chrome Extension Web Store and click on Add to Chrome to install the plugin to your browser.
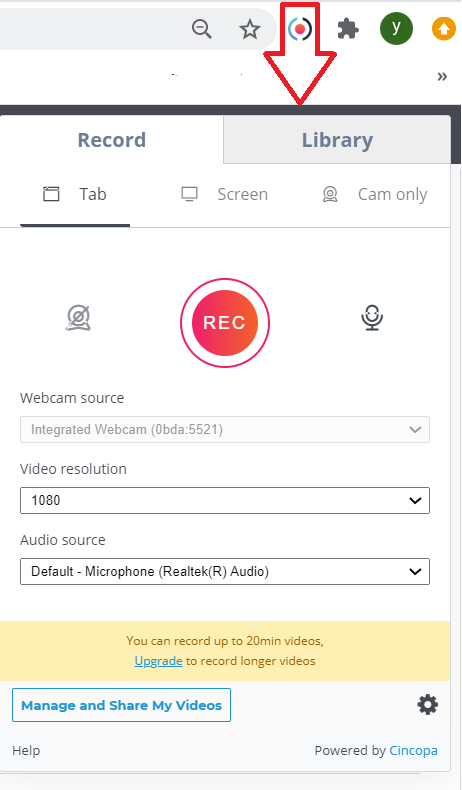
Once the plugin is installed, you should be able to see the Cincopa RecTrace icon on the top right corner of your chrome browser.
To access the plugin you must sign in to your Cincopa account. If you do not have an account, the plugin will direct you to the right page. You can also register by directly accessing the website from here: https://www.cincopa.com and set up your Cincopa profile.
Once you have signed in to your Cincopa account and have installed the Cincopa RecTrace plugin, you must click on the Cincopa RecTrace icon on the top right corner of your chrome browser.
![]()
Now, a new window will appear with different features that the plugin offers.
RecTrace recording components & configuration
The plugin offers different options that you can choose from to record your screencasts. To start you need to open a RecTrace and go to the record tab. Here are the different features provided by the plugin:
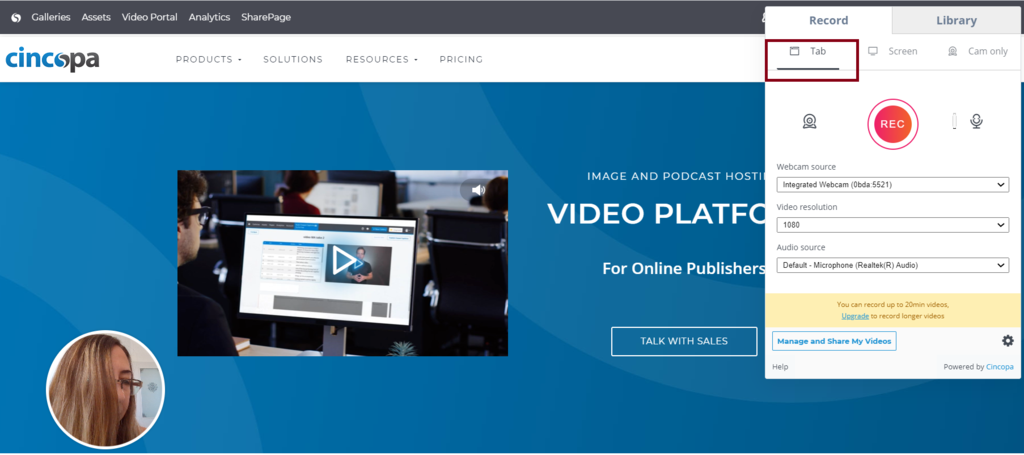
Recording your browser tab
This option allows you to record only the tab which you are currently using. Once the user clicks on this type, all the settings will be applied exclusively to the current tab.

Recording your entire screen
This option allows you to record the entire screen of your computer. You can, for example, record a video presentation or product demo with or without a video recording of the presenter (on the bottom left side). Once you select the Screen option, all the settings will be applied to the entire screen.

Recording your camera (Talking Head Video)
This option allows you to record just a video capture using your computer camera. Once you select the C option, all the settings will be applied to video capture mode.


Record
This option allows you to record a video/screencast which can be used to prepare a presentation or for any other video recording purpose.
Once this option is clicked, the plugin will start recording the tab/screen/cam only, depending on the selected option (bellow is a recording of the entire screen).
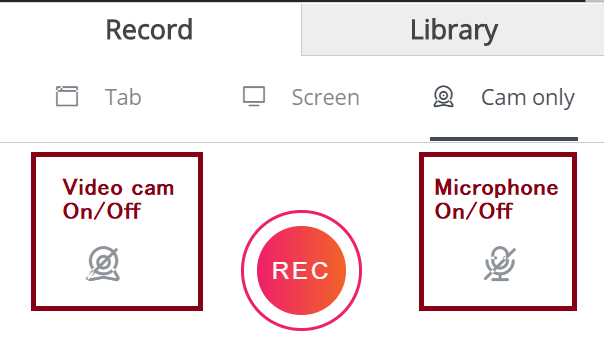
Camera On/Off
This option allows you to record video with or without a camera.
Press on the camera icon to turn the camera off or on.
Mic On/Off
This option allows you to record audio with or without a microphone.
Press on the microphone icon to turn the microphone off or on.
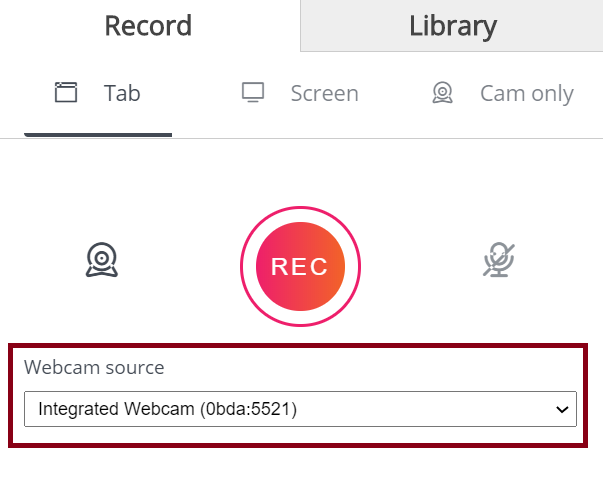
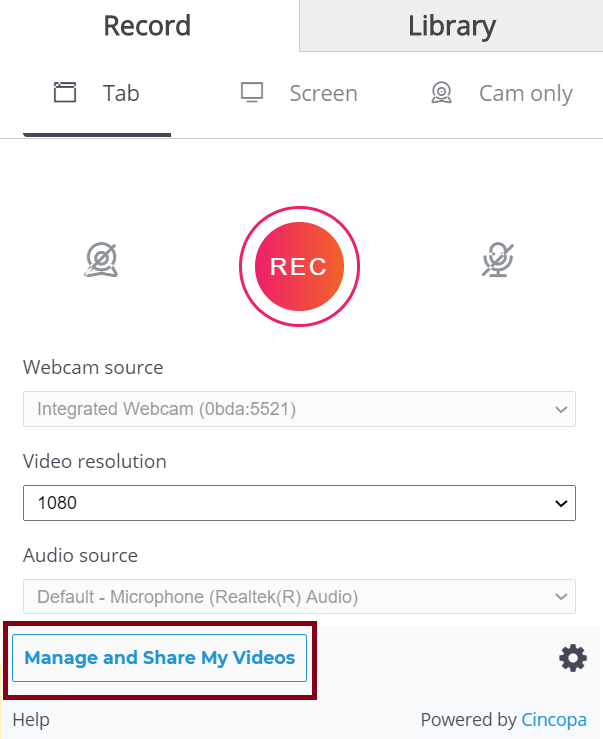
WebCam Source
This option allows you to select which webcam you would like to use if you have multiple webcams attached to your computer.
If there is just one webcam, it will be selected automatically by default.
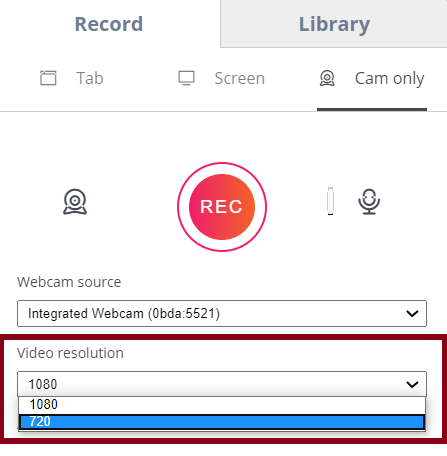
Video resolution
This option allows you to select the resolution of a recorded video. You can select the resolution as shown in the screenshot below.
By default, it selects the highest resolution allowed by your computer.
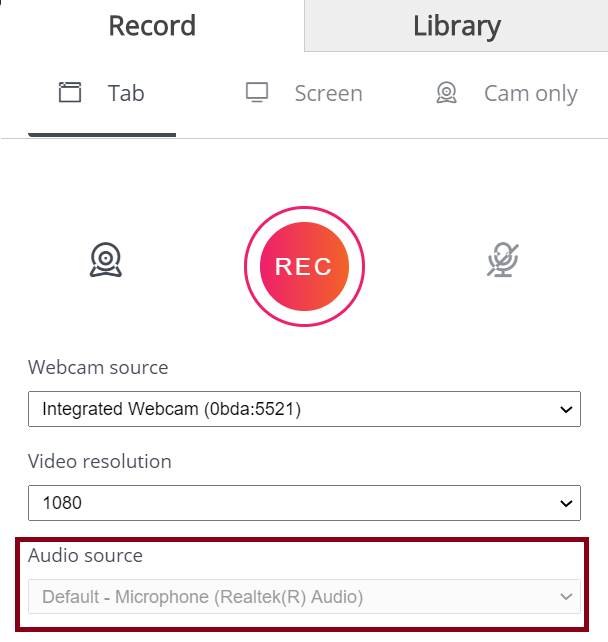
Audio source
This option allows you to select which audio recording device you would like to use while recording a video/screencast. This is useful when you have multiple audio recording devices connected to your computer.
If there is just one audio recording device, it would be automatically selected by default.
Settings
This option allows you to modify additional settings offered by the plugin.
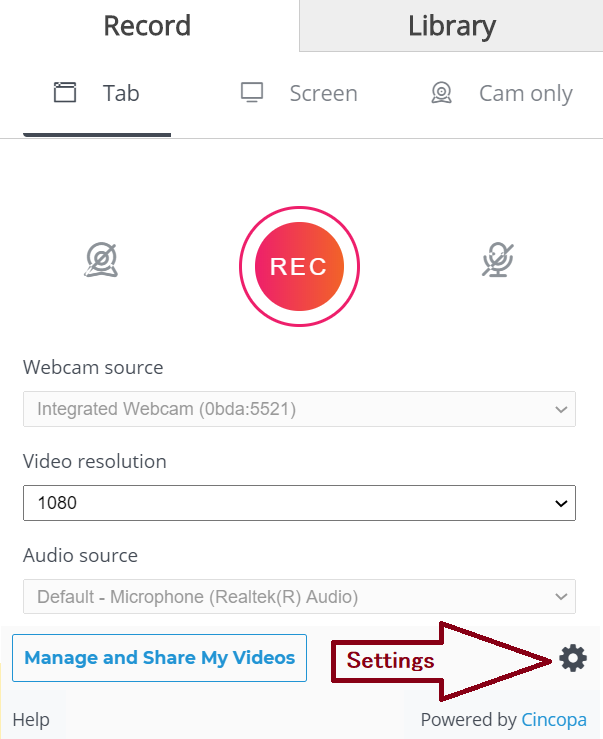
Pressing on the Setting Icon will open the following screen:
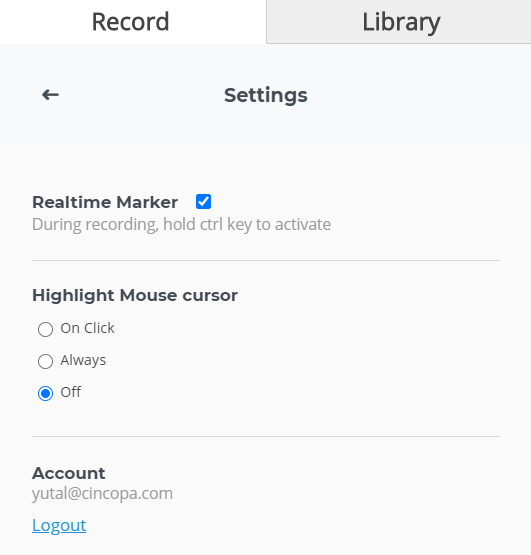
Please find below the list of settings offered by the plugin:
Activating a screen-marker during a recording
This option allows you to turn on/off the real-time marker. Real-time markers help users mark certain areas in their recording/screen capture to explain to the viewers what the video creator is explaining in the recording.
If this option is enabled, you can use it by holding the Ctrl key during the recording.
Highlighting mouse cursor
This option will allow you to show the mouse cursor while recording the video/screencast.
You can choose to show the mouse cursor Always, On Click, or Off (never).
Logging in & out of your account:
This option will show which Cincopa Account you are logged in with.
This option will allow you to logout from the Cincopa account you are currently logged in with.
Manage and Share my videos
Pressing on ‘Manage and Share my videos’ link will open Assets page
RecTrac Library tab – Easy and fast way to view and share your content
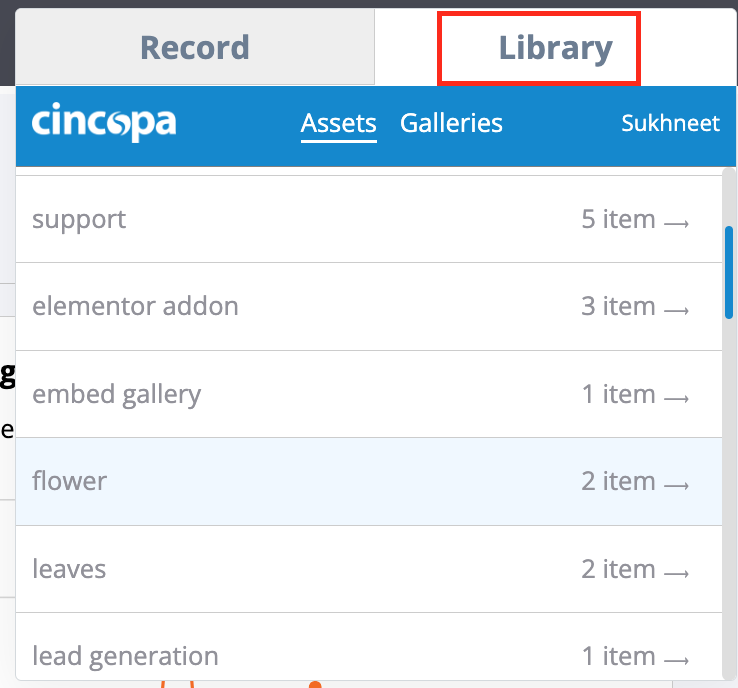
You can view all your recordings without exiting the RecTrace just by opening the Library Tab.
Click on any row to open all files with corresponding tags.
Note: In case you want to see a video that was not assigned a tag yet, then select no-tag or any-tag option
Open Video: Clicking on open will open video Account Page
Copy link: Clicking on Copy link will copy the URL of your video Account Page
Copy Gif: Clicking on the Copy gif option will copy the code to embed the video as a gif
Delete Video: Clicking on Delete Video will immediately and permanently delete the file from your Cincopa account.
Embed a RecTrac-recorded video on your website
Using RecTrace, you can capture videos or screen recordings and embed them on your websites.
Once a video/screencast has been recorded, you can access the Cincopa website from the URL: https://www.cincopa.com/ and then login with your Cincopa username and password.
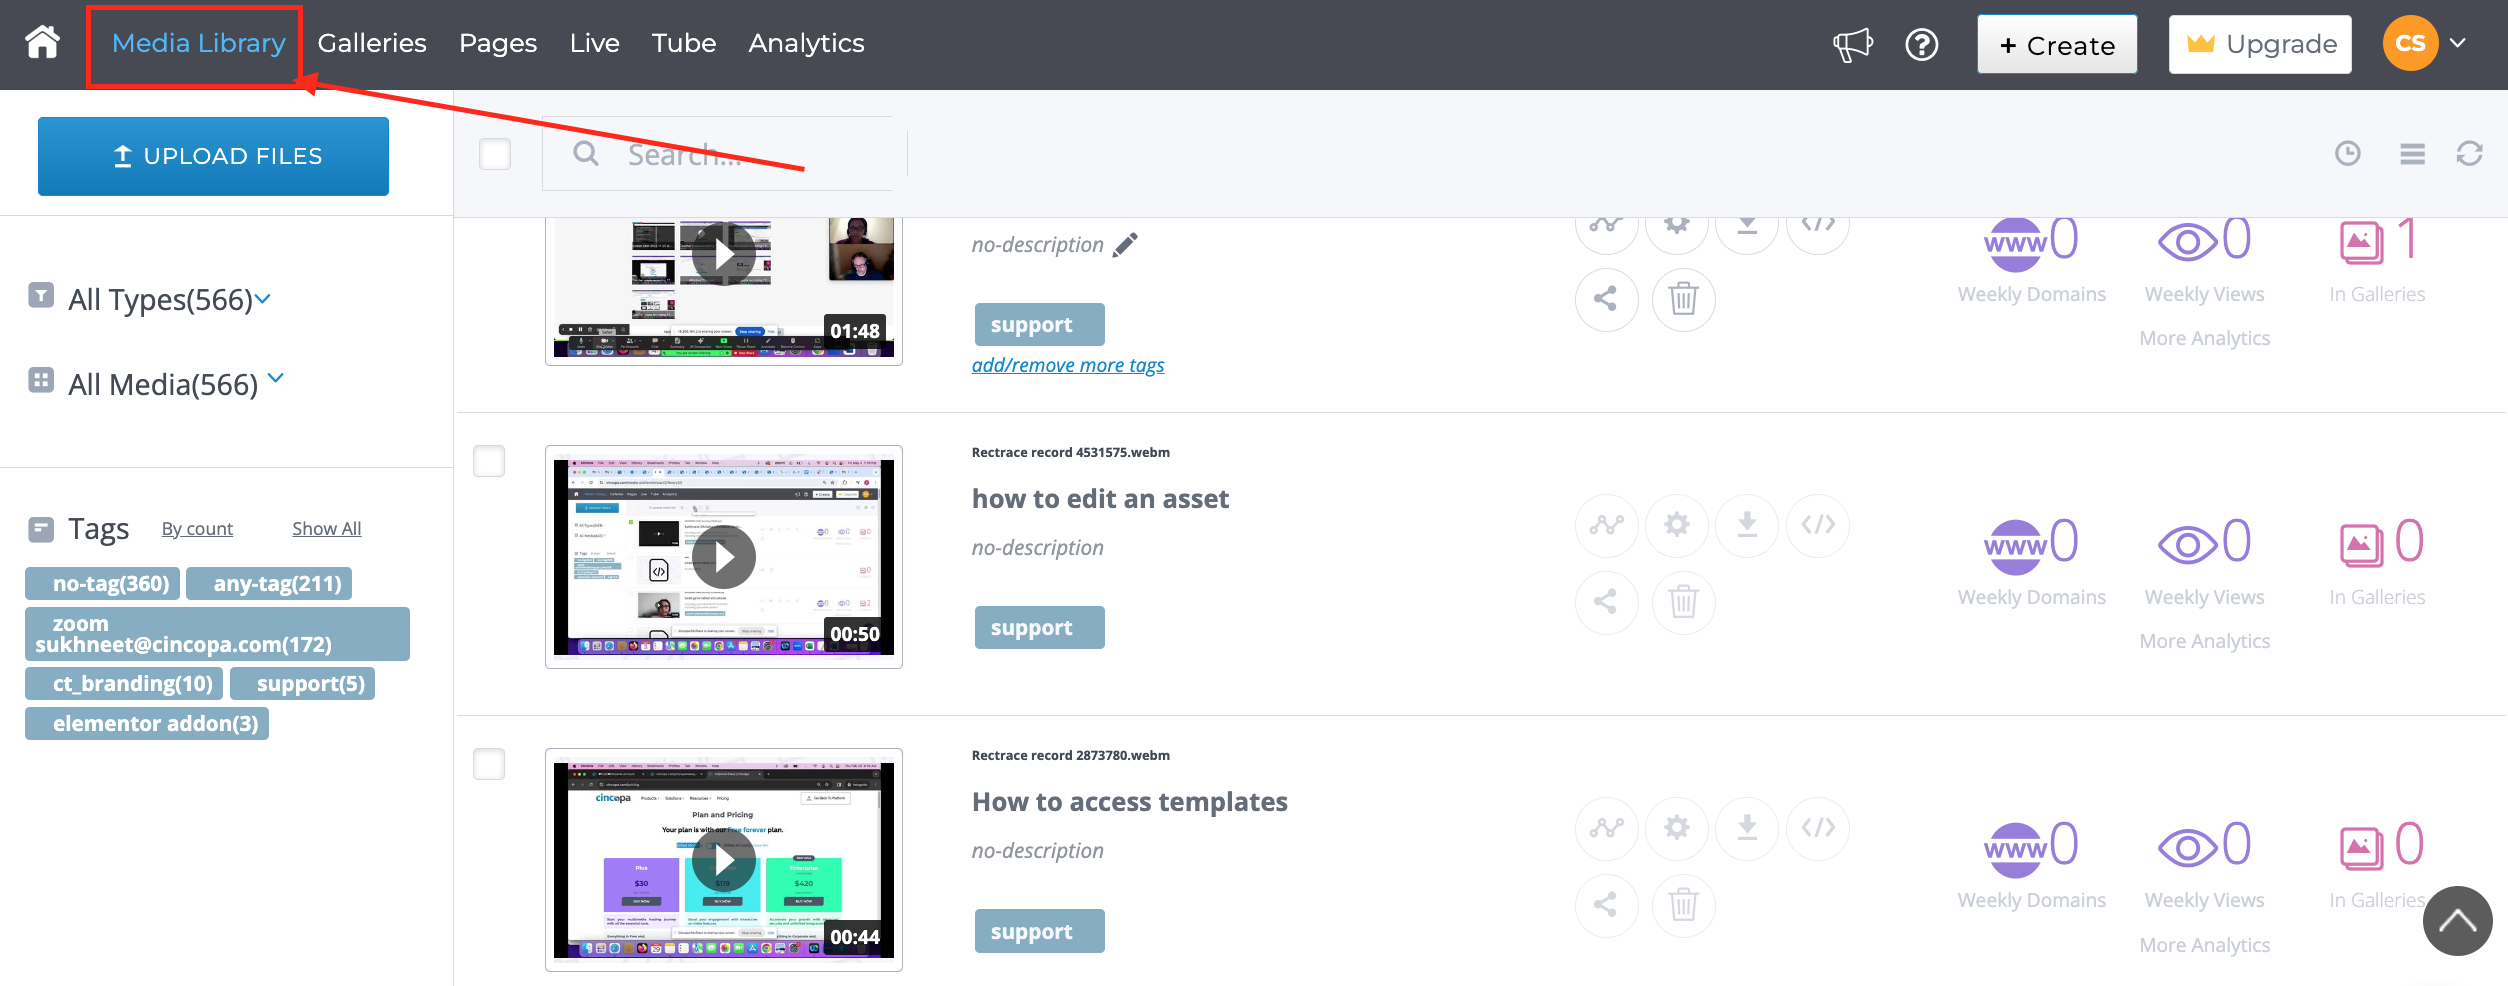
To view all the recorded videos/screencasts using the plugin, you will click on Media Library.
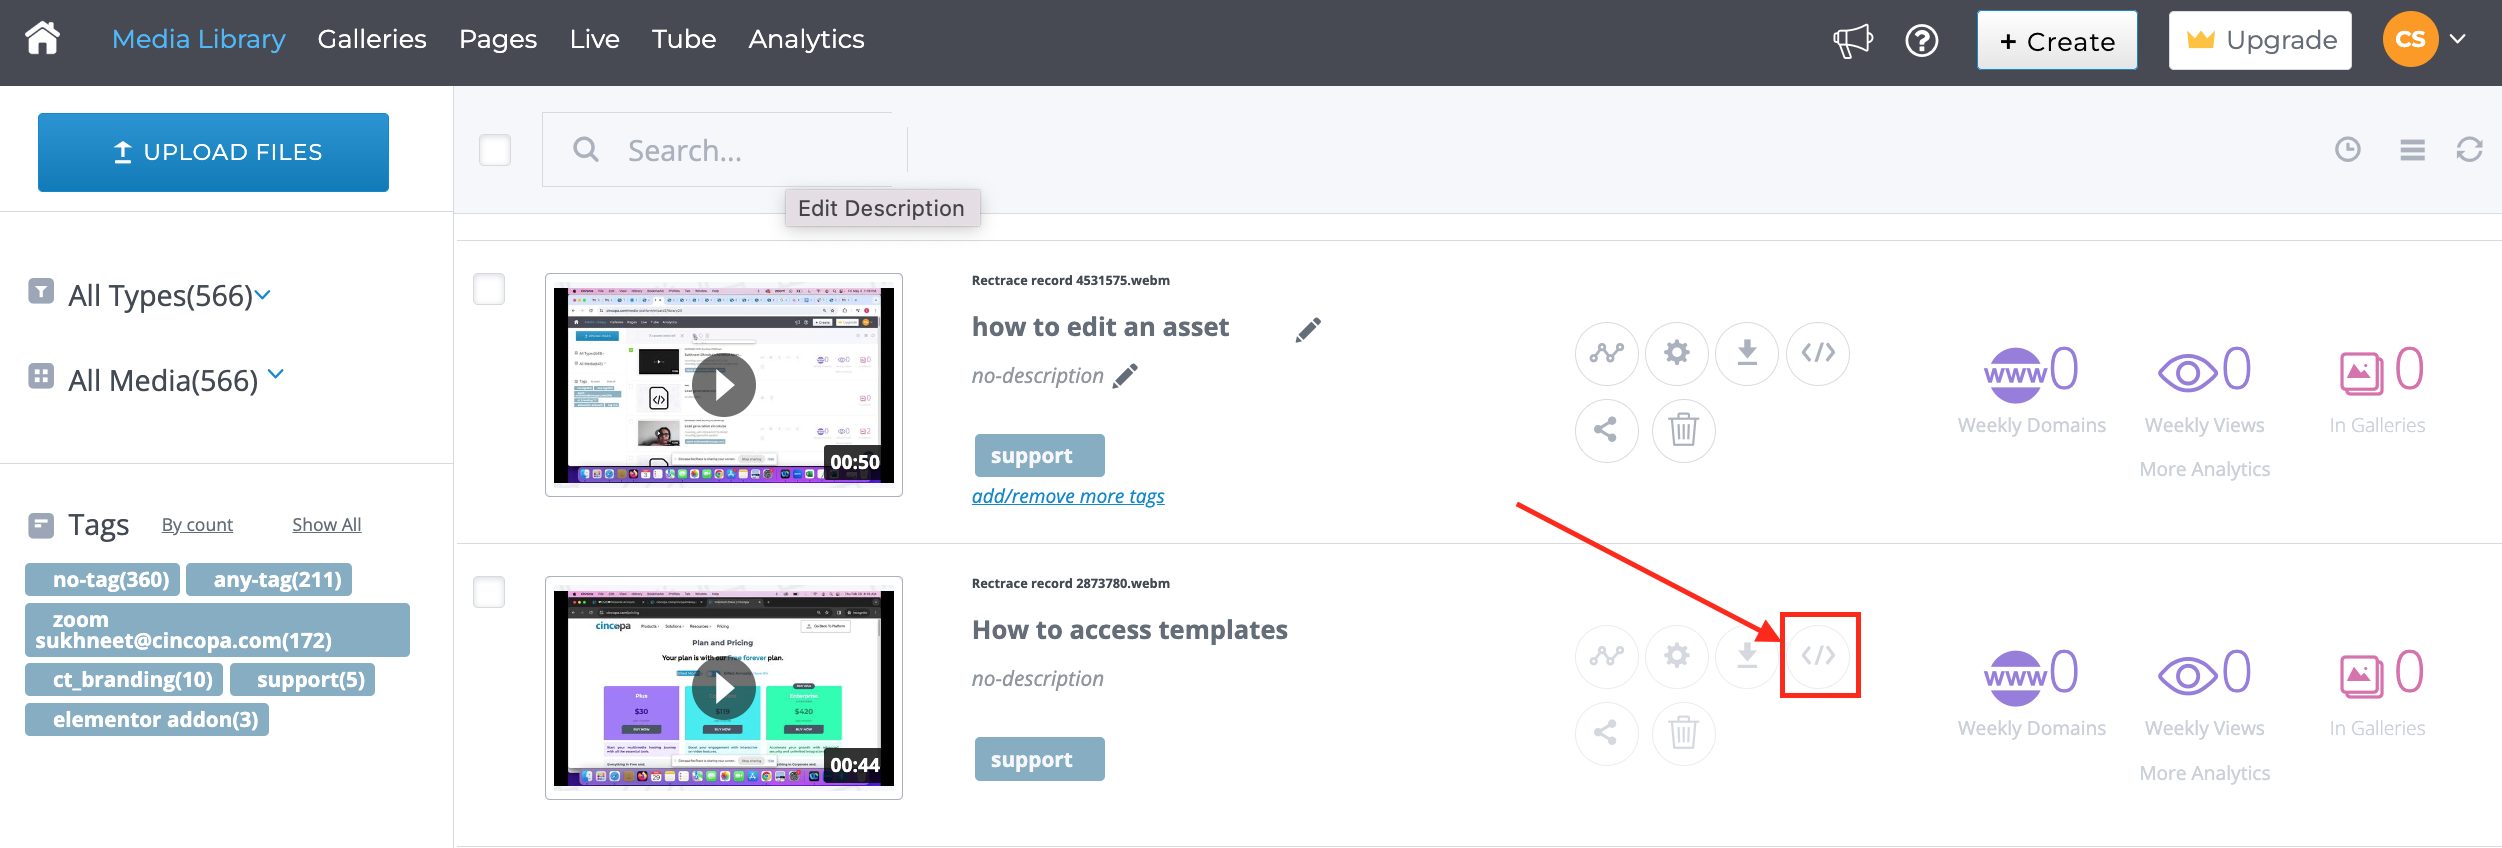
Now, click on the embed option in the video you wish to embed to integrate the video on your website.
Once you click on Embed, it will take you to the list of embedding options that you can choose from.
You can either copy the regular embed code to do a regular embed, select the Popup option to embed it as a popup or select Iframe to embed it in an iframe. The player will get the default look settings defined in your global settings.
If you later change the setting of the default player, it will be reflected immediately on your site.
Click on the Copy Embed Code button from the top-right menu and paste it within your website’s code. Once you paste the code to any section of your website, the recorded video will appear on your website.


