
Welcome to a whole new world of productivity and brand consistency using Master Galleries.
The best way of explaining it is to use the concept of master and slave from the IT world.
By linking a gallery to a Master Gallery, it will take the template and customization settings of the Master. Any changes made to the Master will be magically reflected on the Linked Gallery.
So unlike a preset, you don’t have to re-apply it to countless galleries when you want to change a video player’s color, add a logo to an image gallery or change the timing settings of a slideshow or even completely changing the type of template you want to use throughout your website.
Let’s take an example to see how a master template can be helpful.
Let’s say a user’s blog recently underwent slight design changes to build stronger branding and hence the graphic design team decided to use a different template in order to increase brand visibility by adding a player logo, post-roll video ads, and update their call-to-action.
This new branding direction has to be implemented but the problem is that this needs to updated on over 1000 media content.
This simple change can take days to complete, increase cost and time. Also, in the future, if there any changes then it will again increase the cost and time for the user.
This is where the master gallery helps. We’re glad we came up with a smart and quick solution.
Now, all user has to do is to change the settings on his Master Gallery, and it automatically updates all the media content at once!
Just like magic, Cincopa embeds in over thousands of galleries, changing their look and feel instantly.
Why Master Galleries?
These are a few points where Master Galleries will help you fix your problem:
Branding:
Master Galleries plays an important role in branding a company as it will help update multiple media files with the new branding policies.
Less Man Power:
Using a master gallery for your organization will help you use less manpower to make manual changes to your galleries. This is because when you want to implement a brand change like change the logo in all your media files then using master gallery you can do it by just making changes to the master gallery than manually changing the 100s or 1000s of media files that you have.
Less Time Consuming:
The user of the master gallery will also help you make gallery changes to your media files much quicker than manually changes all the files individually. This is very important for huge organizations that hold 100s or more media files.
Cost-Effective:
As discussed in the first points, how time and manpower is managed well using Master Galleries. For an organization time and manpower is an investment which requires a lot of funds. And hence making master gallery also useful in reducing cost.
Easy To Use:
Creating a master gallery and linking other galleries to the master cannot be easier. In just a few clicks you will be able to create a master gallery and link other galleries to the master gallery. In the rest of the document, we will see how to create a master a gallery and customize them.
How to create a master gallery?
To start with login to your Cincopa Account by accessing the URL: https://www.cincopa.com and then click on Galleries
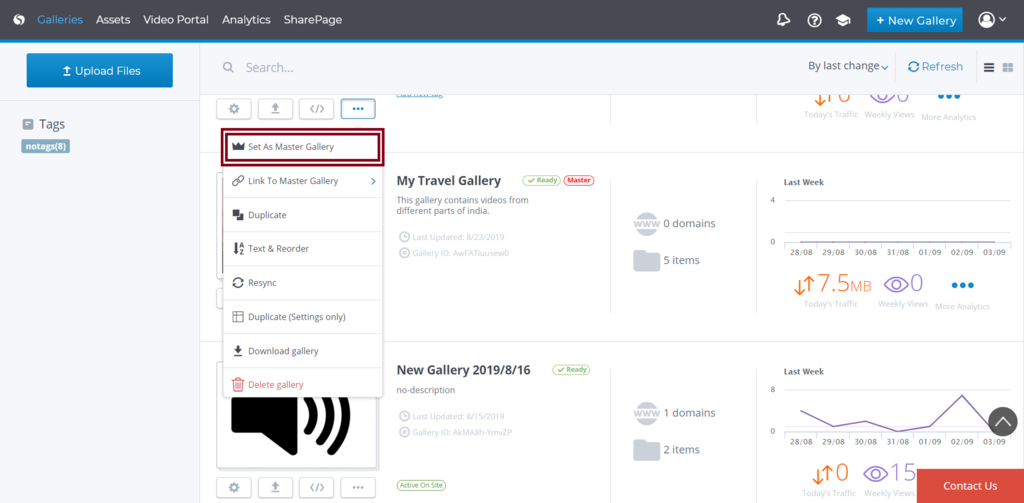
Under Galleries choose a gallery that you wish to make as a Master Gallery and then click on the More Actions icon as shown in the screenshot below.

When you click on the more option then choose Set As Master Gallery
Now, this gallery will become the master gallery and the changes you make in this gallery will appear in the galleries linked to this.
Video walkthrough of how to create a new gallery:
How to link galleries?
Now we will see how to link an existing gallery to a master gallery.
To start with login to your Cincopa Account by accessing the URL: https://www.cincopa.com and then click on Galleries

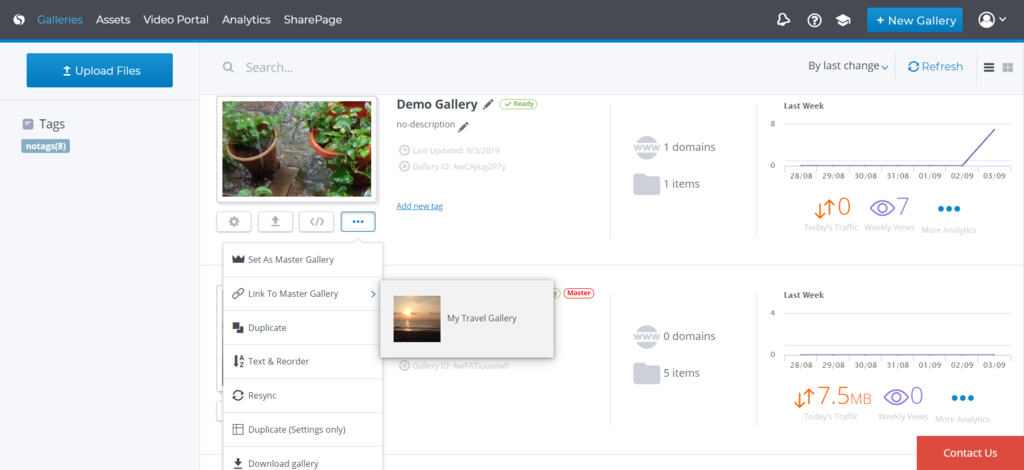
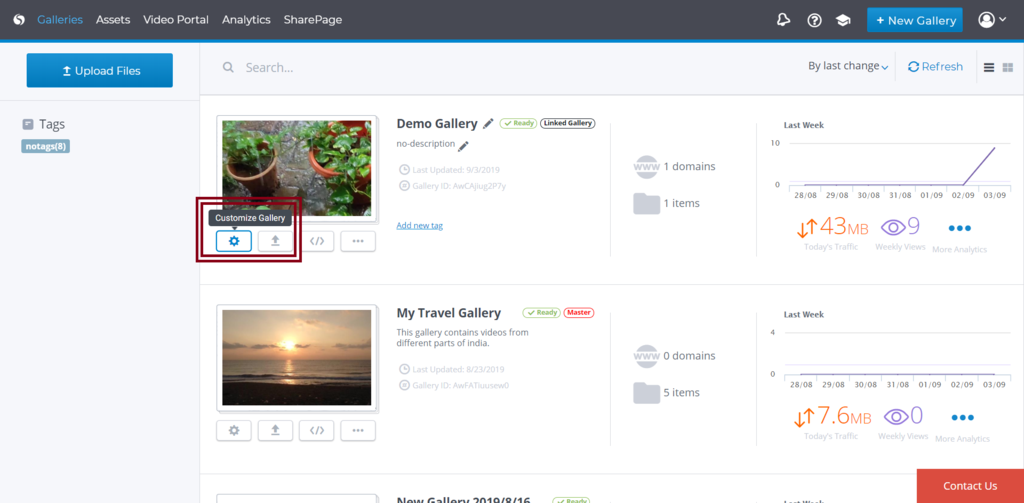
Now from your list of galleries, find the gallery you wish to link to a Master Gallery and then click on More Actions icon as shown in the screenshot below.

Once you choose the gallery you wish to link with a master gallery, click on Link To Master Gallery and choose a master gallery to link it.
Once the gallery is linked, you will see a Linked badge to the gallery as shown in the screenshot below.
The gallery will now be successfully linked to the chosen master gallery. Henceforth any change made to the master gallery will also be seen in the link gallery.
You can also link the gallery to a different master gallery. To do that, go to the galleries page, navigate to the linked gallery and assign it to a different Master Gallery.
Video walkthrough of how to link an existing gallery to a Master Gallery:
Linking an existing gallery to Master Gallery
Customizing a master gallery and its effects?
In this section, we will see how a change in Master Gallery will affect the galleries that are linked to it.
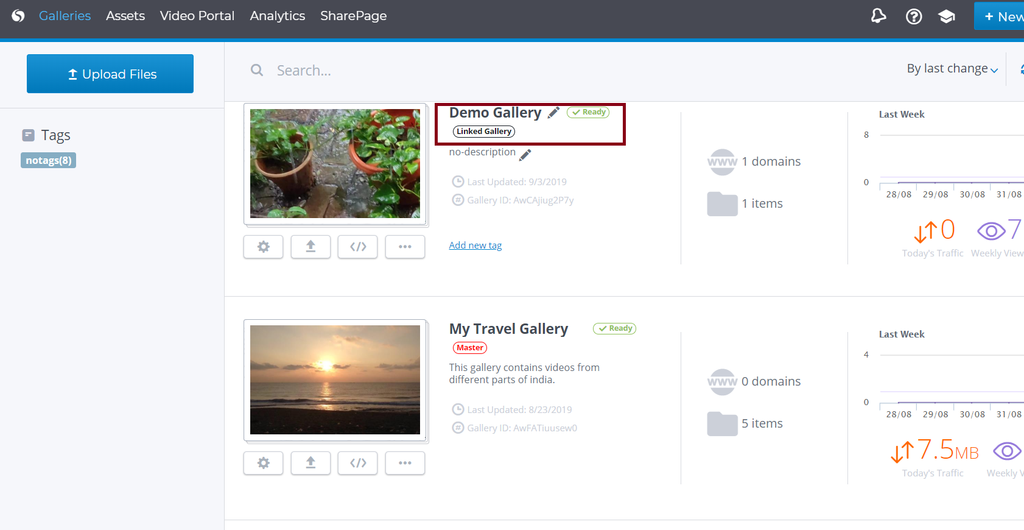
Firstly you must create a new gallery and make them a Master Gallery. We have already created a Master Gallery and this is how it looks.
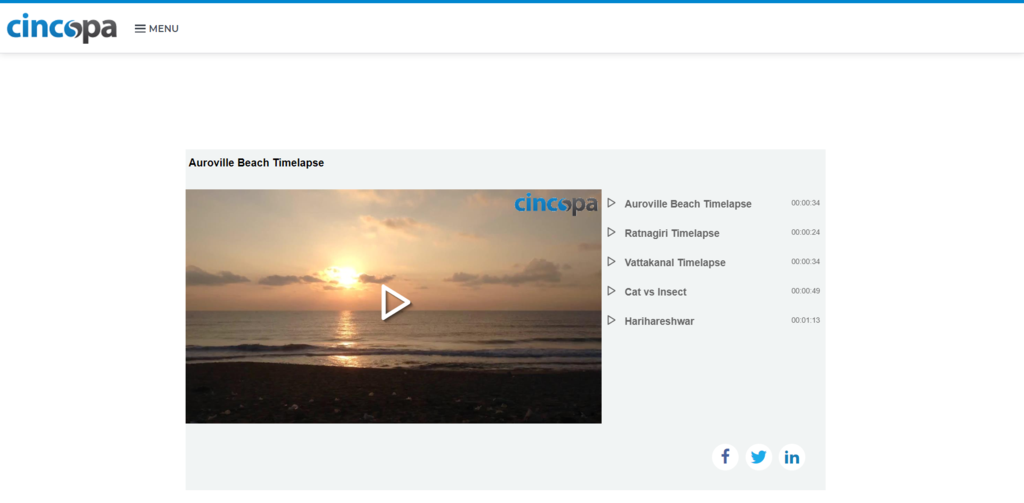
Next, you can choose a gallery that you would like to link with the master gallery. This is how the Gallery looks before linking with the master gallery mentioned above.
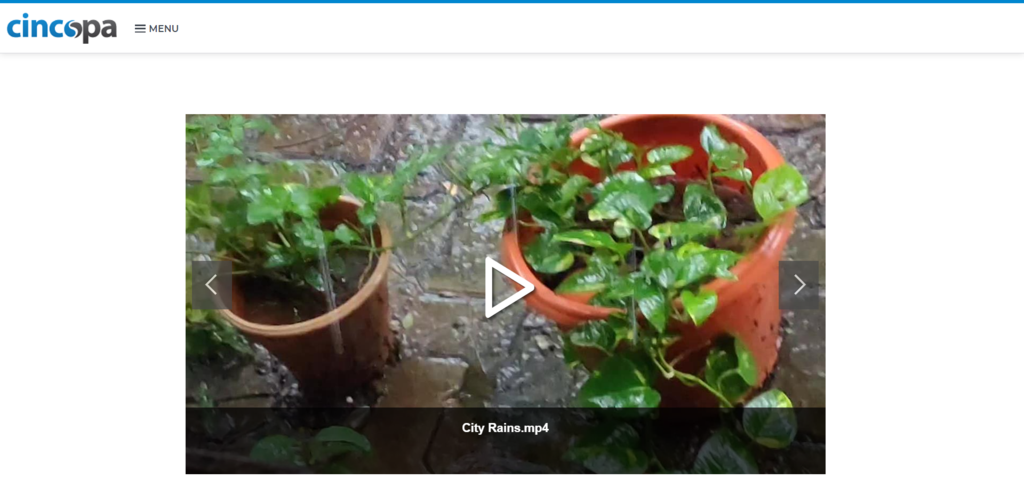
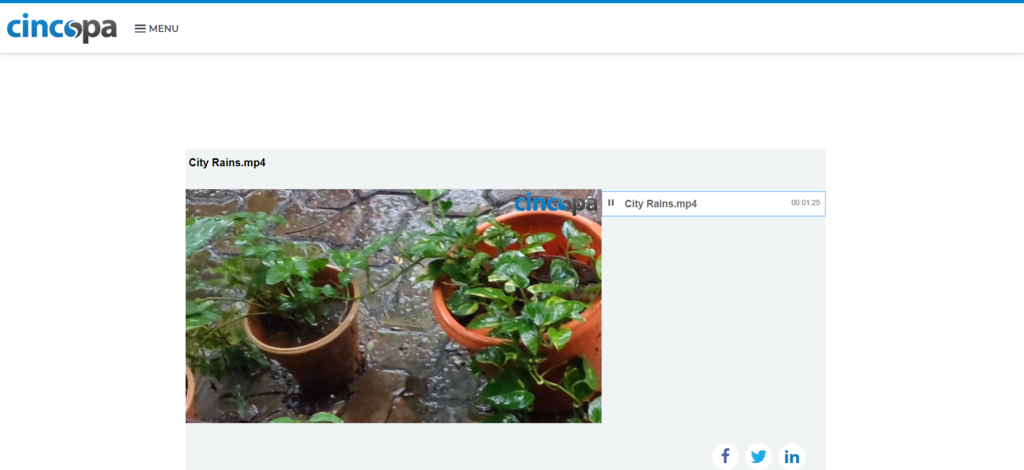
After linking the above gallery with the master gallery you can see how it changes its design to match with the master gallery.
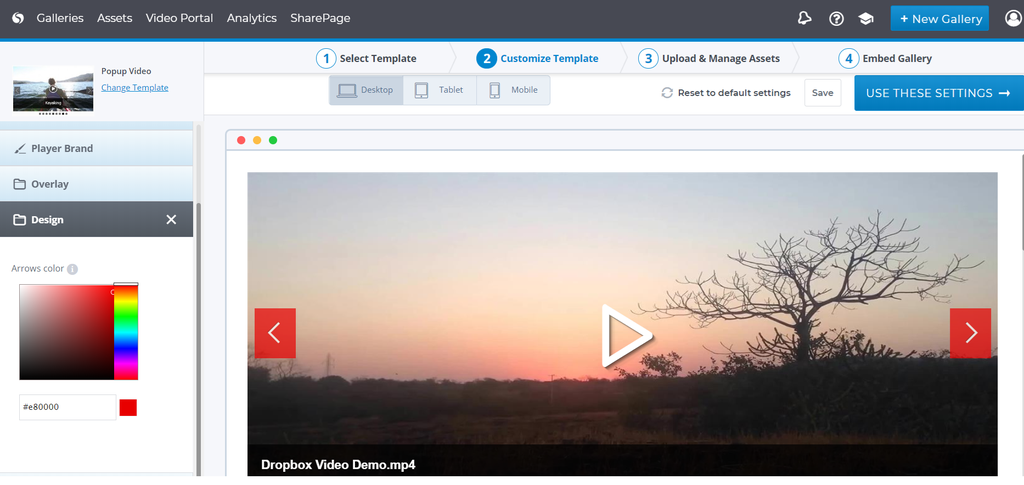
The customization options available for a master gallery is the same as any other gallery.
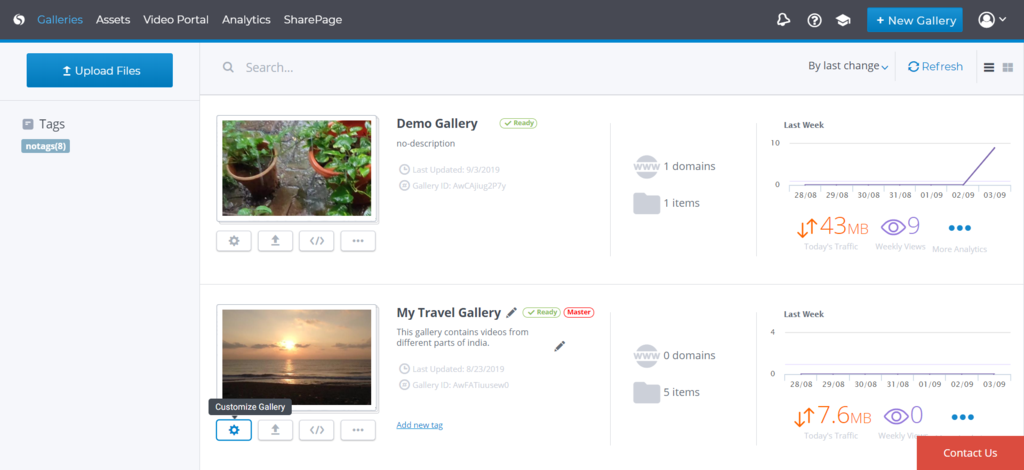
You can customize any gallery or master gallery by accessing the galleries page and clicking on Customize Gallery Icon
Un-linking a gallery?
Linked galleries cannot be customized as they inherit their settings from the Master Gallery. However, this link can be broken if you wish to unlink a gallery and then customize it.
To unlink a gallery, login to your Cincopa Account by accessing to the URL: https://www.cincopa.com and then click on Galleries

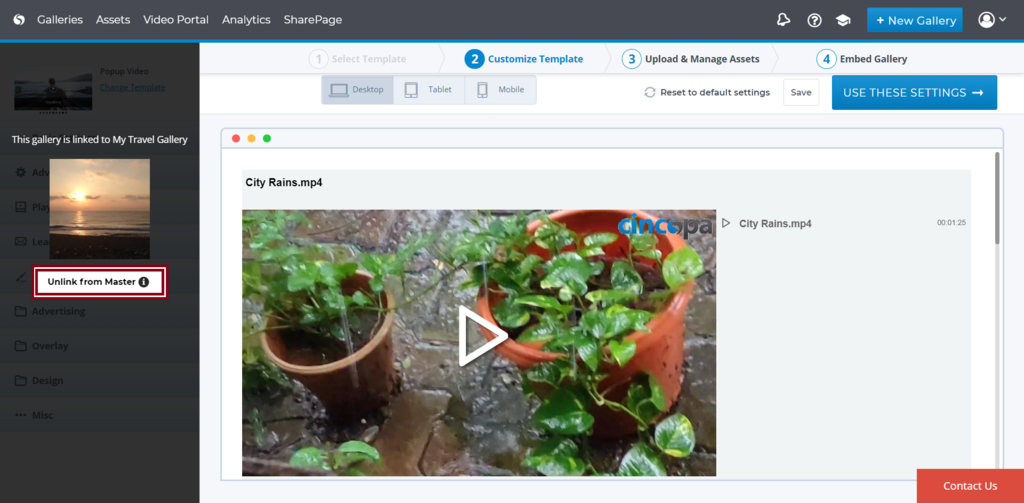
Now select a Gallery that you wish to unlink and then click on Customize Gallery.
Next click on the option called Unlink From Master
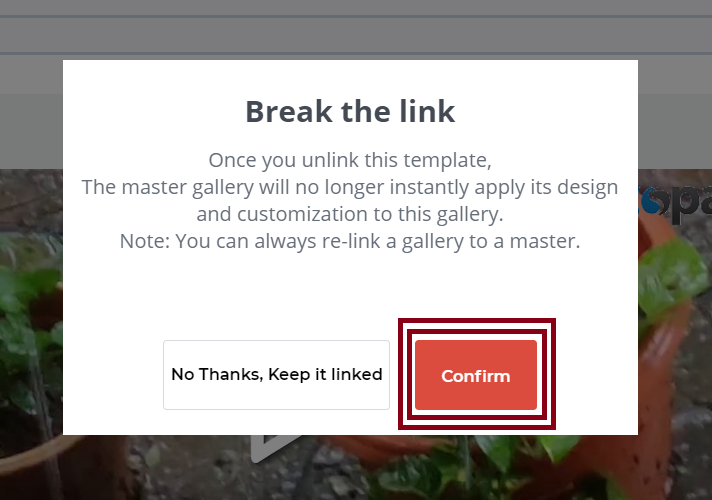
A new popup will appear where you have to confirm the unlinking process. To do so simply click on Confirm
Now the existing gallery will be unlinked from the master gallery
Video walkthrough of unlinking a Gallery from its Master Gallery: