You can easily create a media gallery for your web site using Cincopa in just a few easy steps.
A media gallery is simply a collection of media files, such as images, video, audio or podcast files.
With Cincopa, you can personalize these galleries using different skins (design styles) from Cincopa skins gallery. Select a skin according to the media you are displaying (video, audio or photo images) and the style of your web site.
Please visit Cincopa skins gallery page to see the available skins. After uploading your files you will be able to preview the gallery and easily change the skin to adjust the look which you would like to get.
Ready? Let’s get started!
Follow these steps to create your own Cincopa Media Gallery
Login, create account
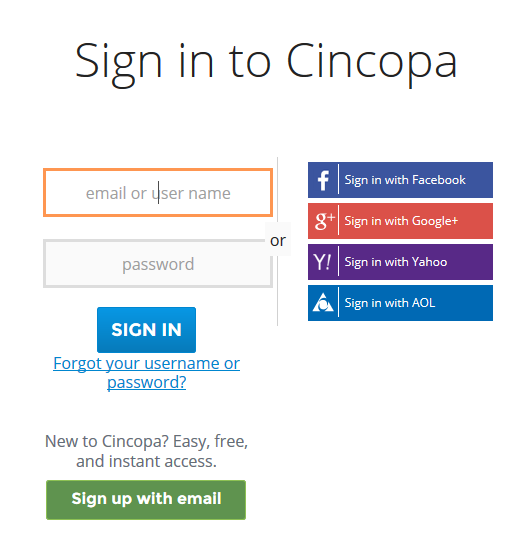
Cincopa Sign in Screen
You must be registered and have an account with Cincopa to get started.
Go to https://www.cincopa.com and click on “Login”
If you already have a Cincopa account use your Cincopa credentials to login, if you don’t have an account please create one.
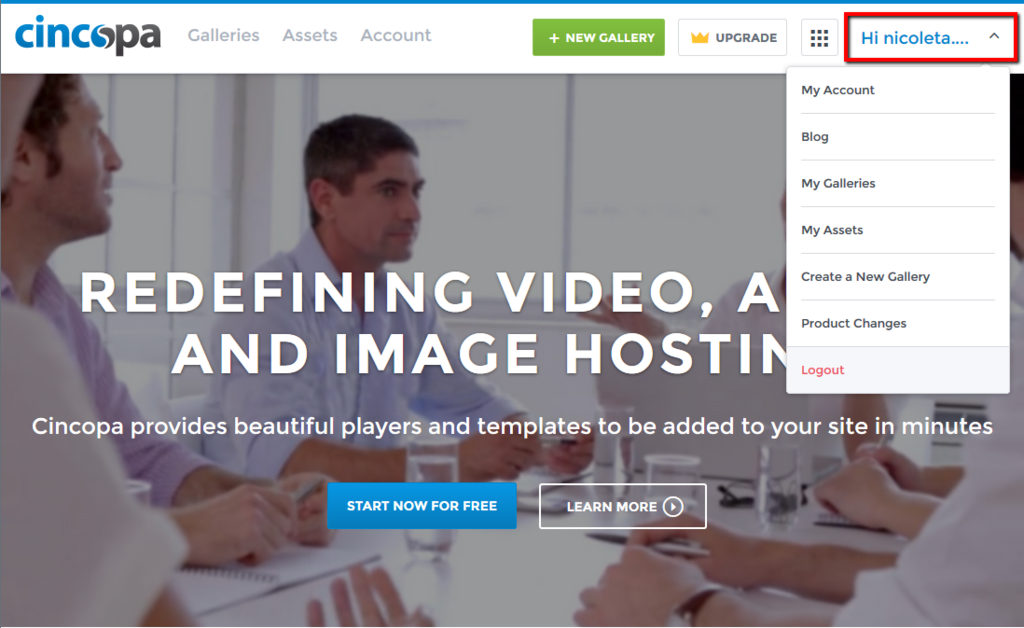
Create your media gallery
Start creating your gallery but clicking on the “+ New Gallery” green button in the header, or by going to your personal menu and selecting “Create new gallery”.
Create new Cincopa Gallery options
Choose skin based on your media needs.
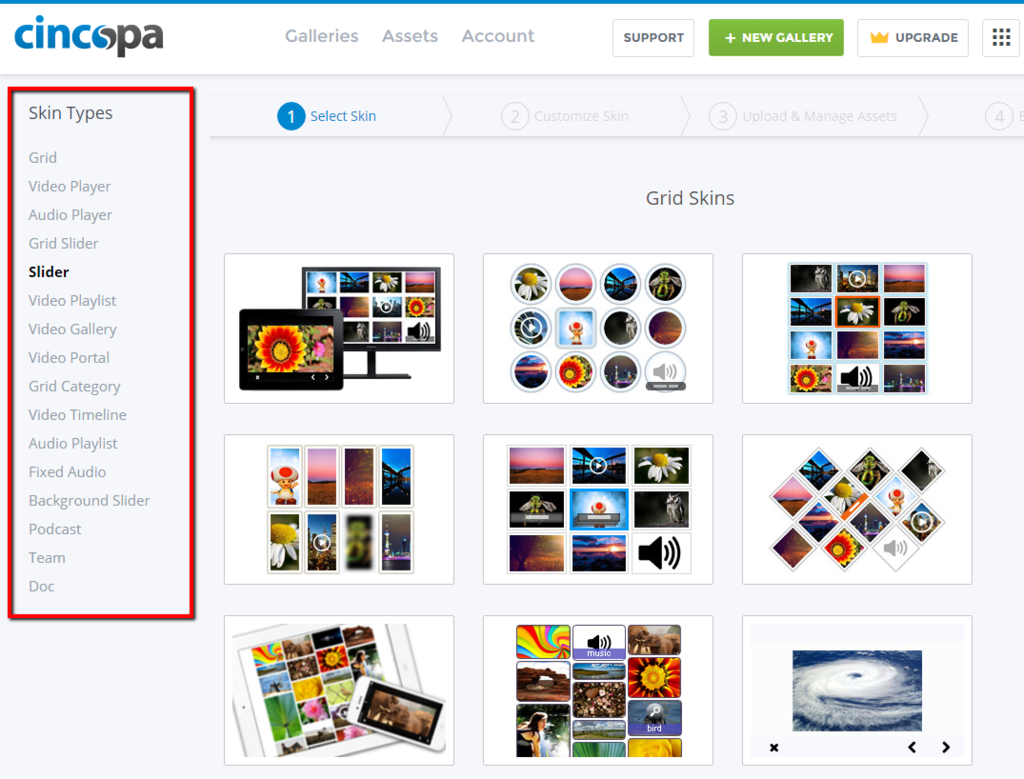
Choose Media, Choose Gallery Skin
You can view the different skins in full size by clicking on the “Preview” option. Once you find the skin that suits your needs click on the “Use this skin” button
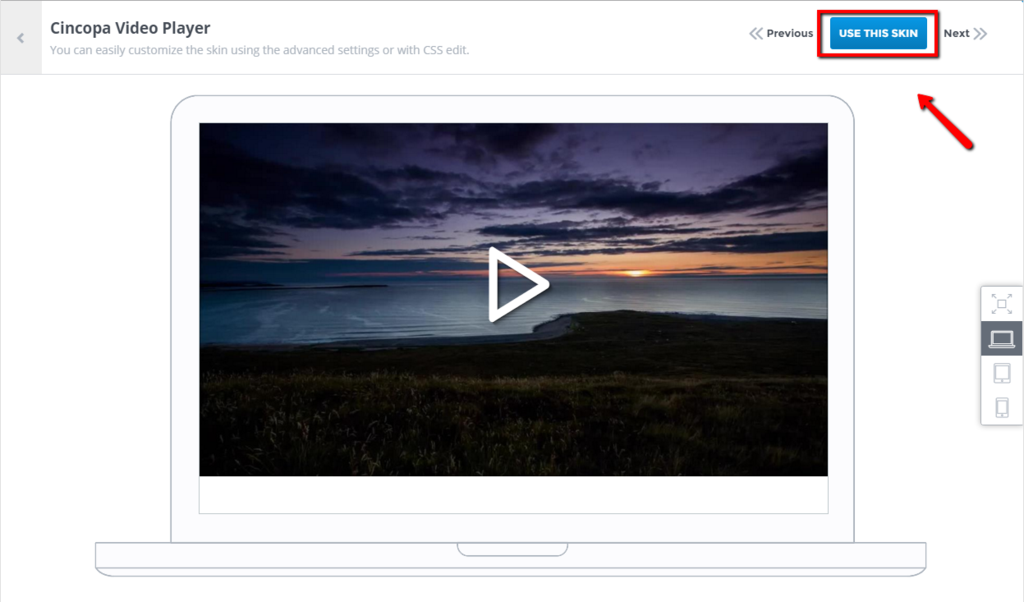
Find the skin that suits your needs and click the “Use this skin” button
Set the name of your Media Gallery and adjust the settings.
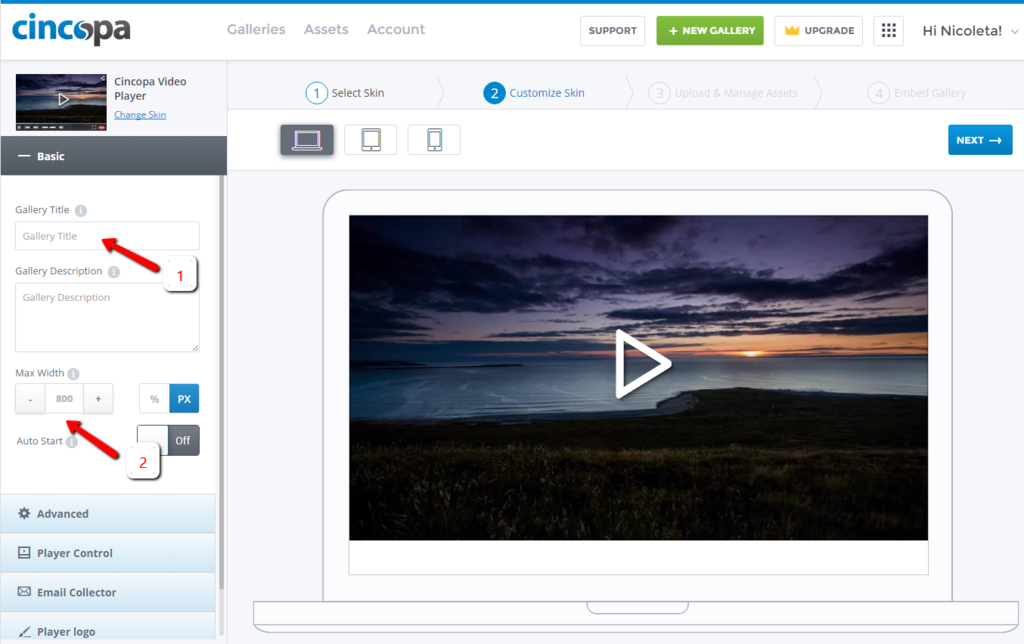
Name your gallery, adjust settings
Now you can update some advanced skin settings (some of the features are available to premium users only). Then you can preview your gallery again to see how it looks after the adjustment of the settings or continue to images upload.
As a premium user you can customize your gallery settings, remove Cincopa brand to make the gallery look more natural on your website, allow your visitors to download files from your gallery, change the size of the displayed thumbnails and adjust many other settings based on your skin design and needs.
- You can check different skins till you will find the one you like.
- You can, at any time, change the skin by clicking on “Change skin”, and then preview the gallery again.

You can change gallery skin at any time
Once you are done with the skin and the settings, click the “Next” button.
Upload your media
Choose your preferred upload method. Cincopa makes great effort to allow you the most convenient upload methods. You can upload your files in a regular way by dragging your files from PC or you can choose to upload your photos directly from your Facebook or Instagram account, upload from Dropbox, even upload videos directly from webcam (awesome feature for video bloggers) or upload your video or music from url.
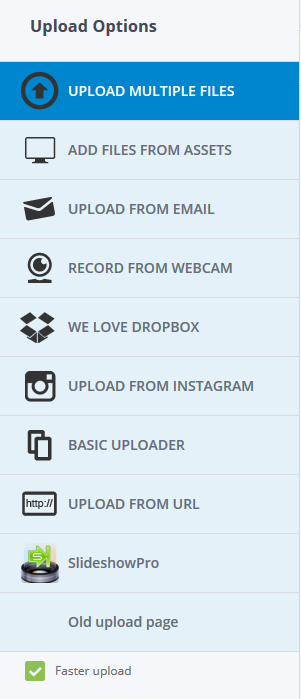
Upload media files
Please note that you don’t need to resize and convert your images or video and music files. Cincopa platform does that for you. Just upload your files.
- Free account users can upload up to 400MB of files ( up to 100MB for single file).
- Premium users can increase the amount of storage, upload and traffic quota using various Cincopa subscription plans
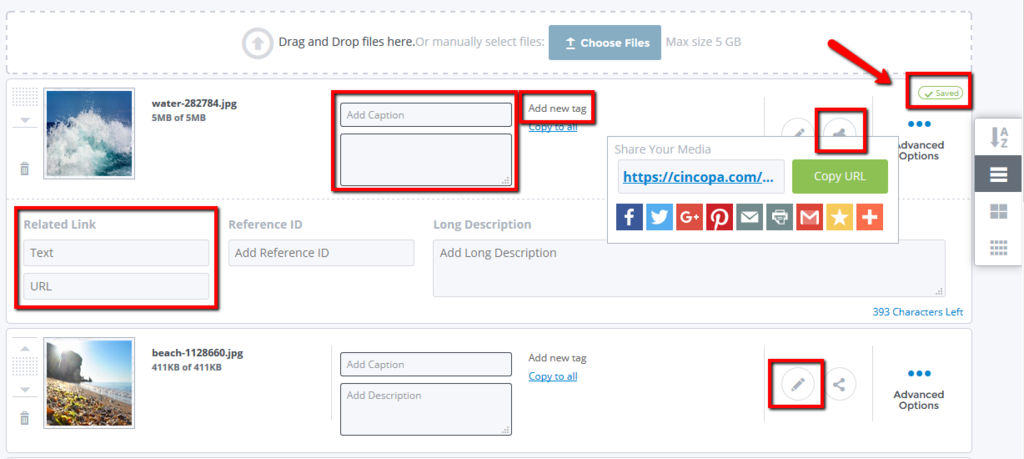
After uploading, add meta data to your media file.
- Add tags, caption and description for SEO perpose
- You can share your uploaded file using unique share links
- You can add external link to each file uploaded
- You can add beautiful effects to your images now with the Free Online Editor Cincopa offers
- Reorder files in your gallery with the top Up/Down controls that let you reorder media assets in the most convenient way. Simply click on the arrow to move the file to the top or to the bottom, or just drag and drop it to the desired position.
NOTE: Please pay attention for changes to be “Saved” before leaving the page.
Add meta data to your media gallery
In the upload page you also can:
- Drag and reorder your files to be displayed in the order you desire. You can use also Grid and Small Grid views to make the reorder easier.
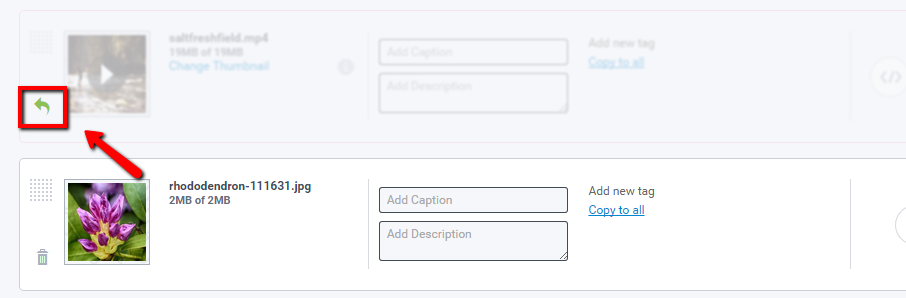
- Delete items from your gallery – You can also “Undo delete” if the item was removed by mistake.
- Get embed code for individual video files.
- Set thumbnail for your video files uploaded in gallery.
- You can quickly and easily sort your uploaded media files by file name and by caption in an ascending or descending order
-

- drag and reorder your files to be displayed in the order you desire. You can use also Grid and Small Grid views to make the reorder easier.
-

- Delete Item
-
- “Undo delete” if the item was removed by mistake.
-

- Get embed code for individual video files
-
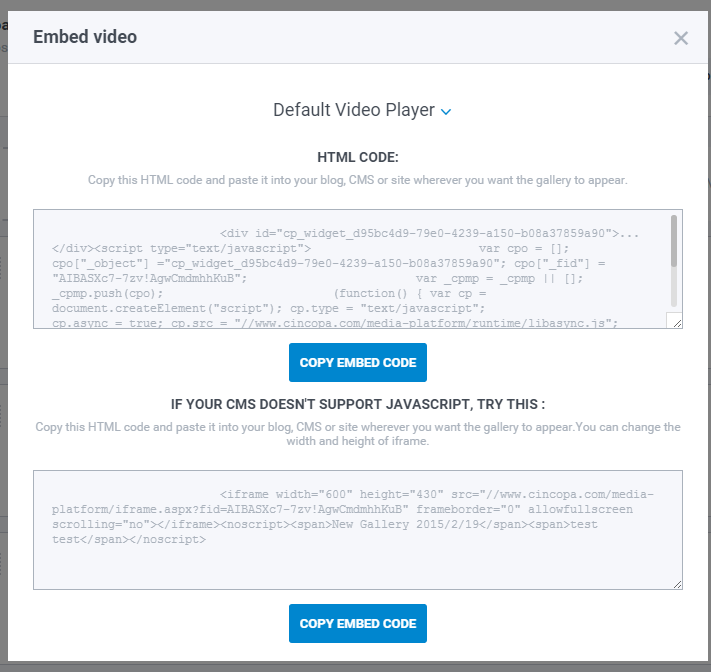
- Embed Code
-

- Change Thumbnail
-
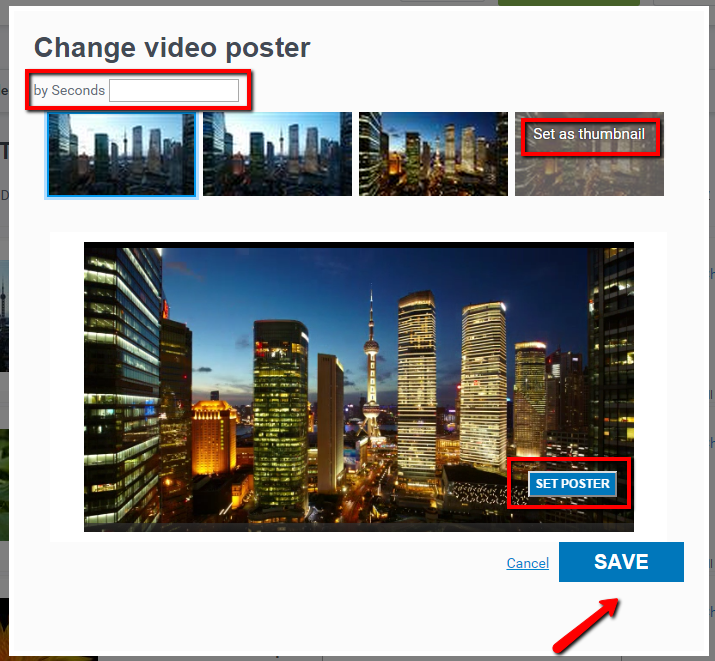
- Set thumbnail for your video files uploaded in gallery
-
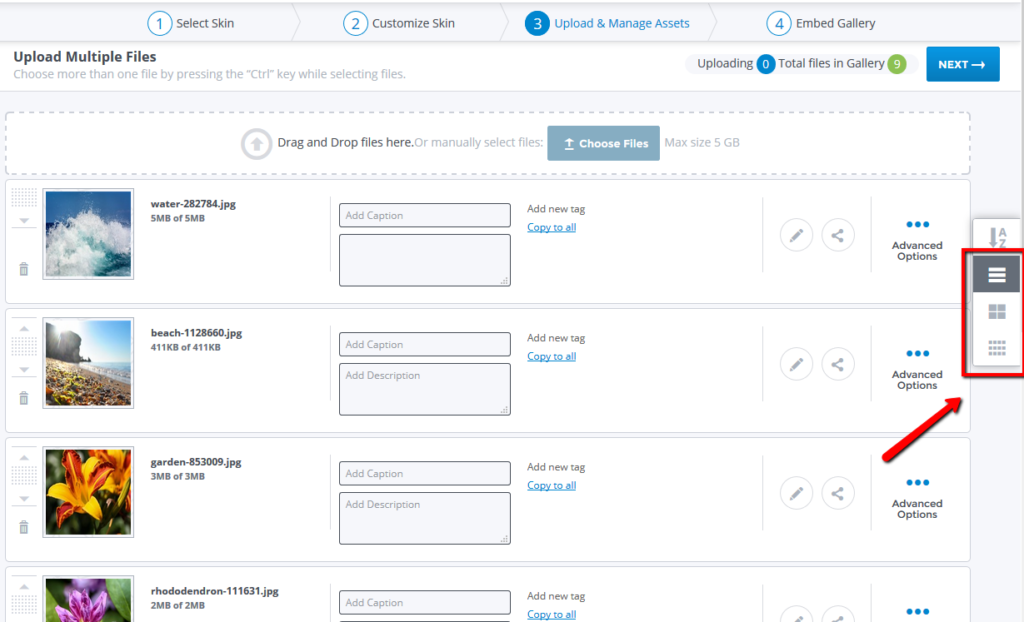
- Use also Grid and Small Grid views to make the reorder easier.
-

- Almost finished. Click on the “Next” button for last step
Once the images upload and reordering is completed, Click the “Next” button.
You are almost ready. Last step is choosing the method you want to embed the gallery in to your website.
For more information on how to embed your gallery on your web assets and how to share your gallery with friends, please go to “Embed and Share” chapter.