Video Portal is a section within Cincopa which allows users to create their portal where they display their videos and also set up a subdomain like yourname.cincopa.com to share it with others. With the Cincopa video portal, you can also create a private easy-to-navigate page for your own employees to easily access all your training and information videos.
The easy-to-follow setup wizard quickly and simply guides you through the process. We have a wide selection of beautiful video portal templates to choose from and each one will give you a professional, user-friendly, and attractive video gallery along with unique features like password protection, branding, call to actions, annotations, and advanced video analytics.
In this article we will cover all you need in the following chapter:
- How to create a Video Portal?
- Video Portal Setup Page
- Design & Branding
- Secure Access Settings
- How to add a custom footer to video portals?
- How to Style your Video Portal login page?
- How to set up a several (additional) Video Portal?
Getting Started
To get started, users need to access the URL: https://www.cincopa.com and if you are an existing user then login or register if you are a new user. Users can register an account here: https://www.cincopa.com/register.aspx?
Once the user is logged in, then click on Video Portals here:https://www.cincopa.com/cincopamanager/video-portals. You will be shown a small demo video on Video Portals and automatically will be redirected to Create New Portal section.

The video portals section offers a wide variety of options to customize the look and feel of your video portal. Please find below, different options allowed to customize your Video Portal:
How to create a Video Portal?
Cincopa’s video portal can be used for secure internal communications or externally as a marketing and sales enablement hub (repository).
Video portals are constructed using your hosted videos. Navigate to Assets to upload new videos or modify existing content.
Let’s see how to create a video portal from start:
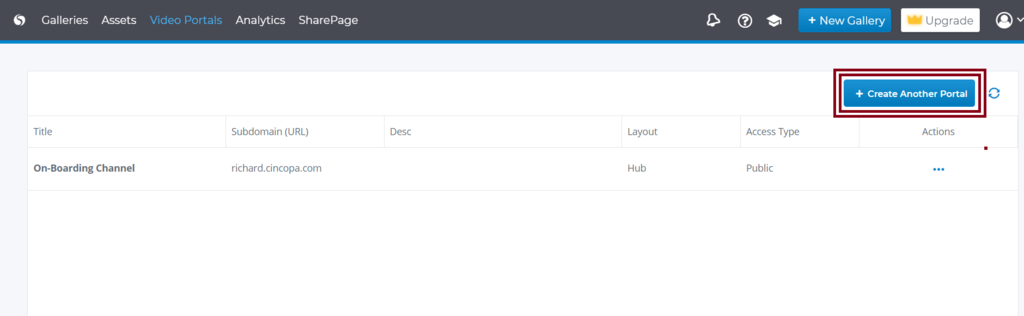
Log in to your Cincopa account and click on Video Portals
Click on Create Portal/ Create Another Portal
In the next screen, you will be taken to the Video Portal setup page.
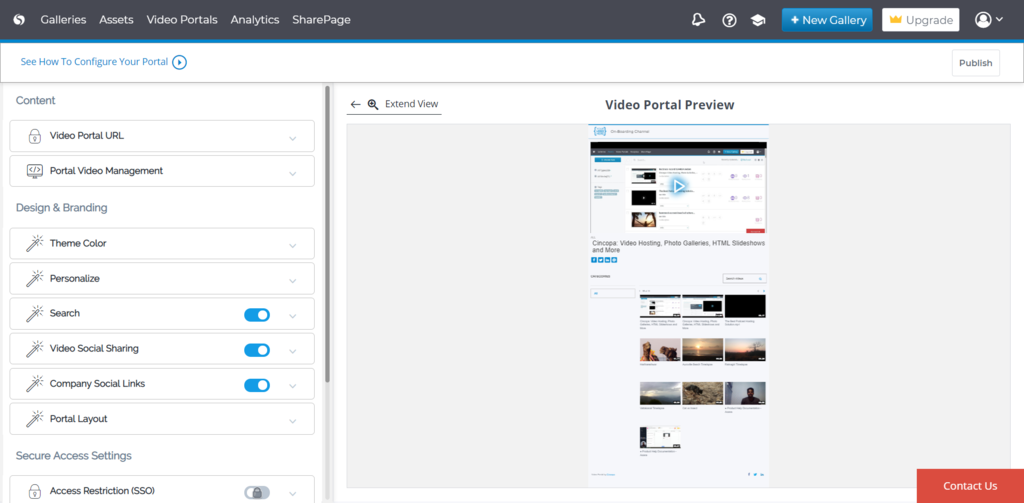
Video Portal Setup Page
Now let’s dive into every option in the Video Portal Setup page:
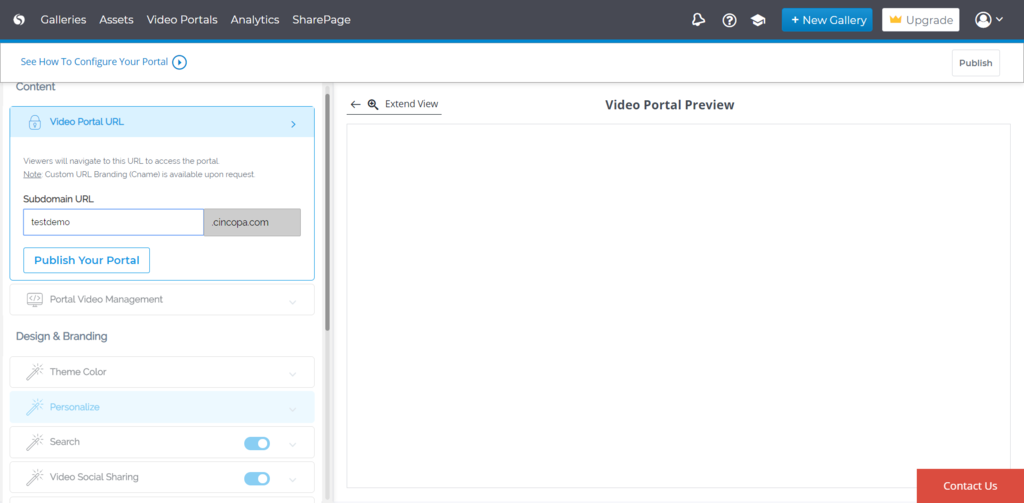
Video Portal URL
Using the Video Portal URL option, you will be able to set subdomain like test.cincopa.com.
To do that click on Video Portal URL >> Enter the subdomain >> Publish Your Portal
Portal Video Management
This option allows you to create Categories using the existing tags, Arrange Categories, Show Video Category, Show Video Description, etc.
To view this option simply click on Portal Video Management.
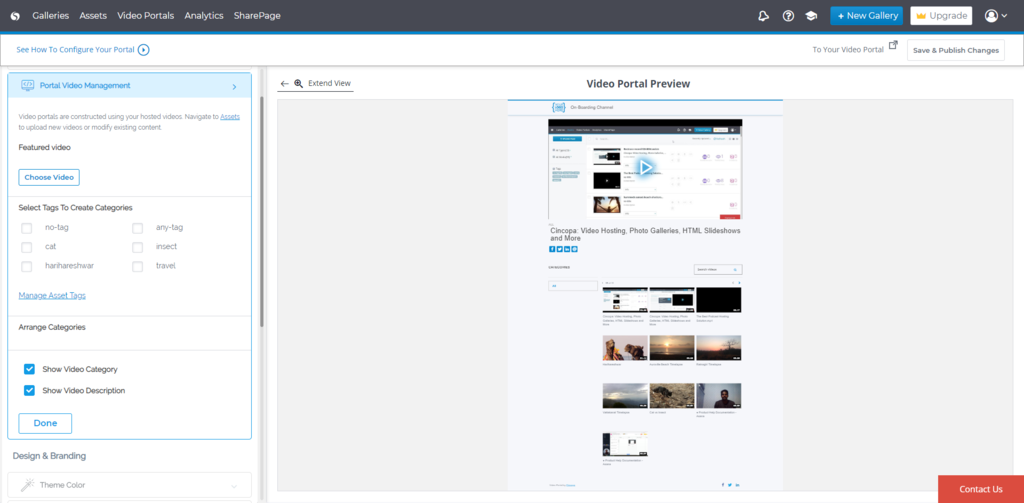
Featured Video
The Featured Video that you will choose will be displayed as the main video in your Video Portal.
To choose a Featured Video, click on Choose Video and then select the Video.
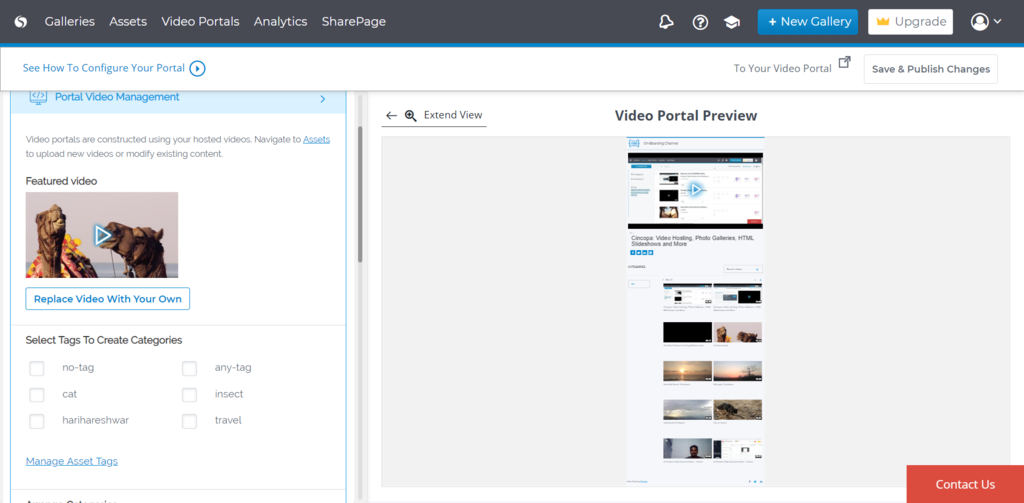
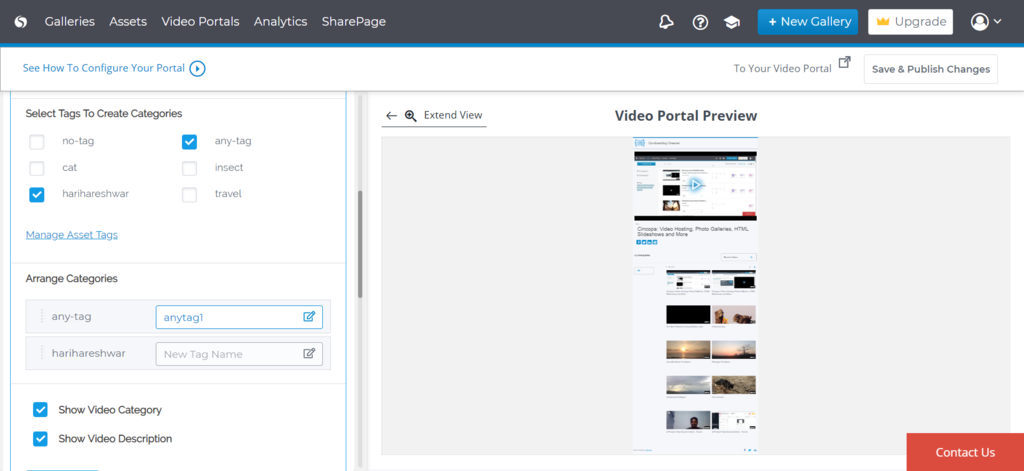
Select Tags To Create Categories
This is where you will see all the tags that you added for the videos in the assets. When you check any tag then it will be considered as a Category.
If you wish to add more tags, then click on Manage Assets Tags and you will be redirected to your Assets page.

Arrange Categories
This option will show you the tags that you selected to Create Categories. You can change the tag name if you wish to change it.
If you wish to show Video Categories and Video Description in your Video Portal, then simply check the boxes Show Video Category and Show Video Description
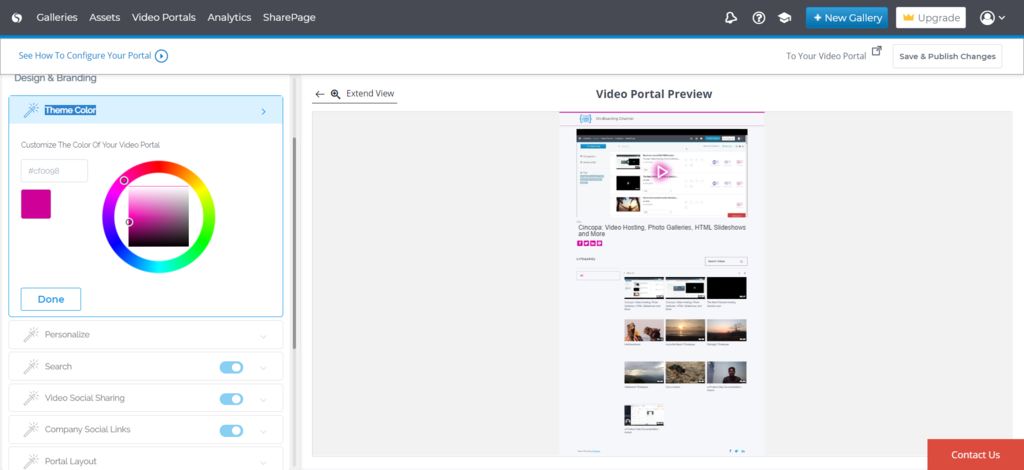
Design & Branding
In this section, we will look into the design aspect of the Video Portal. There are several options which will help you change the look and feel of your Video Portal, let’s look into each of them individually:
Theme Color
As the name suggests, this option will allow you to change the color of your Video Portal Theme. It is best to choose your logo color.
Once done with the changes, click on Done.
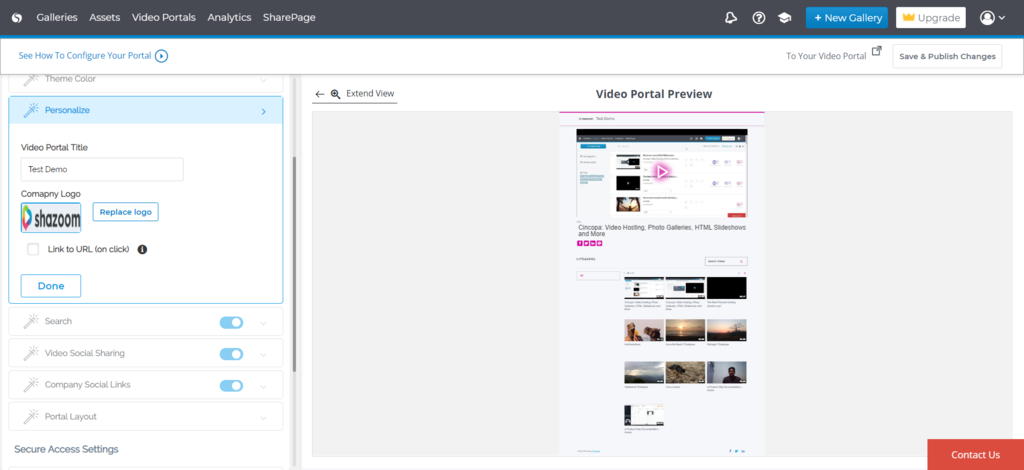
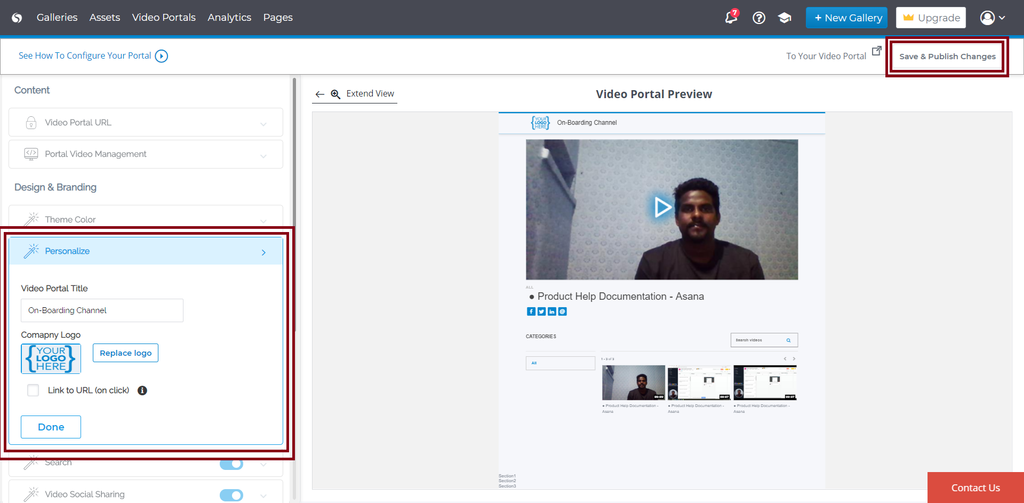
Personalize
In this section, you will be able to add a Title for your Video Portal and add a logo to it.
You can also redirect the user to another URL if they click on your Logo or Title. You can do this by checking the checkbox Link to URL (on click) and then enter the new URL where you would want the users to be redirected to.
Once made the necessary changes, simply click on Done
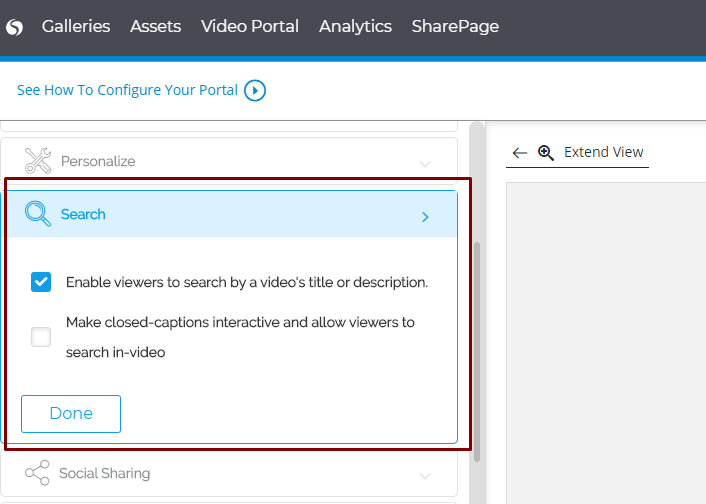
Search
Here you will have 2 options:
-Add a search box to your video portal, you can enable it by check the box.
-Make closed-captions interactive by checking the box.
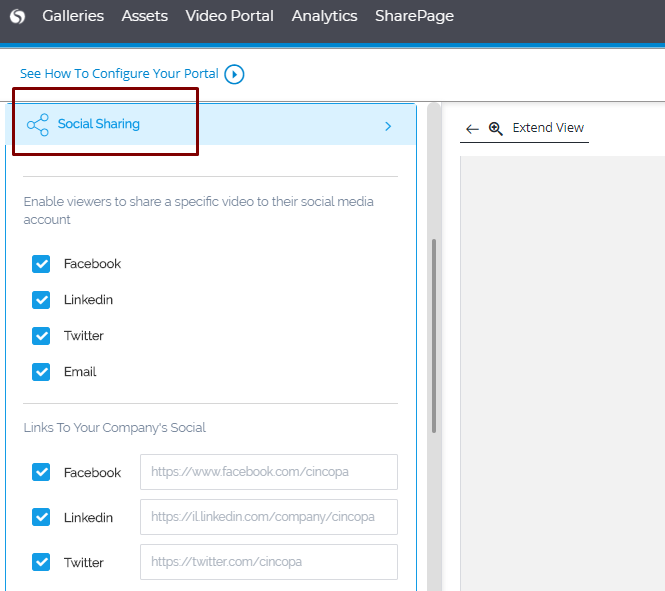
Social Sharing
Here you will have 2 options:
-Social Sharing: here you can select the social media that you want to show up so that your viewers can share it on their profiles. You can choose from the following Social Sharing options: Facebook, LinkedIn, Twitter and Email.
-Company Social Links: this option allows you to link your social media accounts so that your video portal viewers can visit your social profiles and subscribe to your feeds.
Here you have 3 social linking options: Facebook, LinkedIn, Twitter, etc.
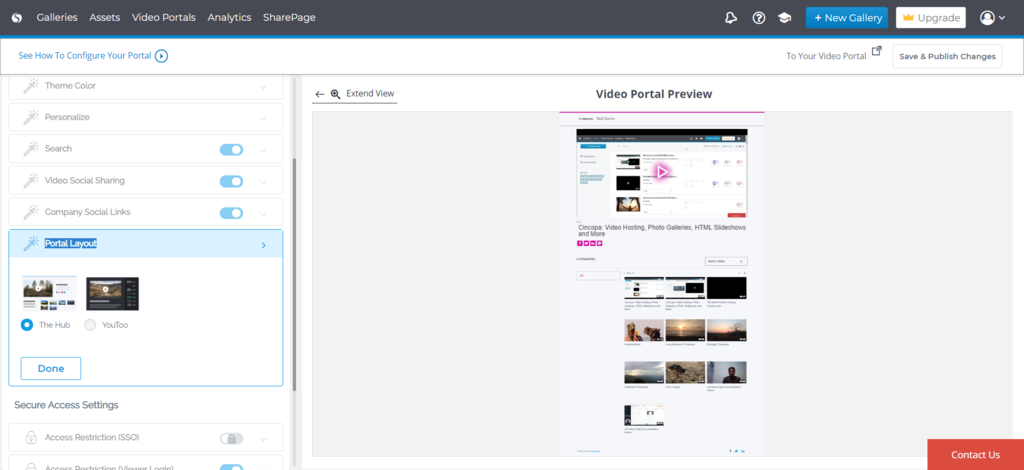
Portal Layout
Here you can choose the templates/layouts for your Video Portal, there is two Portal Layout to choose from.
Secure Access Settings
As the name suggests, here we will work on securing the contents in your Video Portal so that it is not misused by others.
Access Restriction (SSO)
Control viewer access to the video portal using your organization’s Single-Sign-On (SSO) identity management solution (ADFS, Salesforce, Google)
To enable this, you will have to contact our team for setup assistance. You can send an email to our support on support@cincopa.com.
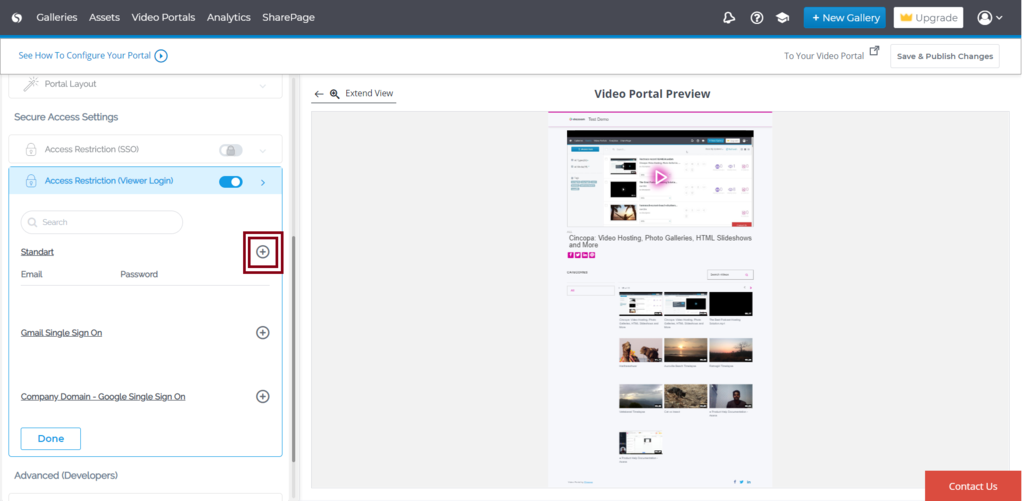
Access Restriction (Viewer Login)
Here you can restrict certain email account from signing into your video portal. You can enable this by clicking on the + icon.
Once you click the + icon, you can enter the email address that you wish to restrict.
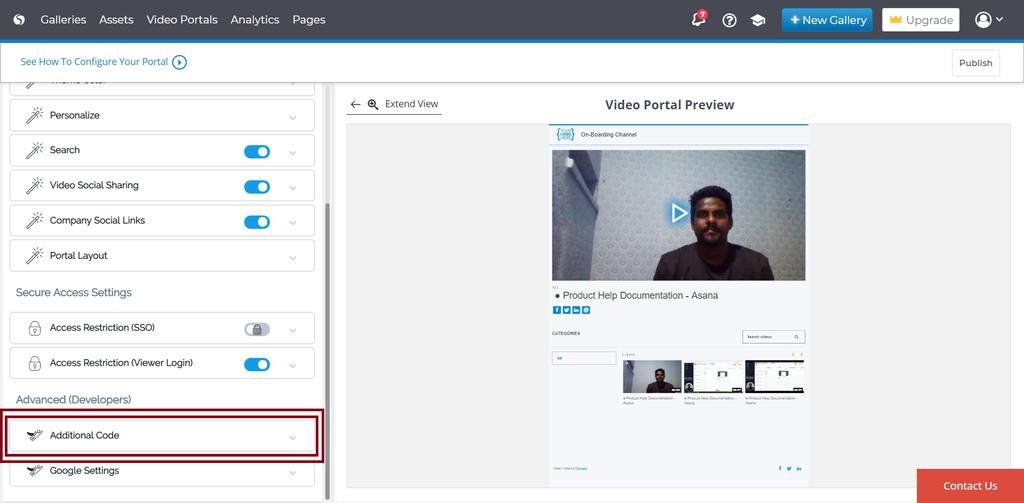
How to add a custom footer to video portals? (Additional Code)
The Video Portals section allows users to add a custom footer where they can use their HTML, CSS, JavaScript code, and create any kind of footer.
To start with, the user needs to click on the Additional Code option under Advance (Developer).
Now a new set of input boxes will appear where the users can add their HTML, CSS, JavaScript Codes to customize their footer and header sections.
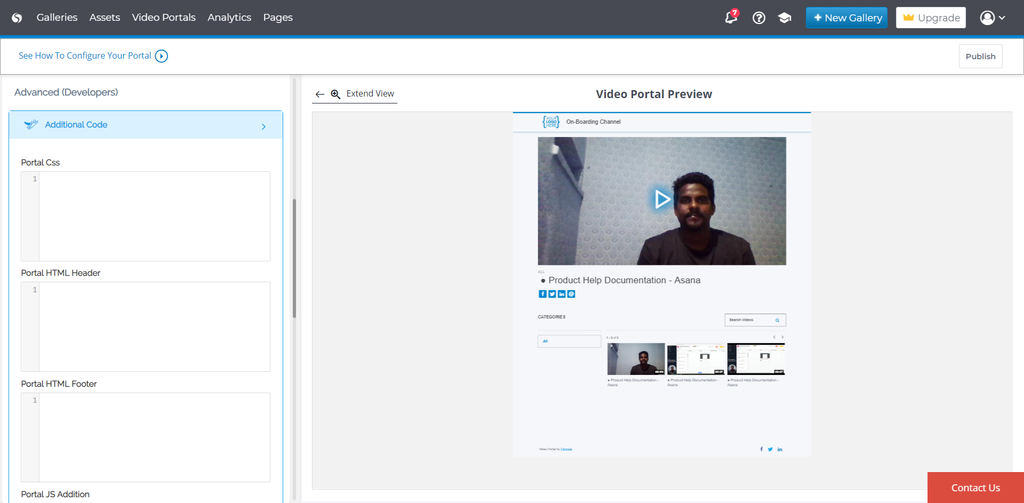
Portal HTML Footer
Now you can add custom HTML code to the ‘Portal HTML Footer’ input box and the output will show up as a preview in the Video Portal Preview section of the page.
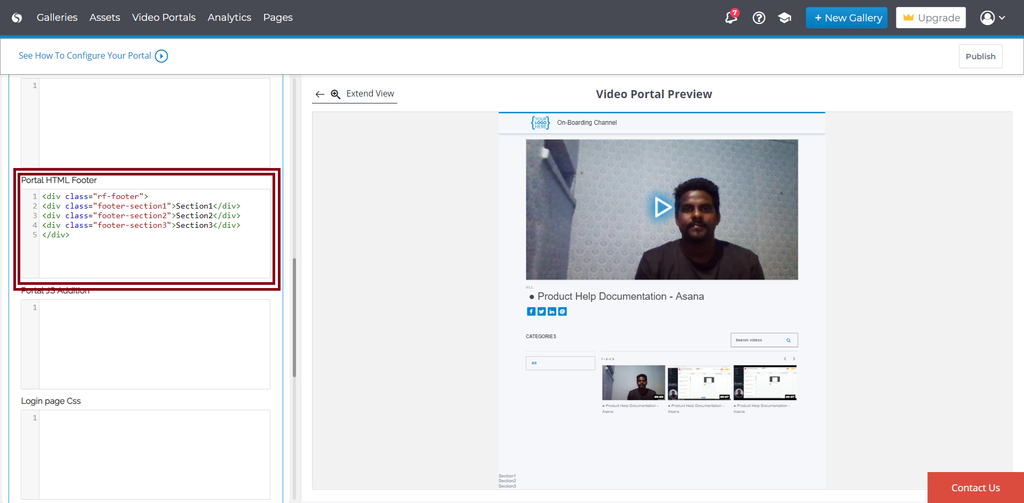
Now you click on Publish and the changes will be saved to your Video Portal Profile (testvideoportal.cincopa.com).
Portal CSS
Once you add the HTML code, you can add CSS code to beautify the HTML code. You can add the CSS code under the ‘Portal CSS’ input box.
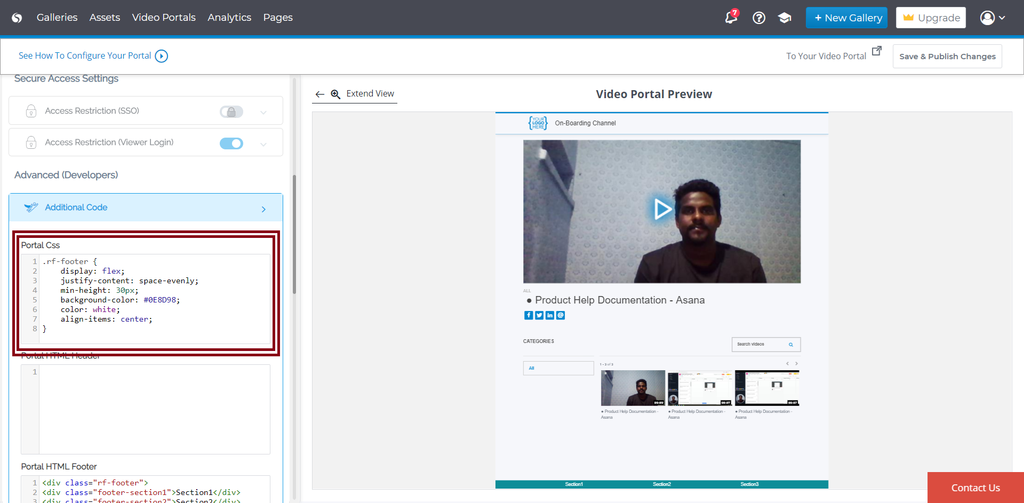
Now you click on Save & Publish and the changes will be saved to your Video Portal Profile (testvideoportal.cincopa.com).
Portal JS Addition
You can then add the JavaScript code to make the footer more interactive under the ‘Portal JS Addition’ input box.
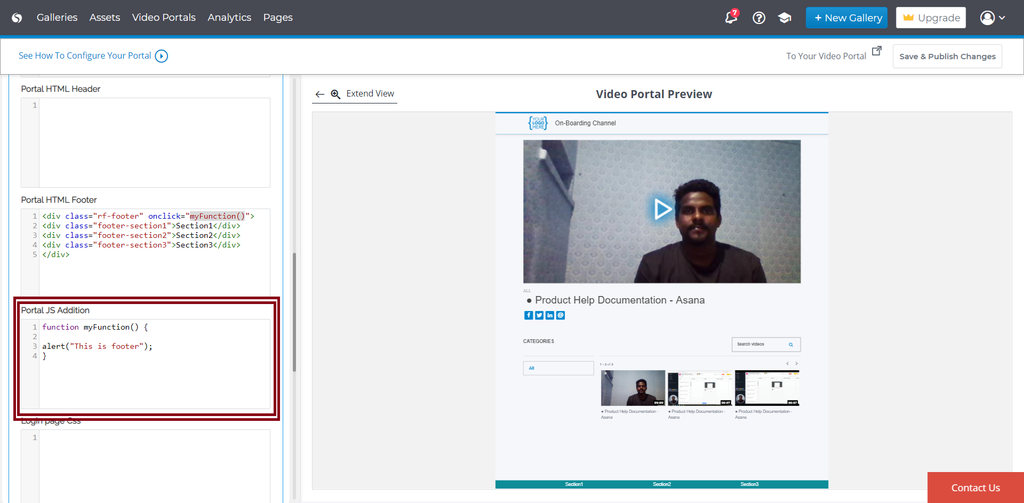
Now you click on Save & Publish and the changes will be saved to your Video Portal Profile (testvideoportal.cincopa.com).
How to Style your Video Portal login page? (Additional Code)
Video Portals allows a login option that authenticates other users before they access your video portal.
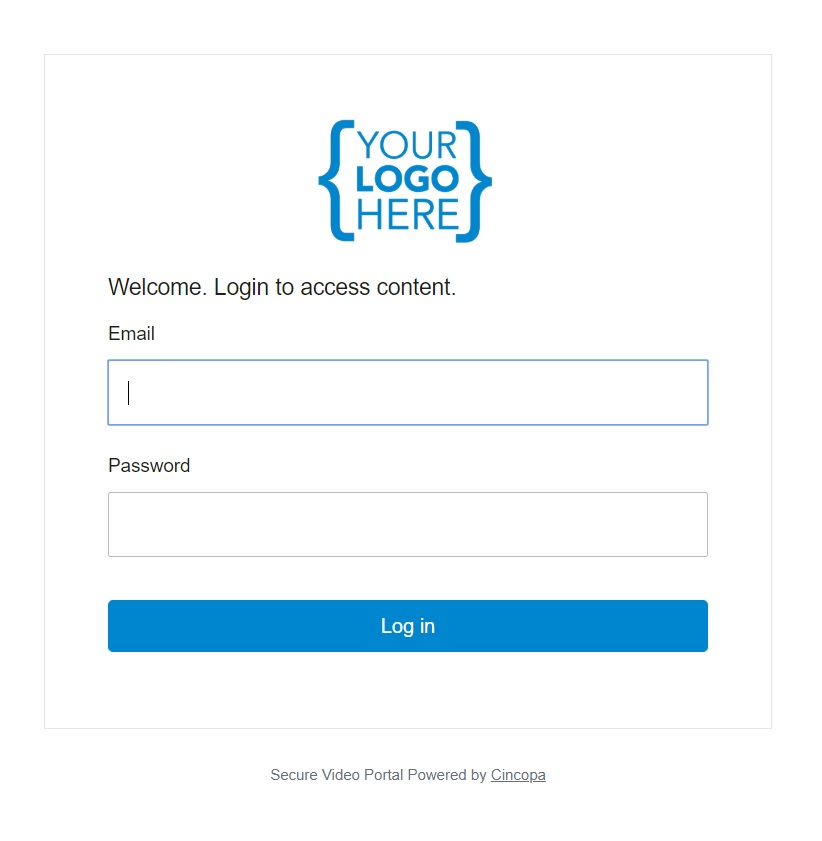
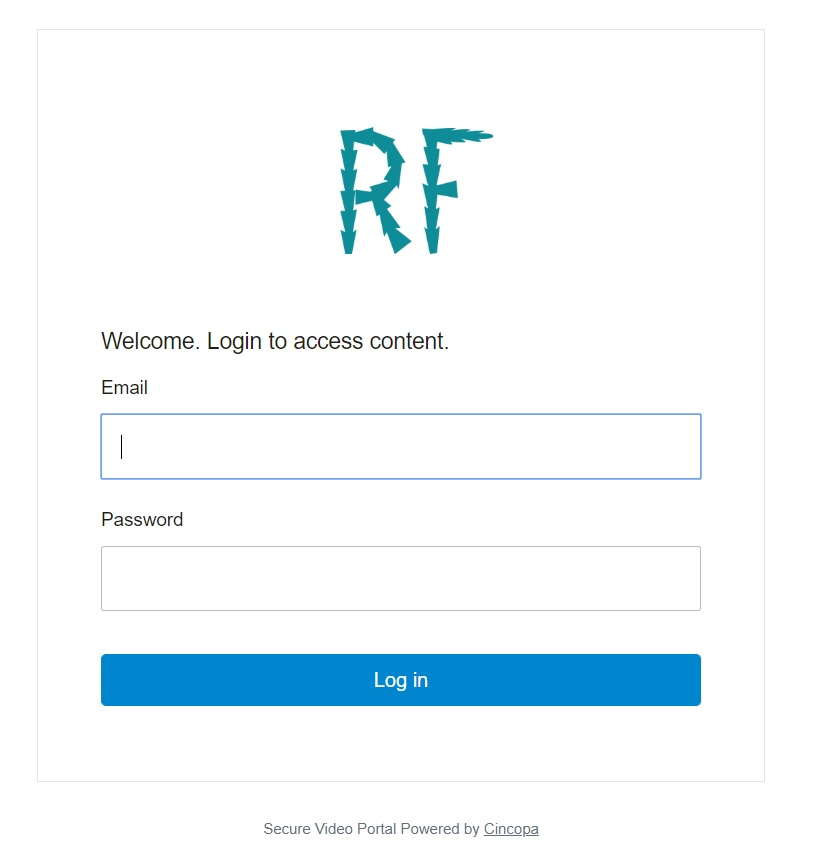
You can customize the look of your video portal login page by changing the logo. To change the logo, follow these steps:
> Access the Video Portals Section
> Click on Personalize
> Click on Replace Logo and then click on Save and Publish Changes
> Now when you access your Video Portal login page it will show up with a new logo.
Google Settings
Here you can work on the SEO (Search Engine Optimization) of your Video Portal and also enable Google Analytics.
Firstly, you will have to set a Video Portal SEO Metadata Title Tag and then if you wish users to find your Video Portal on Google Search results you will have to check the checkbox Google can index this site.
And then if you wish to enable Google Analytics for your Video Portal, enter your Google Analytics ID and hit Done to save the changes.
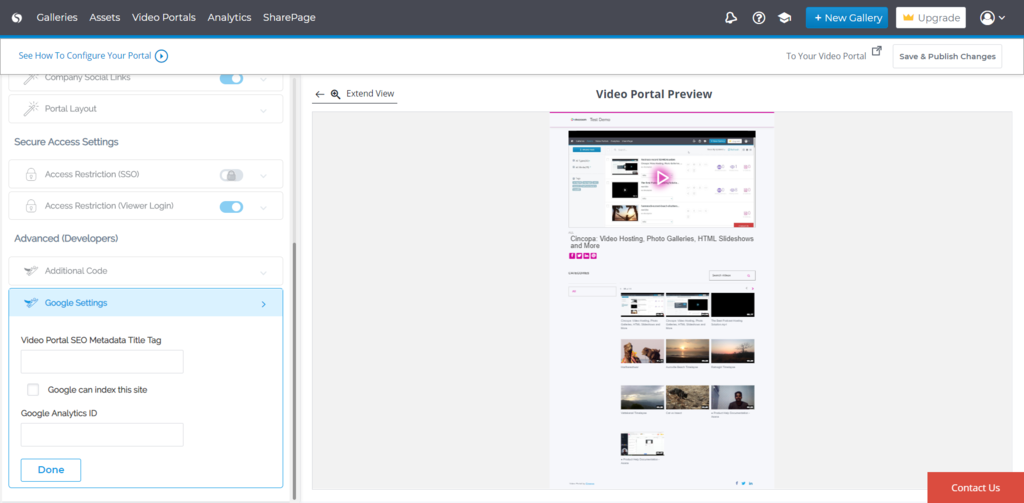
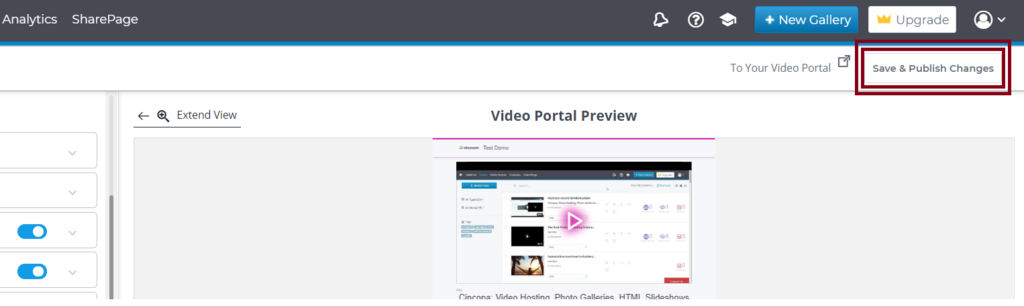
Once all the changes in the Video Portal are completed, you can hit the button Save & Publish Changes
How to set up a several (additional) Video Portal?
By default, most of our accounts come equipped with 1 video portal but many of our users have the need to create additional portals in order to meet their media goals.
If you need to arrange for additional portals to be added to your profile you can reach out to our support team and we will assist you with adding those to your account.
Once you have the ability to add additional portals you will want to navigate to the ‘Video Portal’ area of your Cincopa account (highlighted in the screenshot below). Once there you will want to select the ‘+ Create Another Portal’ option in the upper right-hand corner of your page. Each one of your Video portals will appear in list form on this page and can be accessed from here if you need to edit or make changes to the way they are set up.

Pro Insights: https://www.cincopa.com/blog/newest-feature-cincopa-video-portals/