Cincopa supports many different types of image/video upload. Our users have the ability to choose the most convenient upload method when adding media to their Cincopa accounts.
This article will cover three different scenarios where files are being uploaded to your Cincopa Account:
- Upload an image file to your assets library
- Upload an image to a new gallery
- Upload an image to an existing gallery
and all of the upload options:
- Multiple Files Uploader
- Dragging your files from PC
- Upload your photos directly from your Instagram account
- We love Dropbox
- Upload from Google drive
- Upload from URL
- Upload media via CSV file
Please note that you don’t need to resize and convert your images files. Cincopa’s platform does that for you.
- Free account users can upload up to 400 MB worth of files ( up to 100 MB for a single file).
- Premium users can increase the amount of storage, number of uploads, and the traffic quota using various Cincopa subscription plans
Lets begin !!!
Access this URL https://cincopa.com and login with your Cincopa account details.
Note: If you haven’t registered, you will have to first register and then login.
How to upload a media file to your assets library?
Once you have access to your Cincopa account click on Assets

Once in the Assets click on Upload Files in the upper left hand corner.

Next, you will be redirected to our list of uploading options
How to upload a media file to an existing gallery?
Select Galleries in the upper left hand corner of your screen

Find the gallery that you want to add files to and select the File Folder icon and then click on the Add Files button.

Next, you will be redirected to our list of uploading options
How to upload a media file to a new gallery?
In this example, we will create a new gallery from scratch and then upload an image file directly to that gallery.
Once you access your Cincopa account click on ‘+ New Gallery’ option in the upper right hand side of your screen.

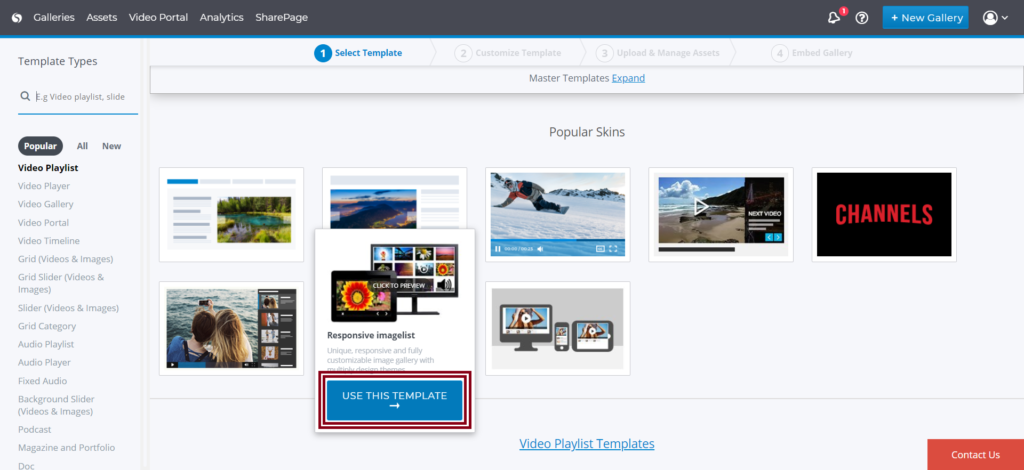
Now choose a template for the new gallery and select USE THIS TEMPLATE option that appears when hovering over a template.
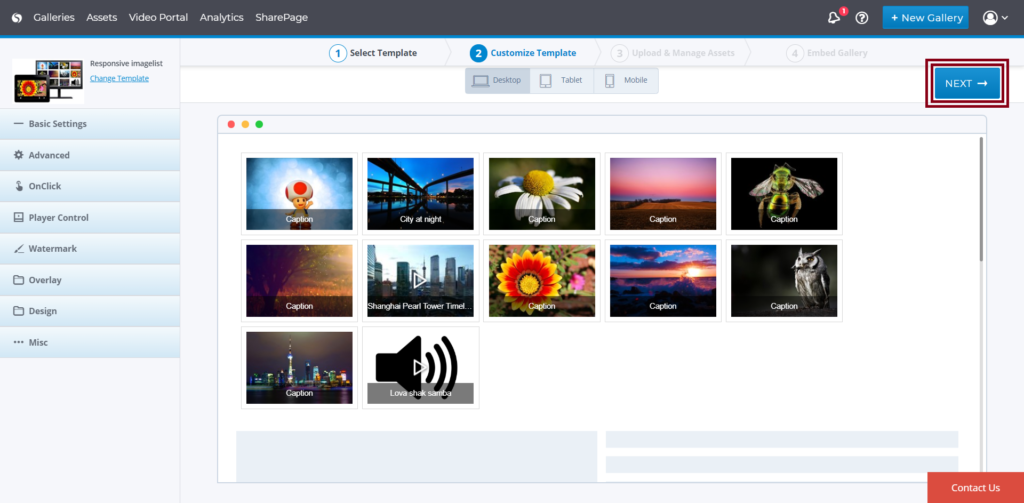
You will then be redirected to the Gallery settings page where you will have many customization options for your gallery. It will show a default image list as we have not yet uploaded any images.
To continue, click Next
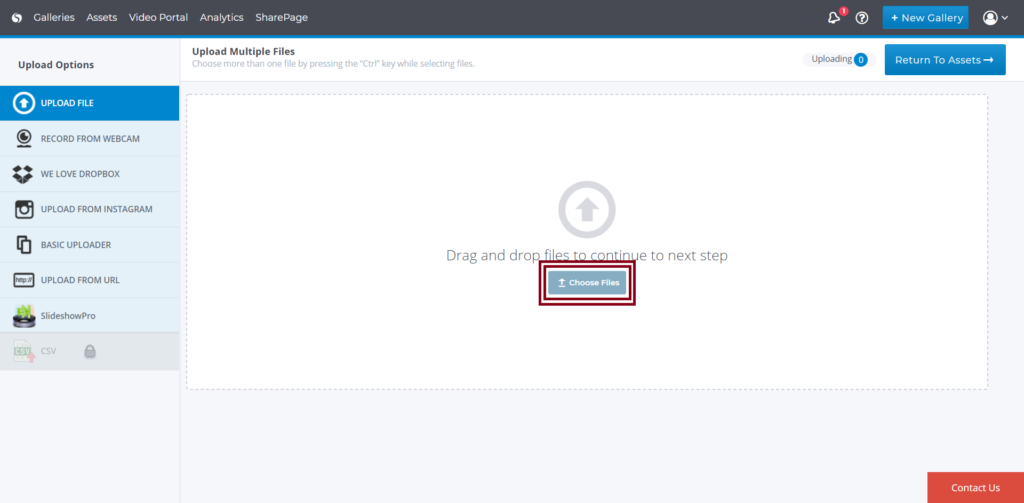
You will be redirected to our list of uploading options
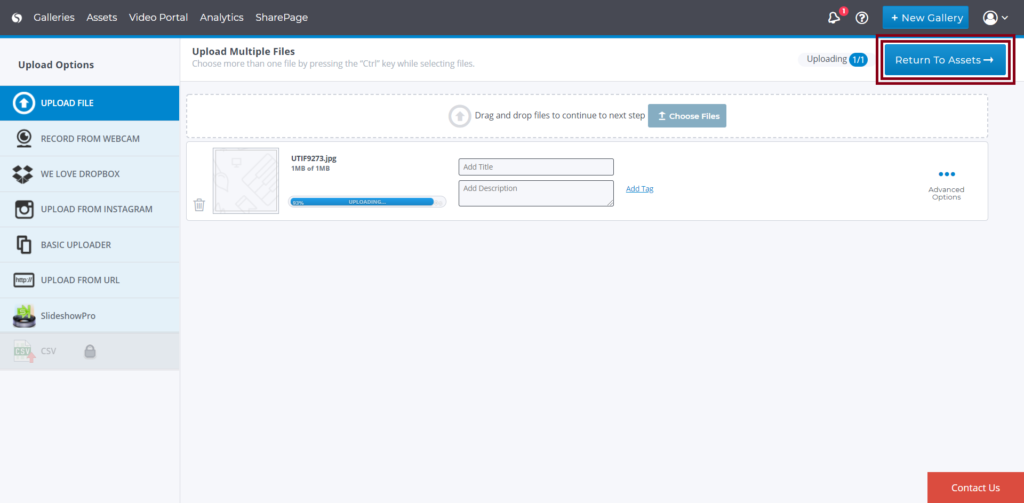
After the uploads are complete, select ‘Next’ and you will be redirected to the embed page. This indicates that your Gallery has been created and will contain the video files you uploaded.
Uploading Options:
Multiple Files Uploader
Upload files directly from any browser, there is no need to install anything on your browser or PC.
- Use the “Upload File” option from the menu (this is the default option).
- Select the “Choose files” button
- Choose the files you wish to upload by holding the “Ctrl” key while selecting multiple files.
- Upload files
Drag and Drop Upload
Drag and drop upload is the easiest way to transfer videos and images from your computer to your Cincopa cloud-drive. Drag the files, drop them in the designated area, and you are ready to go.

Your files will then be uploaded to your Cincopa assets library (and to the Gallery if you started the upload from the gallery creation page)
Upload from Instagram account
Here are the steps on how you can upload media files from Instagram
- Select the Camera Icon
- Log in to your Instagram account
- Mark all files that you wish to upload
- Select ‘Import to Cincopa’

Upload from google drive or URL
Here are the steps on how to upload media files from a URL or Google Drive
-
- Select the ‘http://‘ icon
- Mark all the files that you wish to upload
- Select ‘Import to Cincopa‘
Upload from a CSV file
Occasionally you may have the need to upload files from a CSV file, our upload process for a CSV file makes this process quick and easy.
We provide an example CSV file so that you can ensure the upload format is compatible. This example will follow the recommended upload format for this type of file.

Populate the CSV file and select ‘Upload CSV File’
Now that we have covered the basics on uploading files all that is left to do is to choose your preferred upload method and start uploading !!


