With the Cincopa For HubSpot Video Integration, there’s nothing your marketing team cant do.
Cincopa Video Marketing Automation 101 – Here is how it’s done, Step by Step.
IMPORTANT NOTE: In Cincopa, Most of the Video Interactive Features (Lead Gen for example) exist on a gallery level. Therefore, for your purpose, we recommend using and embedding a Video gallery rather than an asset, Even for a single video.
-
- First, create an integration for Hubspot (press here to the full article)
- Create Gallery (press here to the full article)
- Learn all about gallery customization (press here to the full article)
- Customizing your gallery – Adding Logo, Color Theme
- Adding a Cincopa Progressive Hubspot Form Lead Generation
- Assigning a video asset to a gallery
- Complimenting HubSpot with Cincopa Video Analytics
- Embedding a Video Thumbnail on a nurturing Email Template
- Embedding a Video on a HubSpot Landing Page or CMS
- The Cincopa HubSpot Integration Events for Nurturing Workflows, Lists and Lead Scoring
- Adding a CTA to a video asset
- Modify the Video Thumbnail
Branding – Add your Logo to the Player
Player Logo – Player Brand
Cincopa allows you to completely Whitelabel the player and adds your own logo which can also be clickable if required. Utilizing this feature, the link opens in a new browser tab.
![]()
Branding – Add your Logo
Lead Generation (Capture Viewers Email and Name)
Lead Generation – Lead Generator
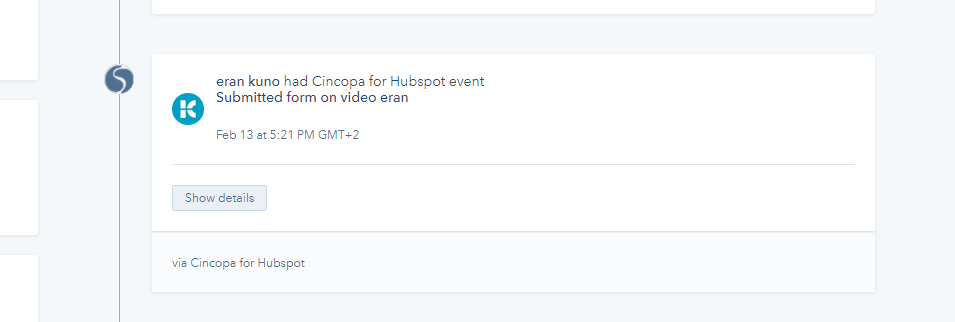
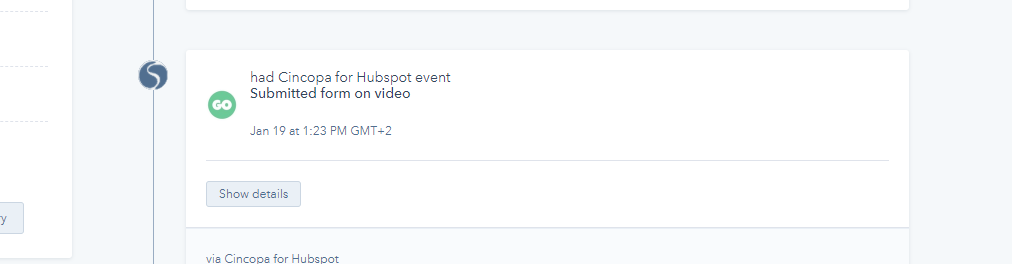
The Submitted form will create a new contact in Hubspot as following:
Submitted form on [Video Title will be inserted here]
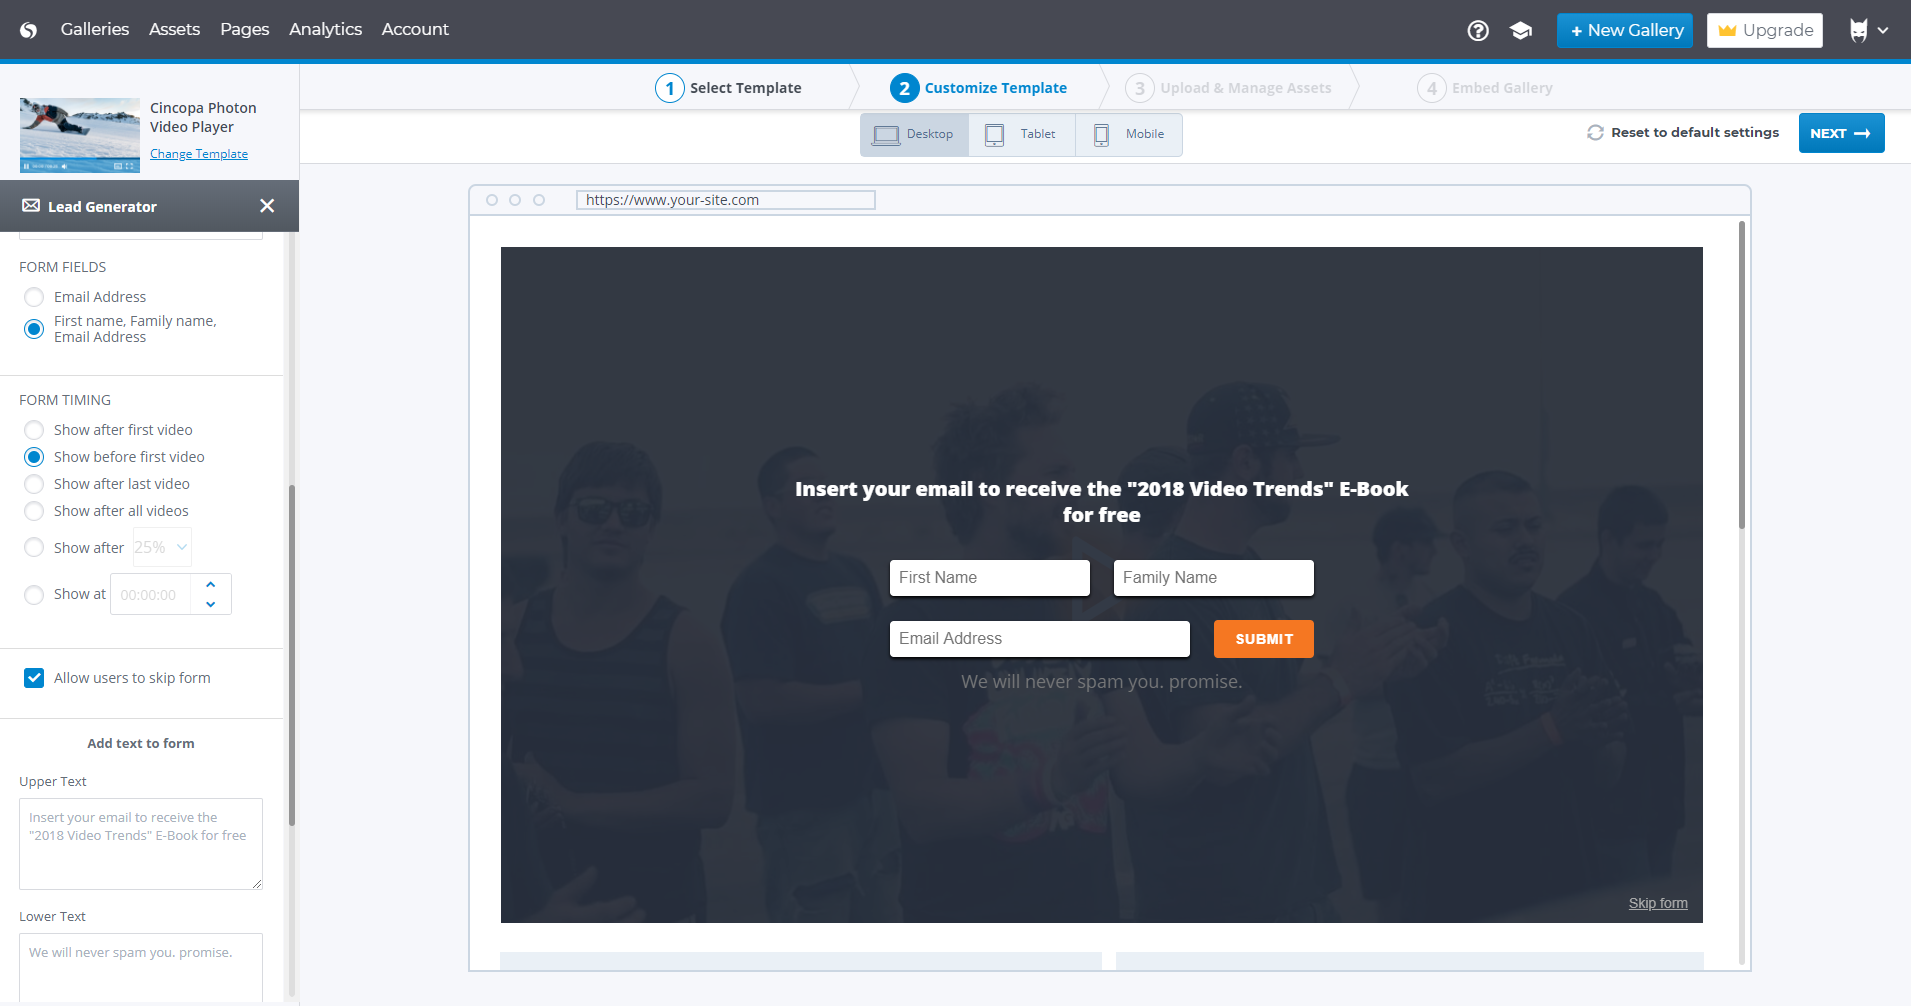
Please do the following to set up the video lead generation in Cincopa :
Activate the form, select the “default form” and click Configure.
Select the form type: Email Only\Email & Name
And Adjust when the form appears as a function of time –
After the video ends | Before the video starts | % of the video length | Exact Time (Hr:Min:Sec)
Choose whether the form is required or allow the user to skip the form.
Add Upper Text and Lower Text.
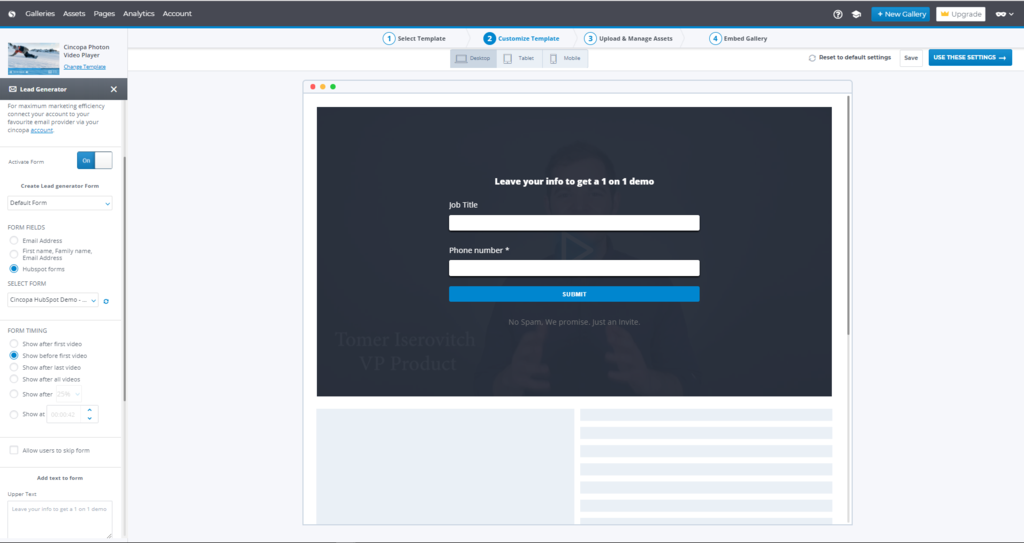
Progressive HubSpot Video Forms

HubSpot forms extend our basic lead generation form to include any predefined or custom field in HubSpot contact attributes. This can be a phone, Company name, company URL, or even something amusing like “What’s your favorite color?”.
The innovation behind this feature is the use of progressive forms. You can apply a single HubSpot form to all the videos on your website. Starting with basic email capture.
Once the email is captured, when the user watches another gated video or even that same video on a new visit\session, The progressive fields will now appear. for example “Phone number”.
This opens a whole new world of progressive data enrichment using video and going a bit more “freestyle” with your video lead gen.
Setting it up on the Cincopa Side:
Simply choose the HubSpot form from the dropdown list.
*Important – When Updating a form on the HubSpot business end, You need to return to the Cincopa gallery customization section and hit the “refresh” button next to the HubSpot form dropdown to update the published changes you’ve made to the form. (adding fields\editing properties on the form)
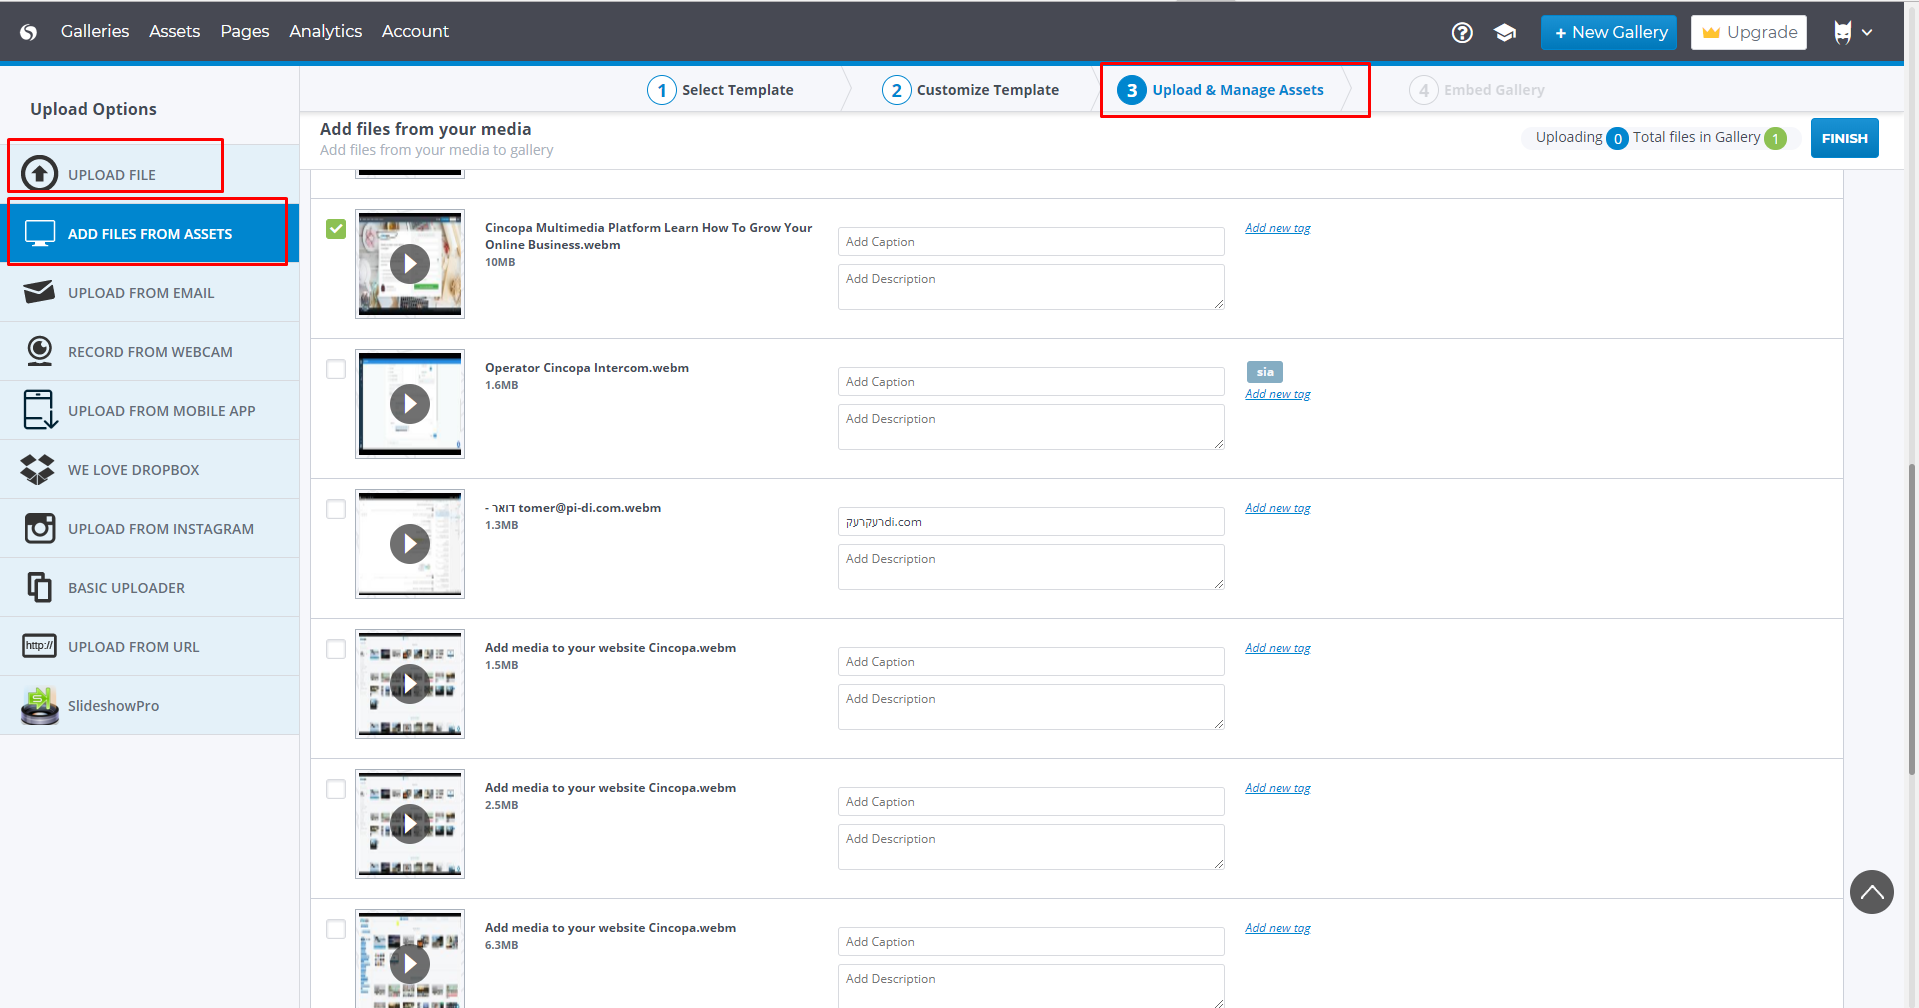
Assign a Video Asset to the Gallery
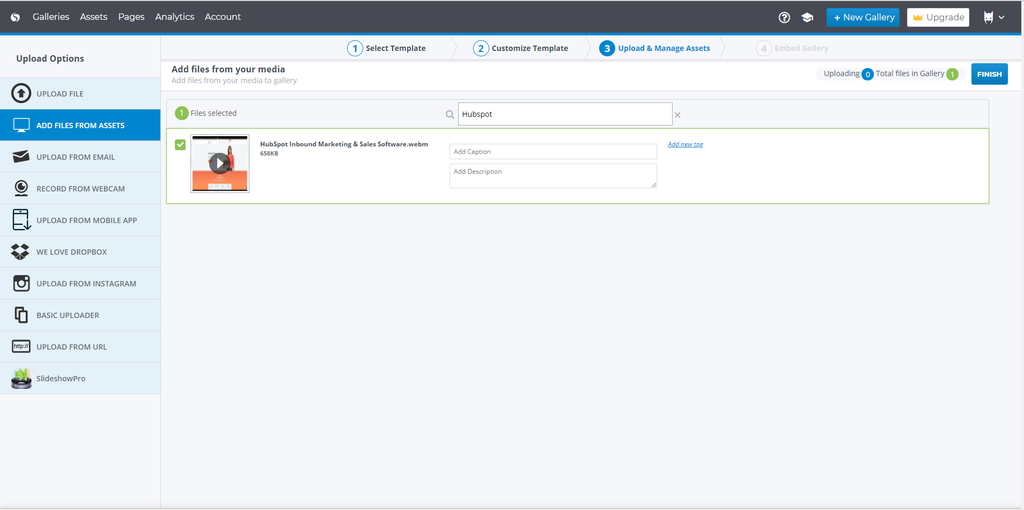
Hit next and head down to the wizard’s step 3 – “Upload and Manage Videos”
Use the “select Files from Assets” Tab to pick a video from your existing video assets that you uploaded earlier or upload new assets. These will also be added to this specific gallery and will be available on your account for later us to be included in other galleries.
Select the Video you want to include and click “Finish.”
This template is saved and if you wish to customize further, just head back to Step 2.
Reusing an existing Gallery you’ve built with a new video – Say no to repetitive tasks! 🙂
Let us talk about reusing this Template which you just deeply customized, so you won’t need to create and customize a new gallery each time you want to use a new video.
Head down to your “Galleries” (Platform menu -> Galleries)
Find the gallery you want to reuse with a new video and click ‘Use as template’’
This will create an exact copy of the gallery minus the video asset it had included within it.
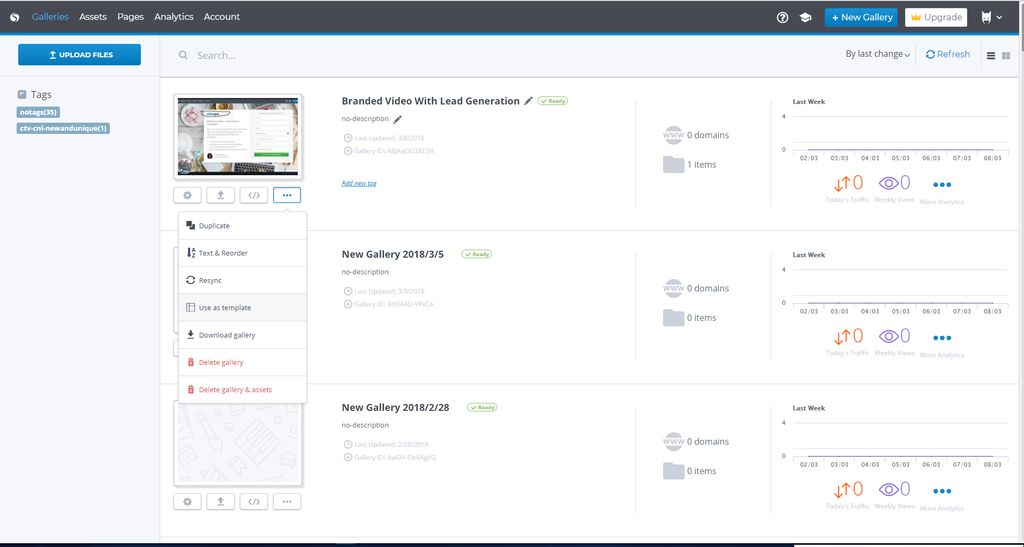
You will then be directed to Step 2 – Customization
Here you can do things like turn off the lead generation. Don’t worry – This action will not affect the original gallery as they are completely separate.
Click next, then upload a new video or select from your existing videos. Oh! Don’t forget to click “Finish”
Enable view data events on your Contacts’ Timelines
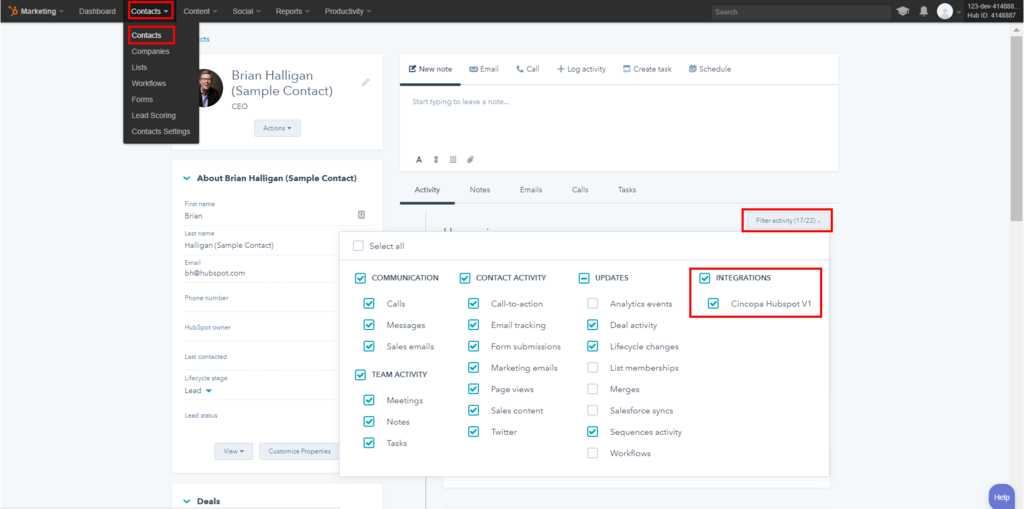
To fully utilize video data, ensure that the Cincopa video integration filter is set up within your HubSpot contact records.
1. In your HubSpot instance, click Contacts.
Open a contact record.
Click “Filter activity”
Check (switch to “On”) the Cincopa Hubspot V1 under Integrations.
Now… take a break. Drink some coffee. You’re doing great!
Good. So, by now, you’ve got everything set up. You have your video branded and ready to capture leads.
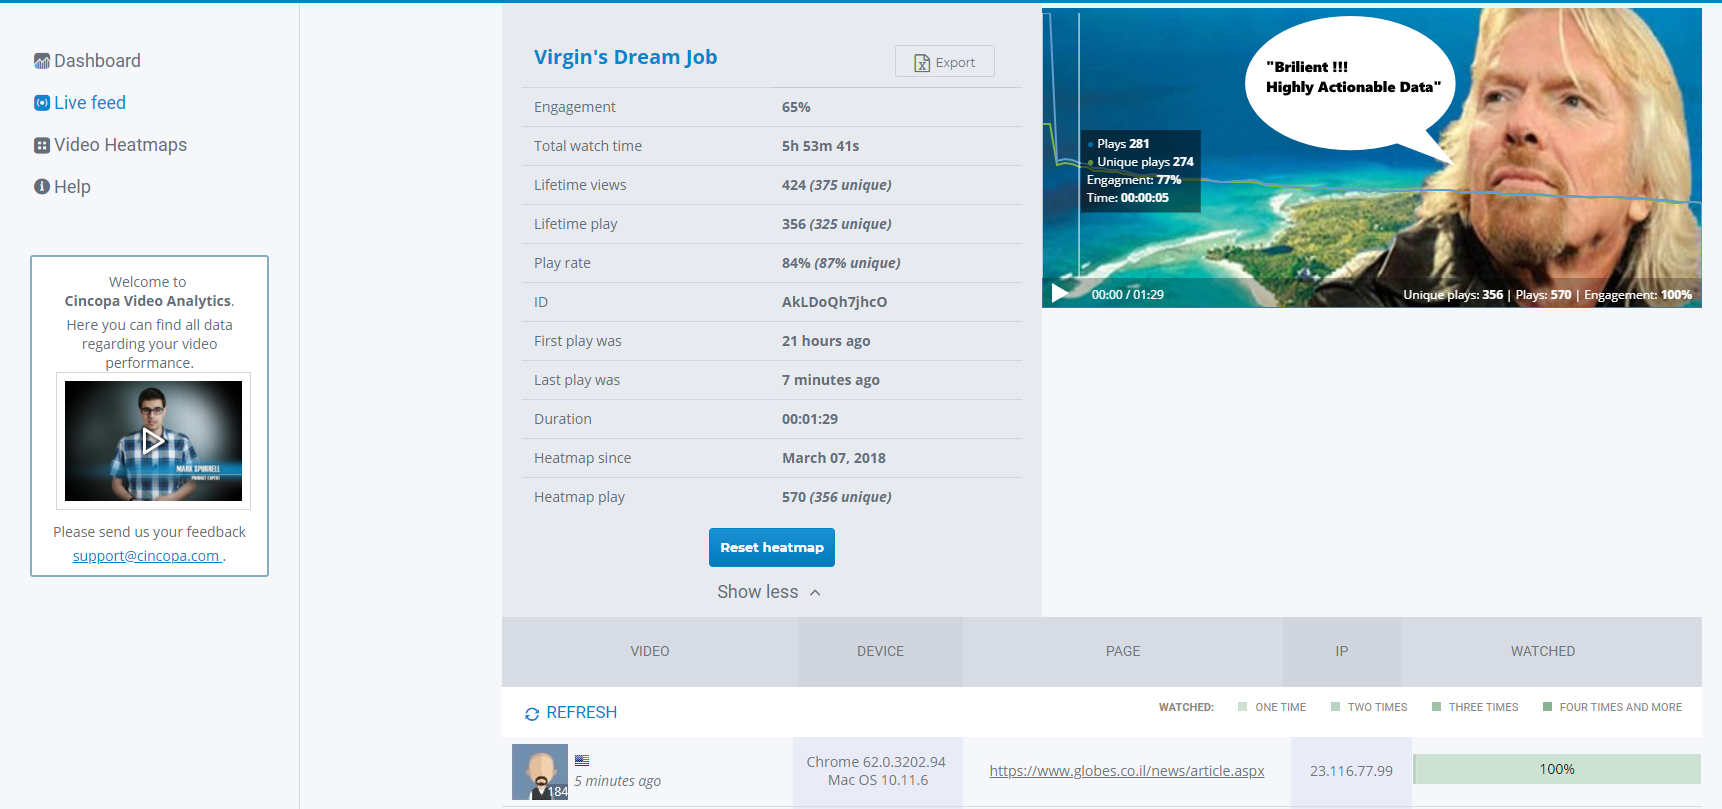
Using Hubspot alongside Cincopa’s Video Analytics
The captured leads will also be available on Cincopa’s User level analytics for tracking.
Cincopa’s user and audience level Video Analytics will provide valuable insights on a video’s audience level engagement to complement HubSpot’s timeline video events and help you understand what is a good number for “% video played” between engaged and none engaged users for utilization in HubSpot’s lead scoring.
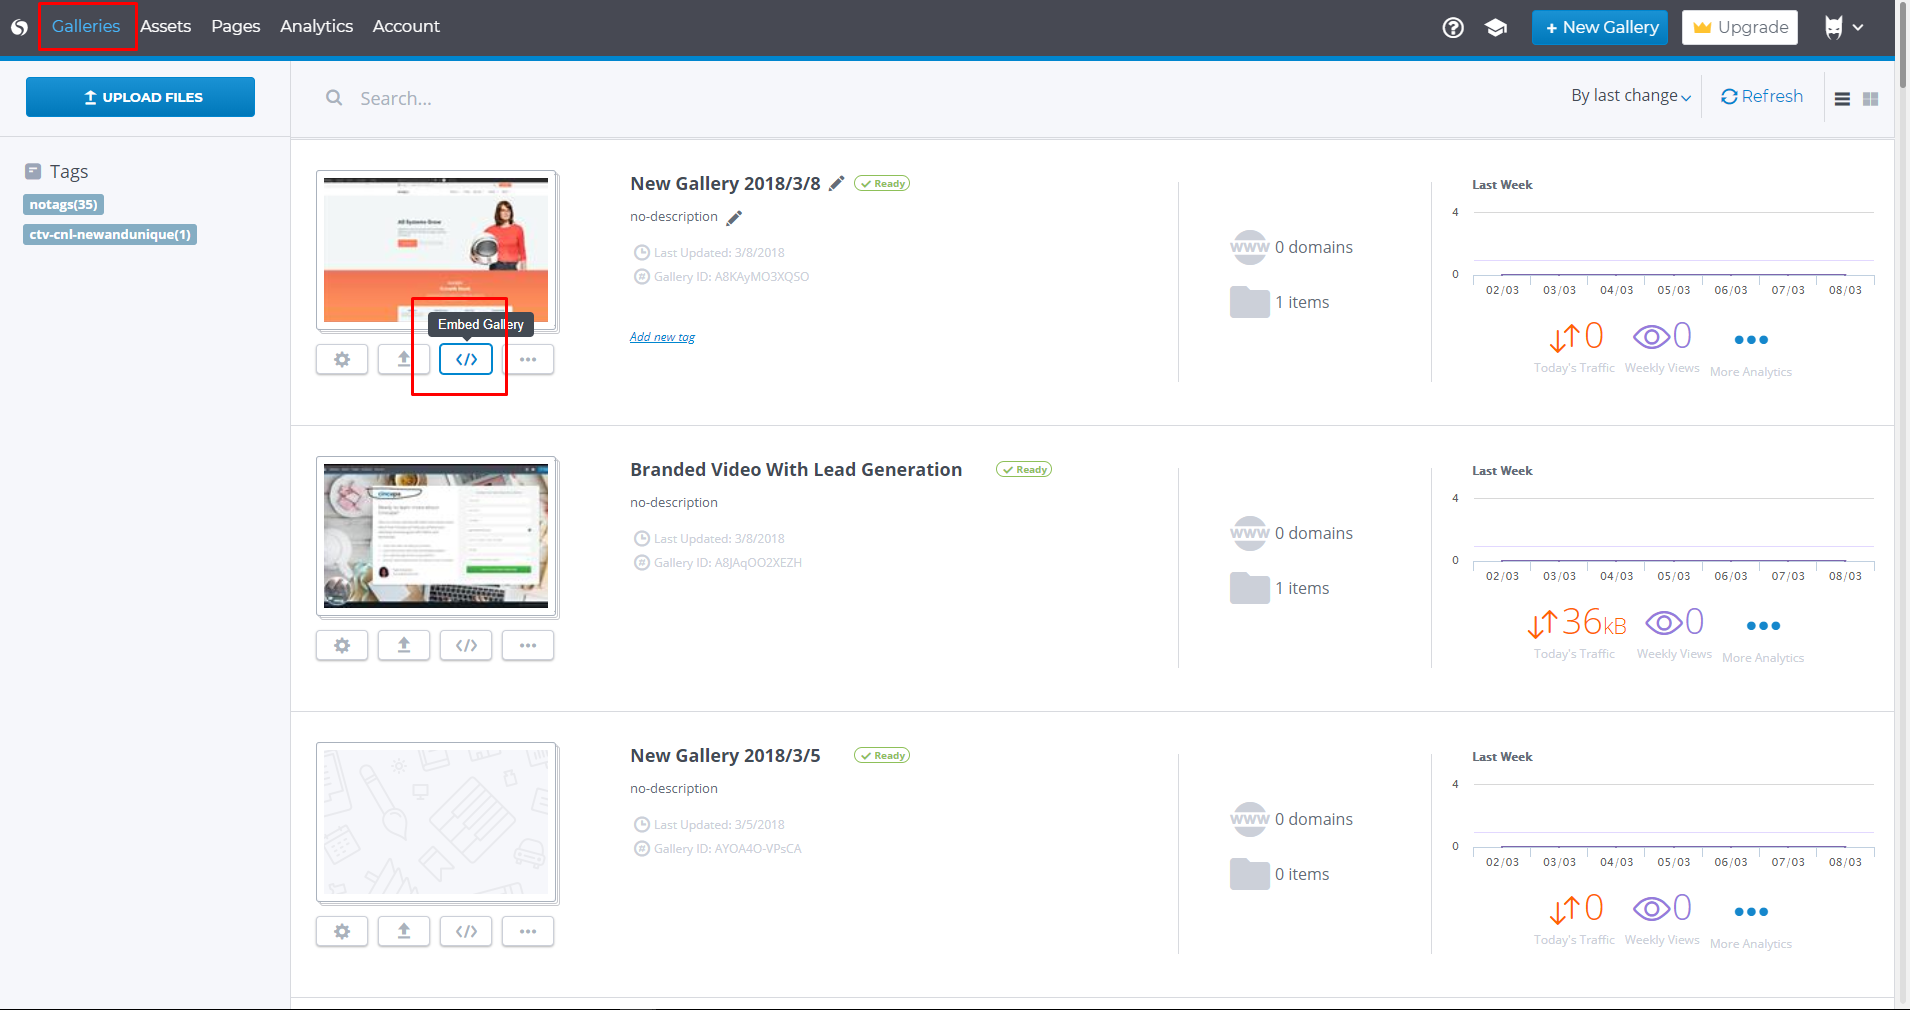
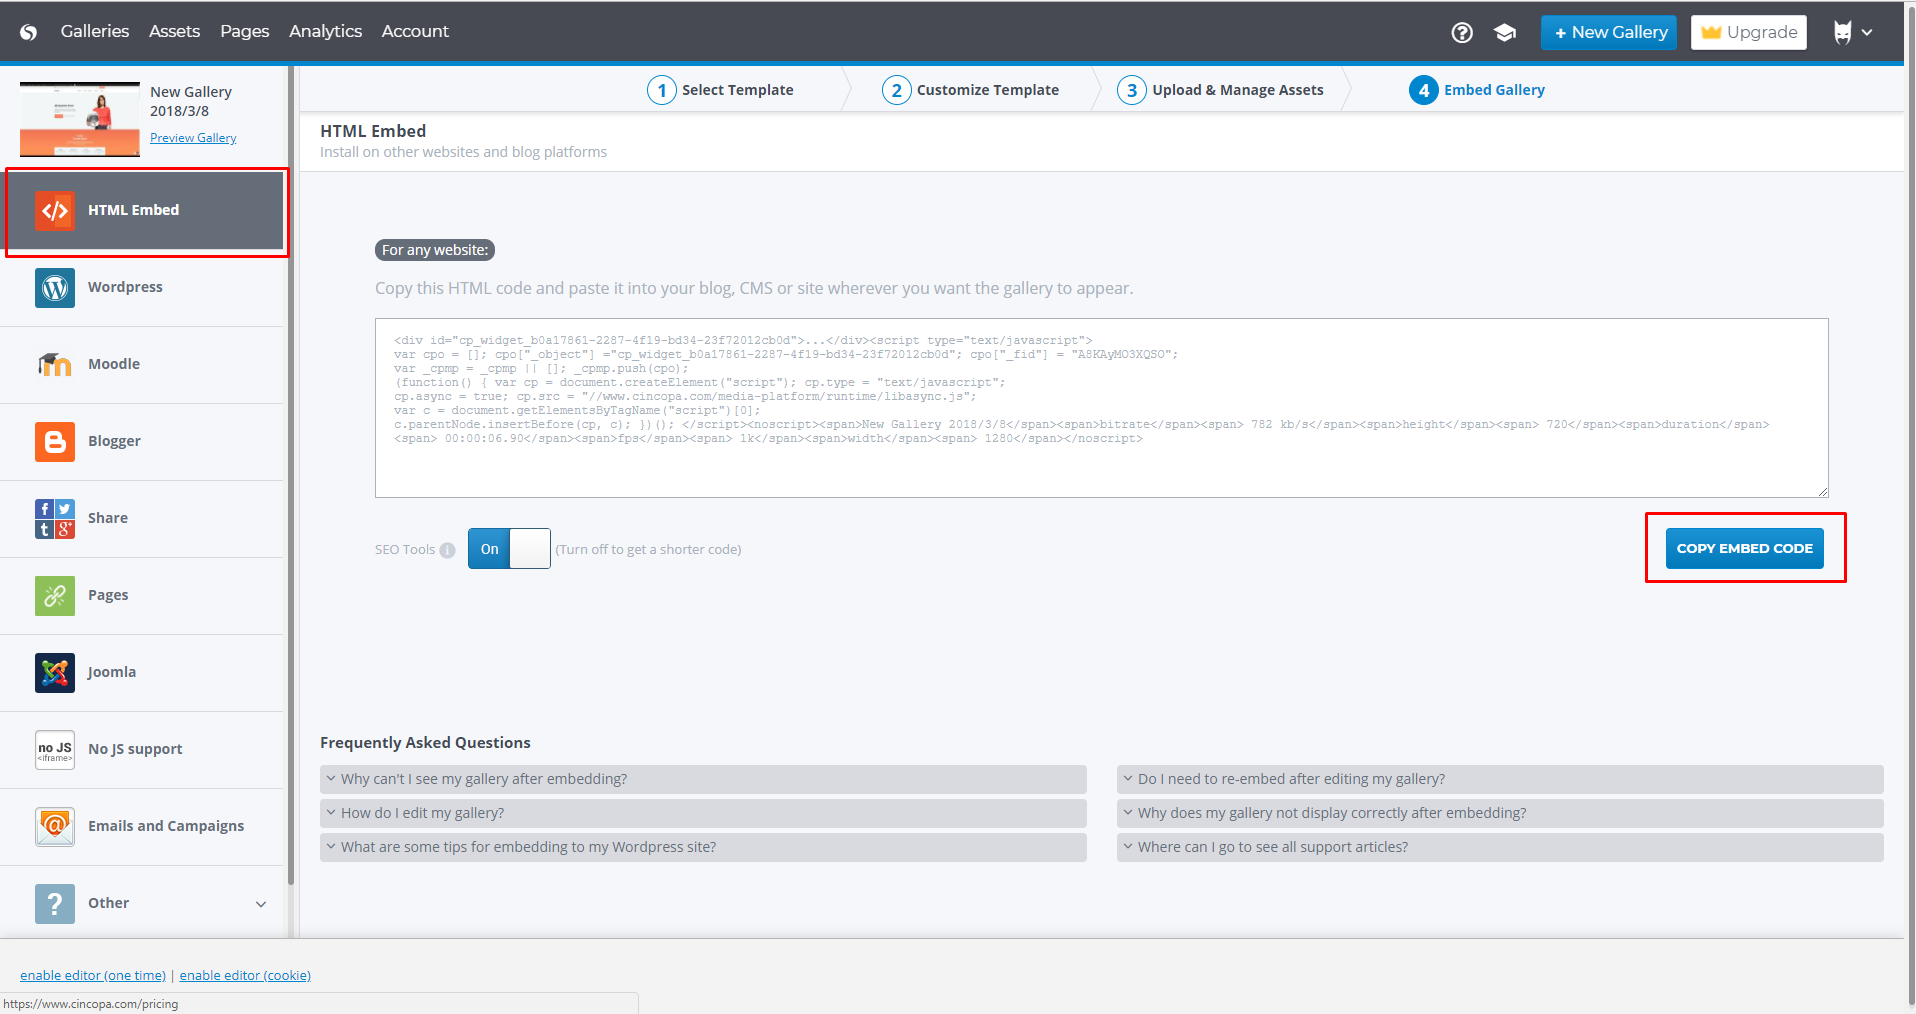
Embedding Your Video Gallery:
Galleries can be embedded into any HTML supporting platform.
To embed head to Galleries and click <Embed>
Embedding Video Thumbnail on Hubspot Email Editor
This will be used in combination with HubSpot’s Landing page where the video will be embedded or your Website (who should have the HubSpot pixel to track viewing).
You can play with the thumbnail size property. The ratio is locked to 16:9 so you can’t break it, even if you try really hard…
*Dont forget to “link to” to your blog post or landing page.

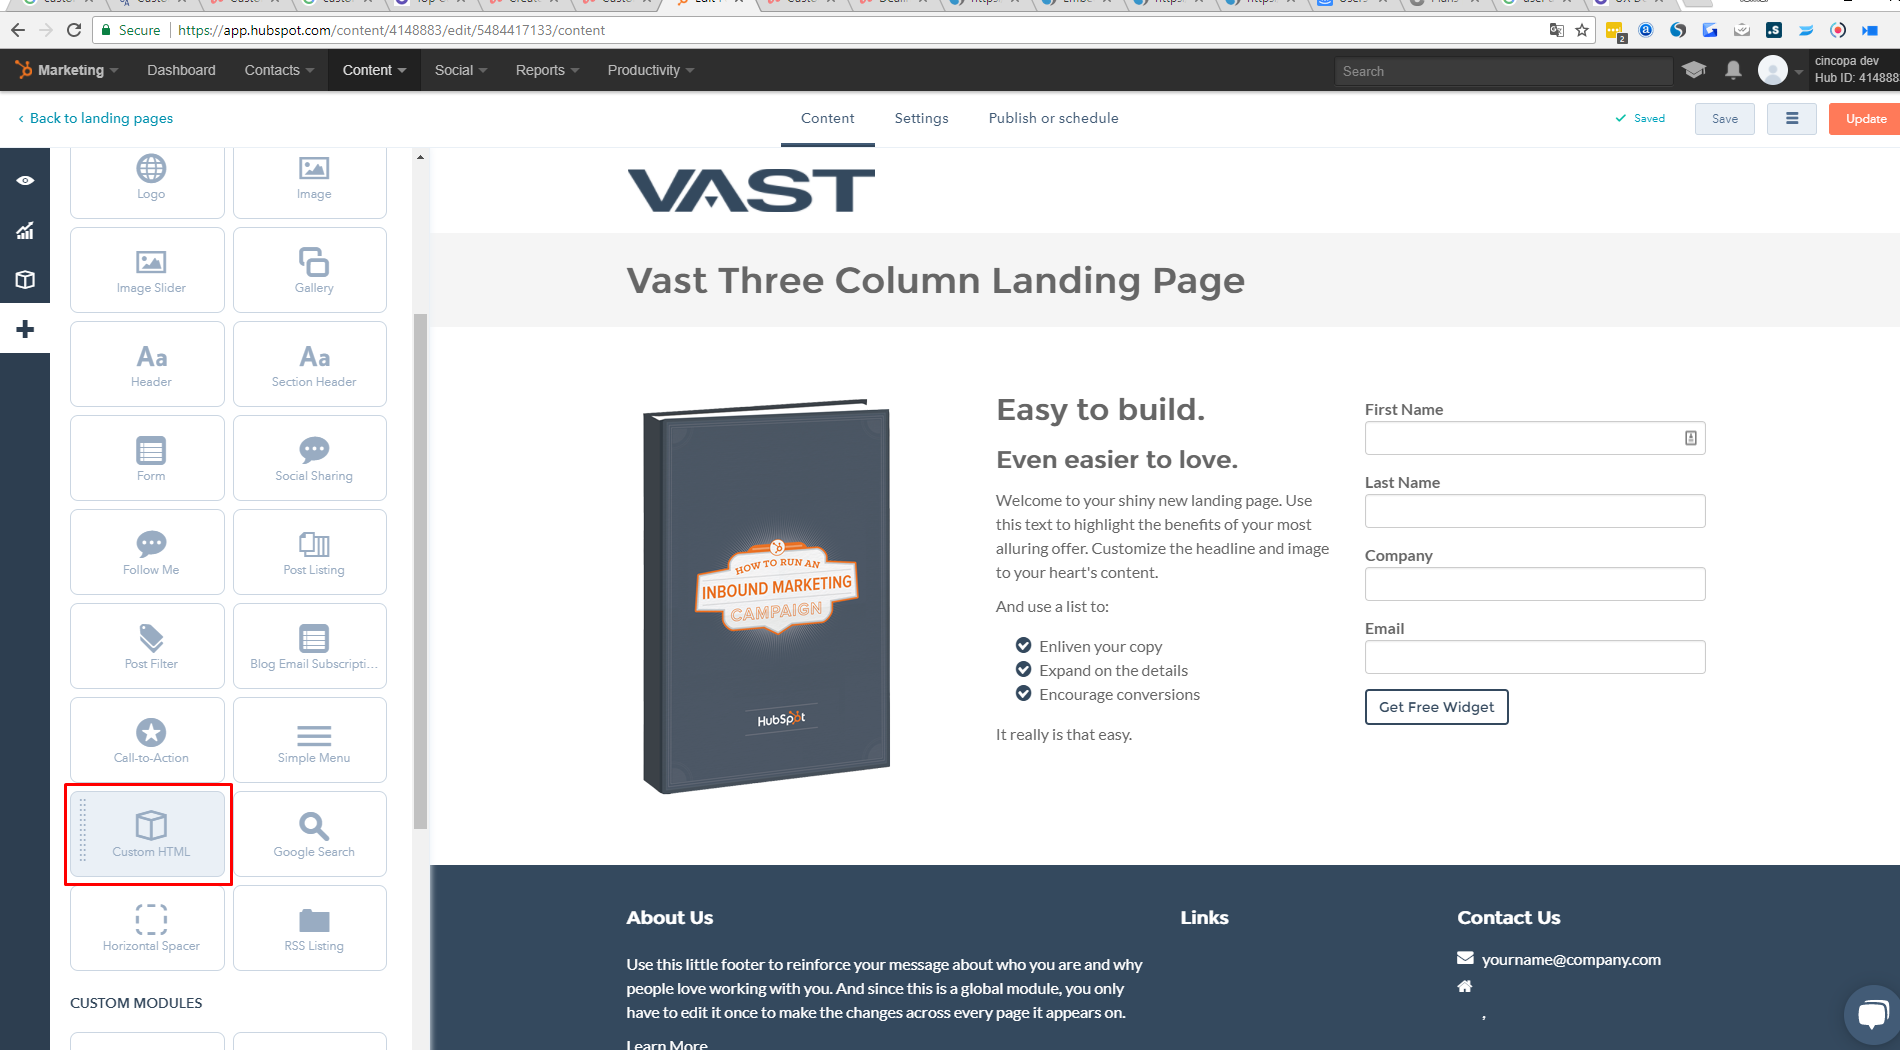
Embedding a video on your Website\CMS
Use this code to embed into your HubSpot CMS or any website builder.
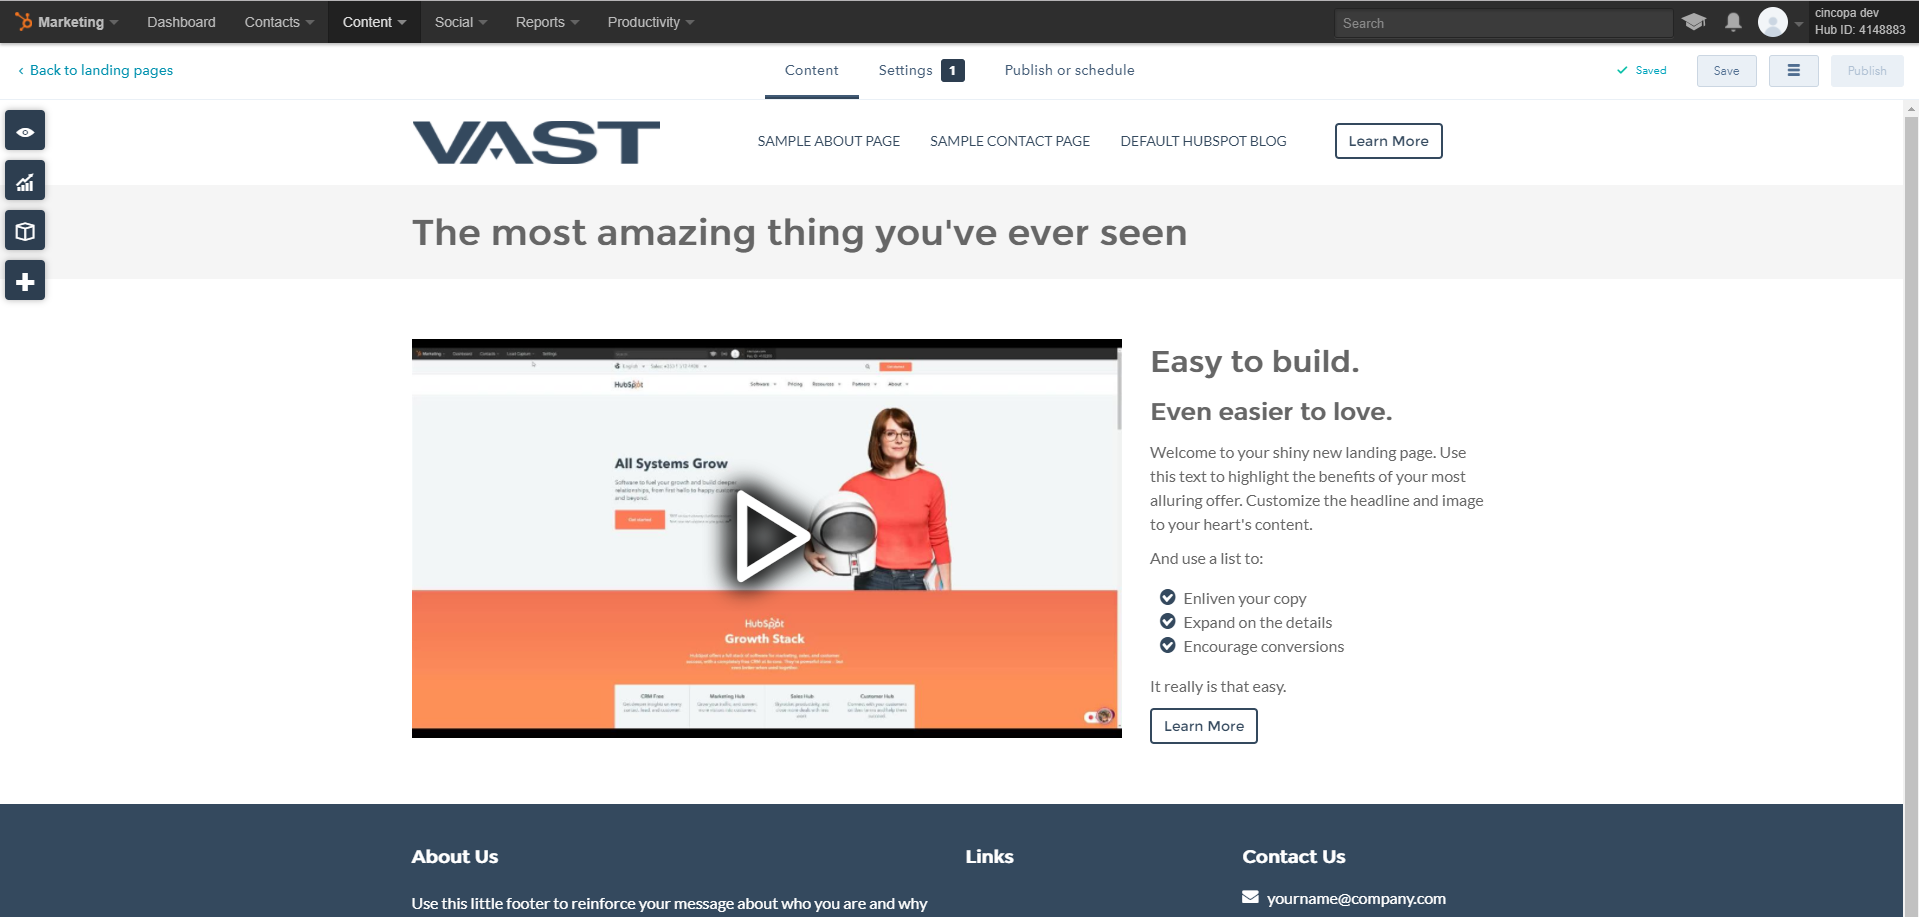
Embedding a video on a HubSpot Landing Page


Cincopa For Hubspot. Integration Events – Run Down
Now, we’re up and running. Visitors are coming in and easily turned into contacts using HubSpot forms and Video Forms.
Let’s do a quick rundown of the different Video features we can use as triggers\enrollment criteria for Hubspot Workflows, Lists, and Manual Lead scoring.
So after a contact was captured using a Cincopa Video Lead Generation form or a HubSpot form, we can start tracking him.
Past video events which occurred when he was still a lead will also show up on his timeline and drive list and workflow actions.
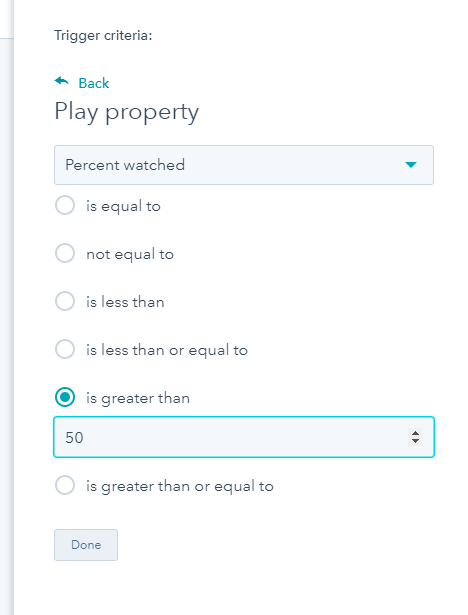
Play property – contains all of the video viewing events.
Percent Watched (0-100%) – How much did a viewer watch.
Should be used alongside an “AND” condition with Play property – Media Title
To trigger when he watched % of a specific video.
Media Title (Text type)
Contains the title of the video a viewer watched. See how we used a combination of 50% watched and video title contains “On boarding video” to suggest that he will enroll the workflow when he watches 50% of our onboarding video. As we used contains if we had 2 videos named “Onboarding video part 1” and “Onboarding Video part 2”, both will trigger which saves you the effort of building two exact copies of the same workflow for part 1 and 2 when you really want to include both as a criteria.
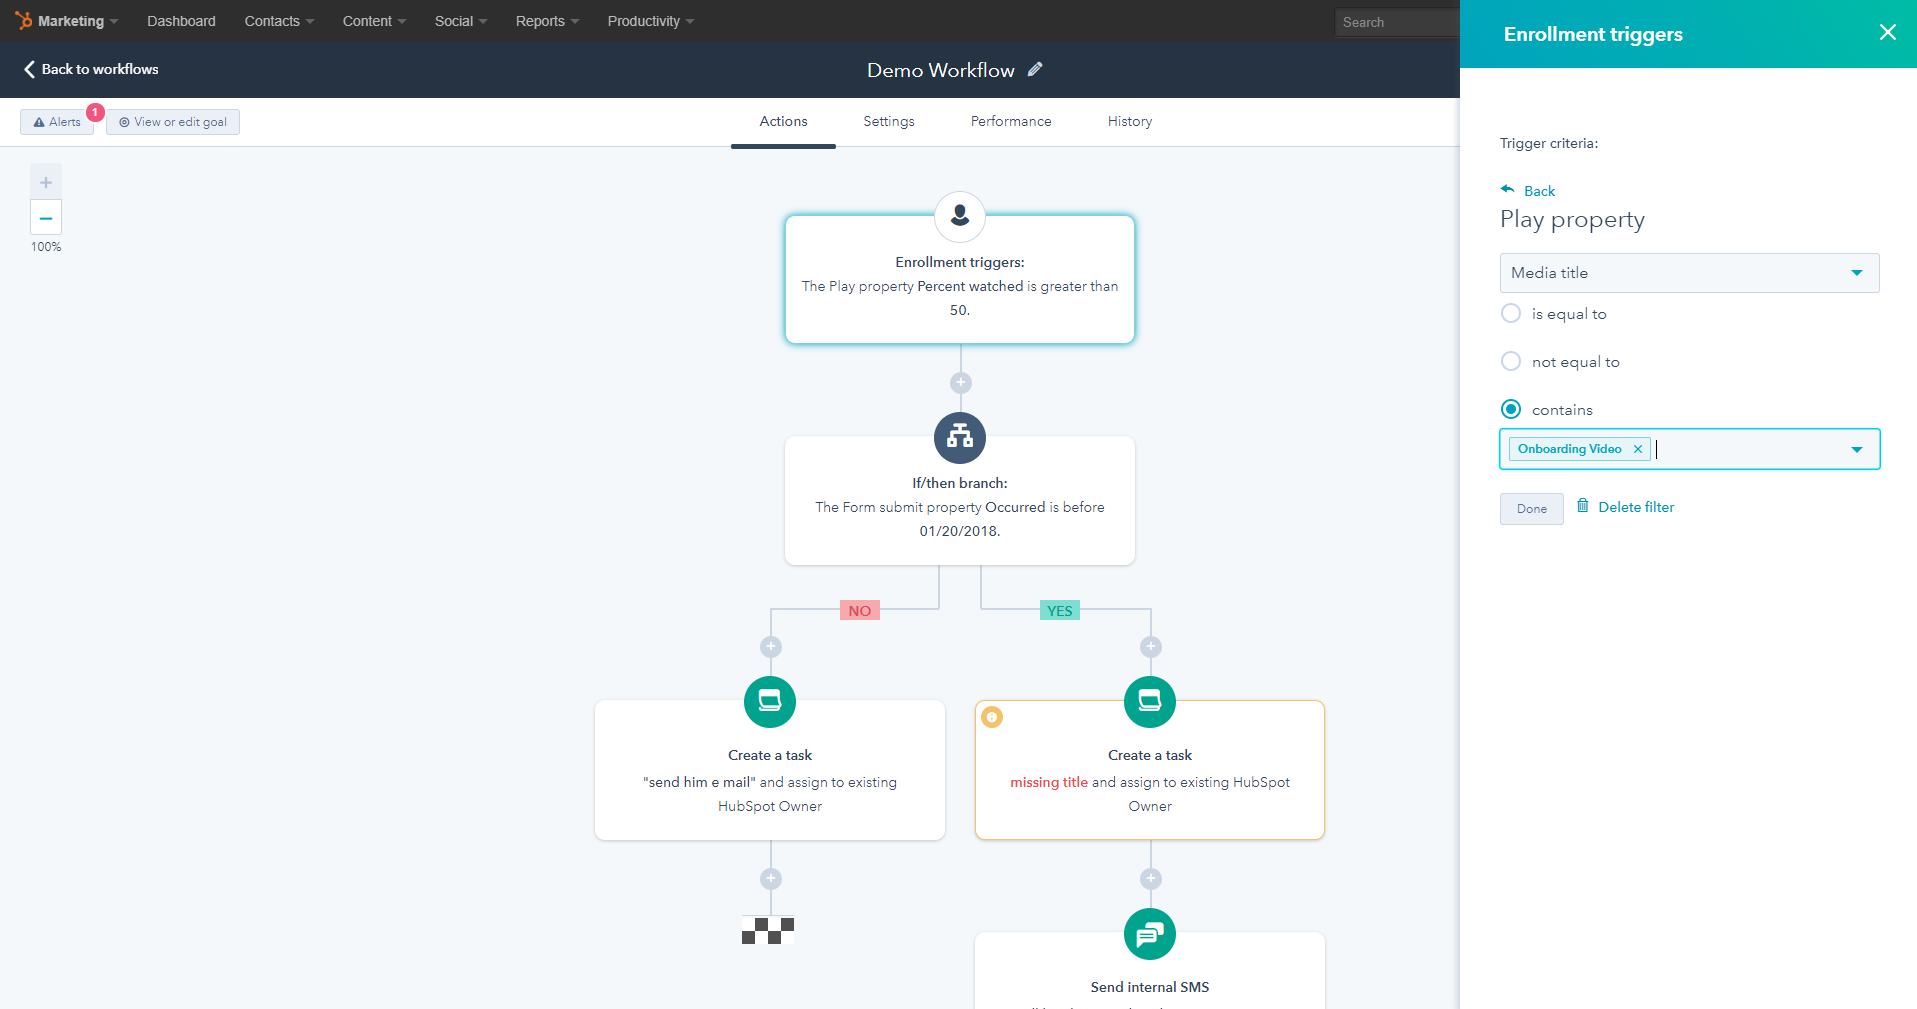
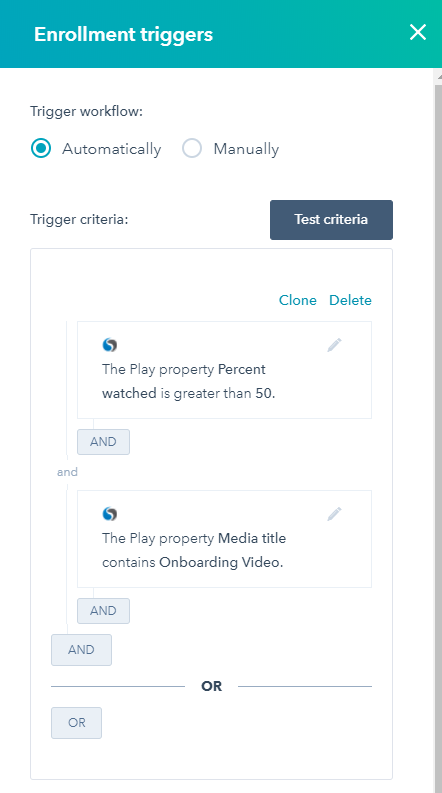
Media Title + % Watched used together with an And Condition
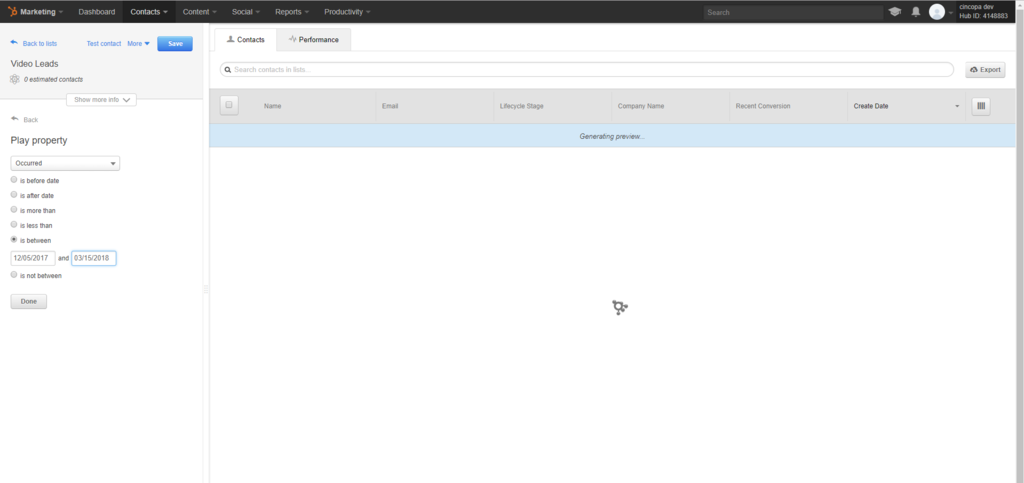
Occurred (Date) – this is a relative time-based event.
Common use case: A blog post went up on February 1st called “How to Chop Onions – The right way”,
Thos who watched the video “Onion Chopping using a piano” between February 1st and February 3nd can be enrolled in a smart list called “Blog Fans” and despite the fact that they didn’t sign up to the blog’s “official” newsletter, They will now start to get every single post because they love reading what we publish and they found that Piano dropping on a bag of onion video – hilarious.
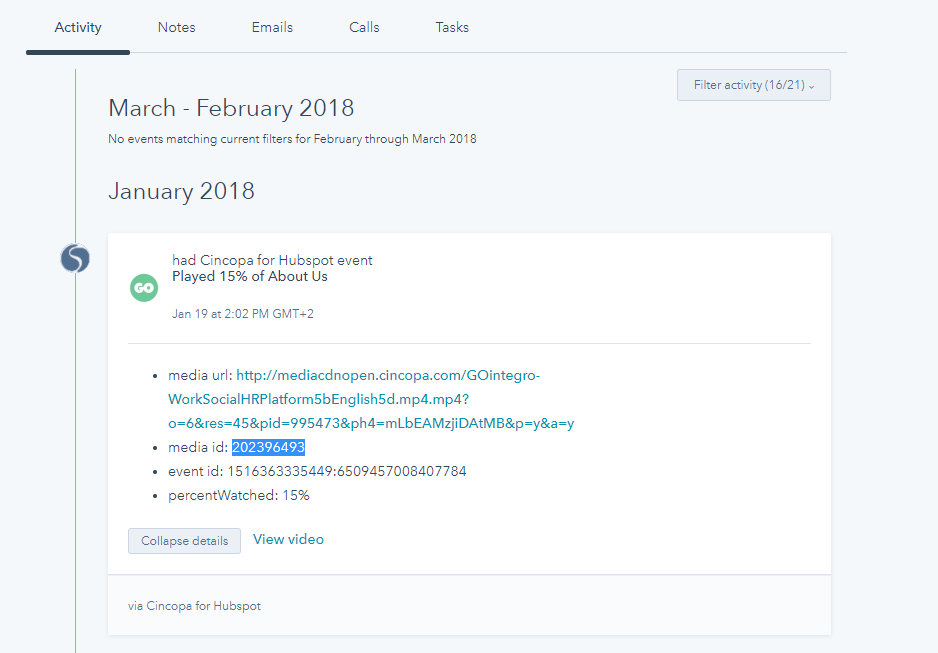
Media ID (Number) – HubSpot’s Unique Identifier for a video
This can be used instead of “Media title”. This can be taken directly from a contact’s timeline by finding a video playing event and hitting “show details”
Form Submit property – contains all of the Video Form Submitted events.
Media Title (Text type)
Use as a trigger when a user submitted a form and was converted into “contact” from a specific video.
Suggested use:
Let us know if you find a good use-case! 🙂
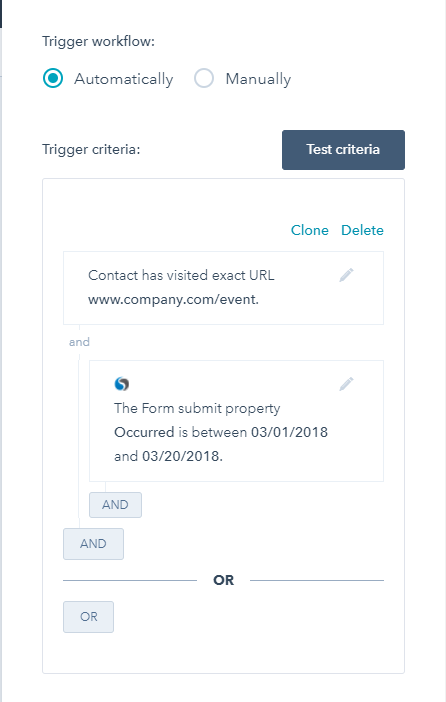
Occurred (Date) – this is a relative time-based event.
Use as a trigger when a user submitted a form and was converted into “contact” at a specific or relative date.
Suggested use:
Use for short campaigns. Example:
An event ticket sales campaign will run for 60 days between March 1st and May 1st.
You start it at an early bird discounted price of 50% for two weeks.
Using the Form Submit -> Occurred property, you can set up a “last chance for a discount” from day one for those who were captured between March 1st and March 20th. Do all the planning ahead of time and just sit back, relax and optimize according to sales.
Adding a CTA to your Video Assets
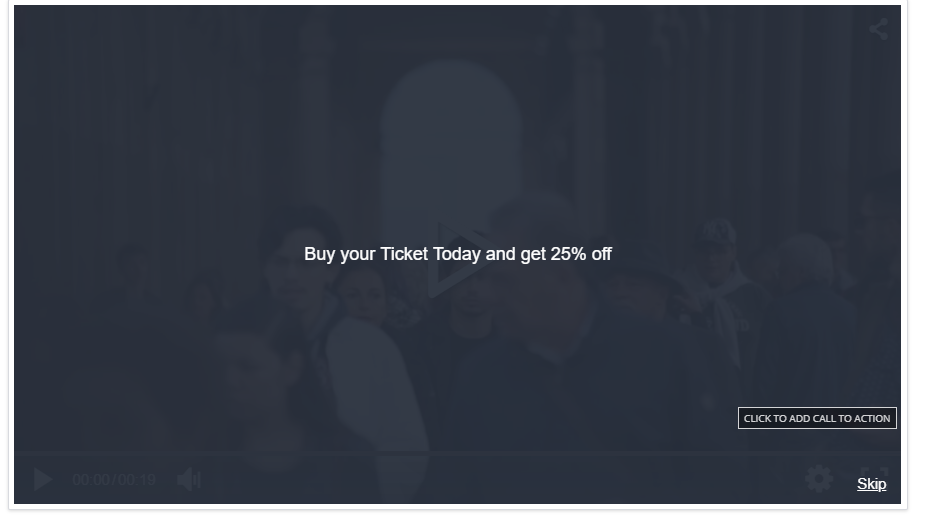
https://www.cincopa.com/blog/increase-user-engagement-in-your-video-with-call-to-action/
Changing the Video Thumbnail