Account Settings is the central workspace for managing your Cincopa account. It allows you to monitor usage, manage users, configure platform-level settings, and control integrations and access.
From this area, you can view subscription details, track storage and traffic consumption, manage team access, and configure features such as API tokens, webhooks, and integrations.
All settings are organized into dedicated sections, making it easy to navigate and manage different parts of your account.
How to Access Account Settings
Access Account Settings directly from your dashboard after logging into your Cincopa account. This takes you to the central workspace where all account configurations are available.
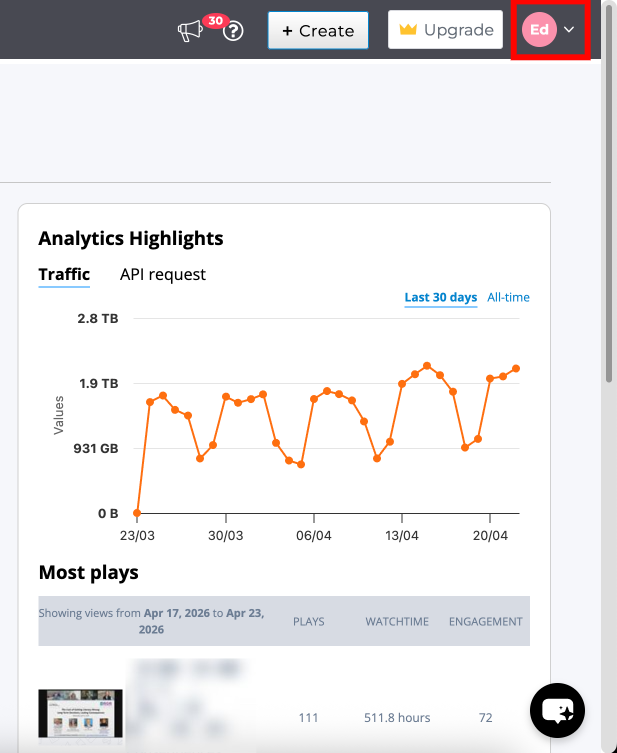
Step 1: From the dashboard, click your profile icon in the top-right corner
Step 2: From the dropdown menu, select Account Settings
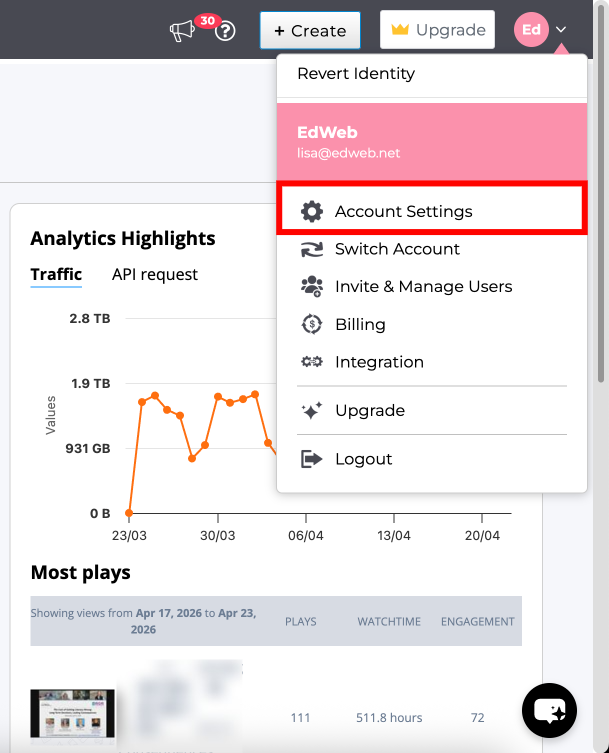
Step 3: The Overview page will open by default, showing your account summary.

Account Overview
The Overview section provides a snapshot of your account status, usage, and activity.
It includes:
- Account details such as name, email, and current plan
- Monthly traffic usage, including remaining limits and reset cycle
- Storage breakdown across images, videos, audio, galleries, and non-media files
- Traffic analytics graph showing usage trends over time
- API request activity for monitoring integration usage
- Top galleries and files based on recent activity
For detailed information on metrics and usage, refer to the Account Dashboard documentation.

My Profile
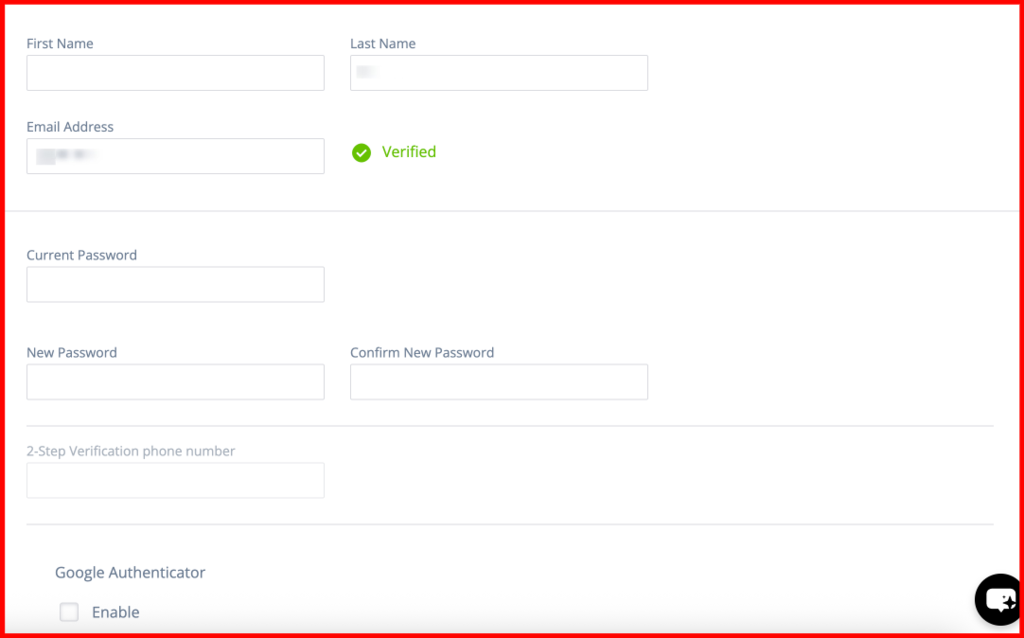
The My Profile section allows you to manage your personal account details, update your password, configure security settings, and control email preferences.
From this section, you can update your name and email information, change your password, enable two-factor authentication (2FA), and manage the types of notifications you receive, including gallery update emails.
Make sure to click Save Changes after updating any settings. You can also deactivate your account from this page if needed.
For detailed steps and configuration options, refer to the My Profile documentation.
User Management
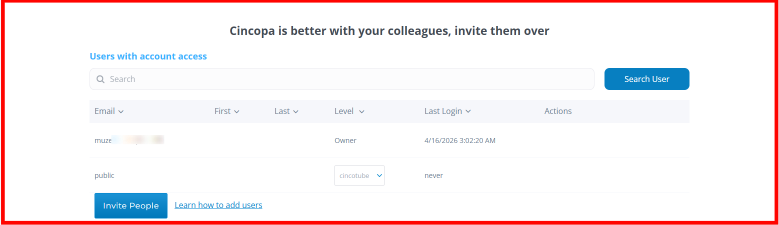
The User Management section allows you to manage who has access to your account and define what actions they can perform.
You can view all users associated with the account, along with their roles, access levels, and last login activity. Each user can be assigned a specific permission level (such as admin, editor, viewer, or custom roles like cincotube), depending on the level of control required.
New users can be added using the Invite People option, while existing users can be updated or removed directly from the list. You can also resend invitations if a user has not yet accepted access.
For detailed steps on inviting users and managing permissions, refer to the User Management documentation.
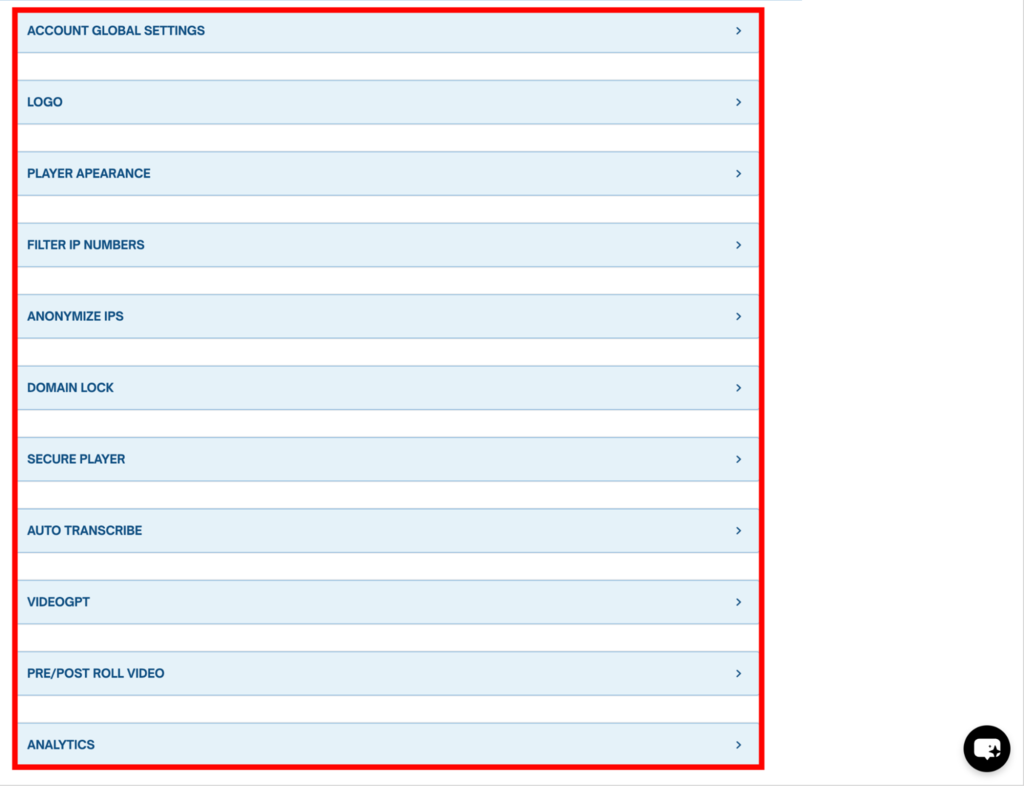
Global Settings
The Global Settings section allows you to configure account-wide behaviors, branding, security, and video-related settings that apply across your media and galleries.
This section is divided into multiple configuration blocks, each handling a specific aspect of the platform such as player appearance, security controls, analytics, and monetization.
You can use this section to:
- Apply branding elements like logos and player styling
- Configure privacy and security settings (IP filtering, anonymization, domain restrictions)
- Control player behavior and advanced features
- Enable features like auto transcription, VideoGPT, and lead generation
- Manage ad monetization settings such as VAST and pre/post-roll videos
- Configure analytics and tracking preferences
Each option opens a dedicated configuration panel.
For detailed setup instructions for each setting, refer to the Global Settings documentation.
Billing
The Billing section allows you to manage your subscription details, view invoices, and track payment history.
From this section, you can review your current and past subscriptions, including plan details, billing frequency, payment method, and upcoming charges.
It also provides access to:
- Invoices generated from credit card payments
- PayPal invoices for payments made via PayPal
- Subscription status and transaction history
Use this section to monitor billing activity and manage your subscription.
To update your payment method, refer to the How to Change Your Credit Card documentation.
For detailed steps on managing billing and payments, refer to the Billing documentation.

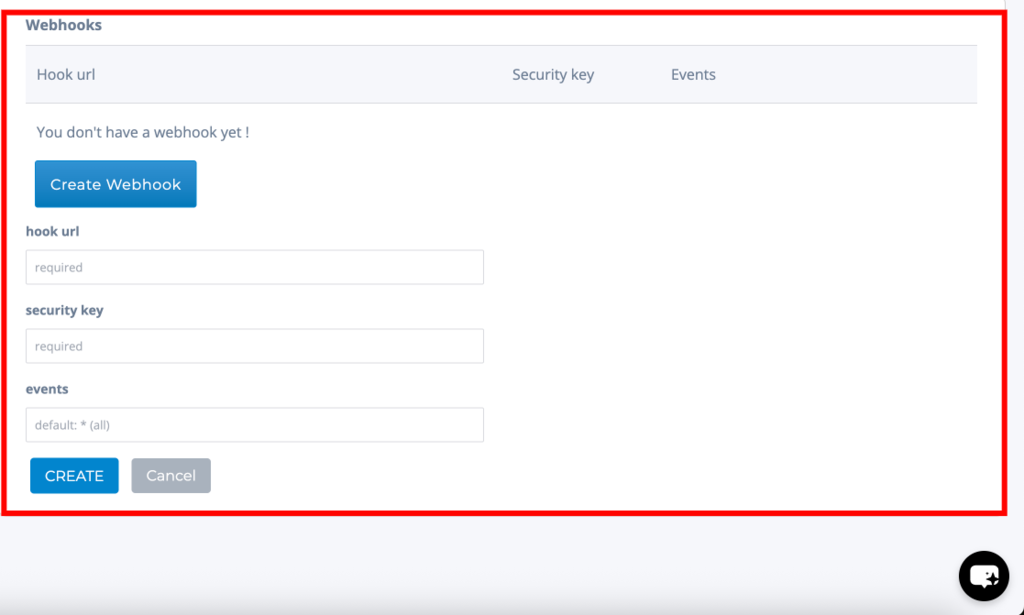
Webhooks
The Webhooks section allows you to automate workflows by sending real-time event notifications from Cincopa to external systems.
You can create and manage webhooks by defining a hook URL, setting a security key, and selecting the events you want to track.
Use this section to trigger actions such as notifications, integrations, or custom workflows whenever specific events occur (e.g., media uploads or processing completion).
For detailed steps on creating and managing webhooks, refer to the Webhooks documentation.
Integrations
The Integrations section allows you to connect your Cincopa account with external tools and platforms to extend functionality and automate workflows.
By default, this section displays a limited view of available integrations along with the Browse All Available Integrations option.

Click Browse All Available Integrations to access the complete list of supported integrations. Once selected, all integrations are displayed and grouped into categories such as Email Providers, Marketing Automation, and API Integrations.
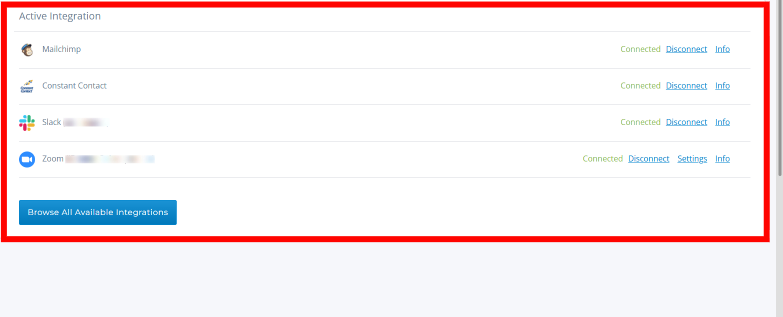
From this view, you can connect integrations, view additional details, and configure them based on your requirements.
For detailed setup instructions, refer to the Integrations documentation.
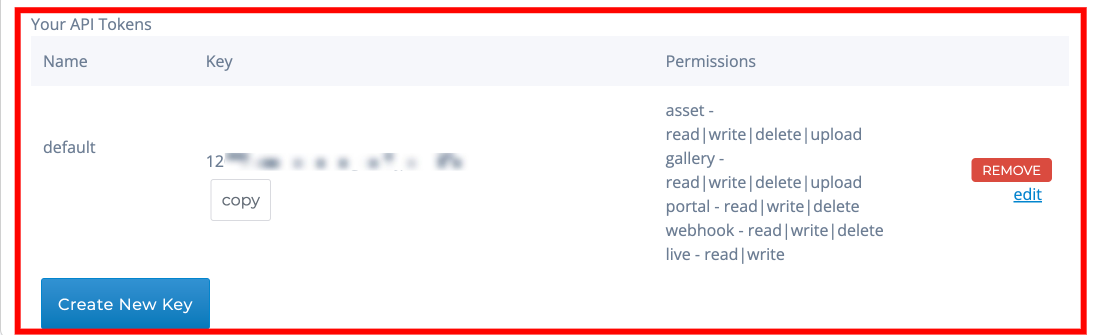
API Tokens
The API Tokens section allows you to generate and manage API keys used to authenticate requests to the Cincopa API.
You can view existing tokens along with their permissions, copy keys for use in your applications, and manage access as needed.
Use the Create New Key option to generate a new API token. Each token can be assigned specific permissions based on the level of access required (such as assets, galleries, webhooks, live, etc.).
You can also edit or remove existing tokens directly from this section.
For implementation details and permission scopes, refer to the API Tokens documentation.
SSO
The SSO (Single Sign-On) section allows you to configure authentication using SAML, enabling users to securely access Cincopa through your organization’s identity provider.
(Insert Screenshot: SSO configuration page with SAML fields)
From this section, you can:
- Enable SAML/SSO authentication
- Configure required fields such as Domain, Entity ID, and IDP URL
- Add IDP certificate and metadata for secure communication
- Use the provided Cincopa Entity ID and ACS URL for integration setup
This setup is typically used in enterprise environments to centralize authentication and improve security.
For detailed setup instructions and configuration steps, refer to the full SSO documentation.
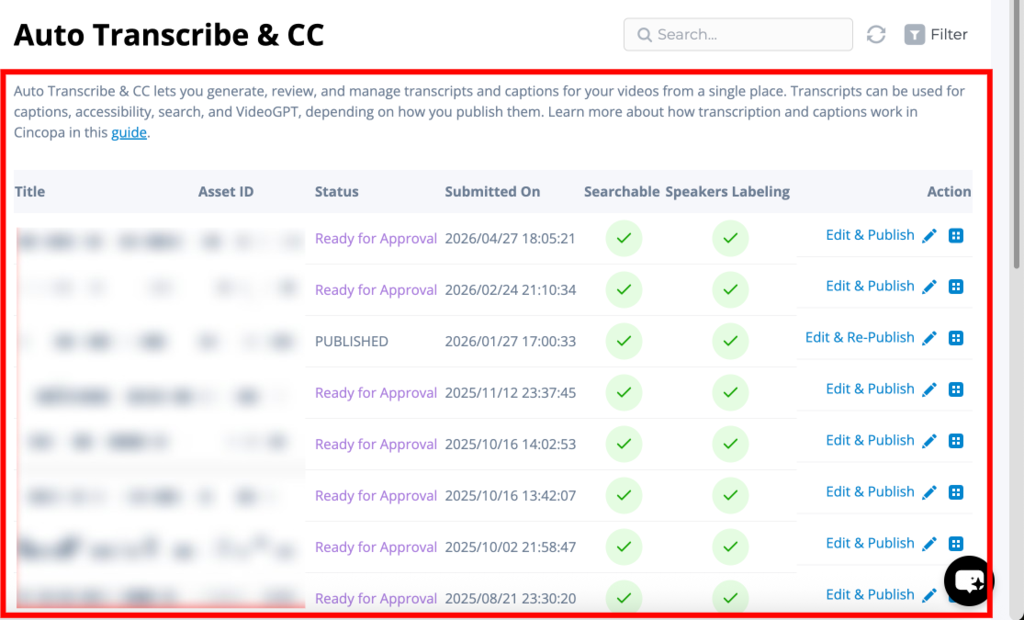
Auto Transcribe & CC
The Auto Transcribe & CC section allows you to generate, review, and manage transcripts and captions for your videos from a single place.
This section displays all transcription jobs along with their status, including draft, published, or failed.
From here, you can:
- View and manage transcription records for each video
- Edit and publish captions
- Track transcription status and submission details
- Enable searchable transcripts and speaker labeling
Use this section to maintain accurate captions and improve accessibility, searchability, and overall video experience.
For detailed steps on generating and managing captions, refer to the Auto Transcribe & CC documentation.
Live Streams
The Live Streams section allows you to create and manage live video streams directly from your account.
From this section, you can:
- Create new live streams using the + Create option
- Monitor usage such as passthrough and transcoded minutes
- Manage and control existing live streams
- Use API support for creating, starting, and stopping streams
This section is used to set up and manage real-time video streaming within Cincopa
For detailed setup and streaming configuration, refer to the Live Streams documentation.
