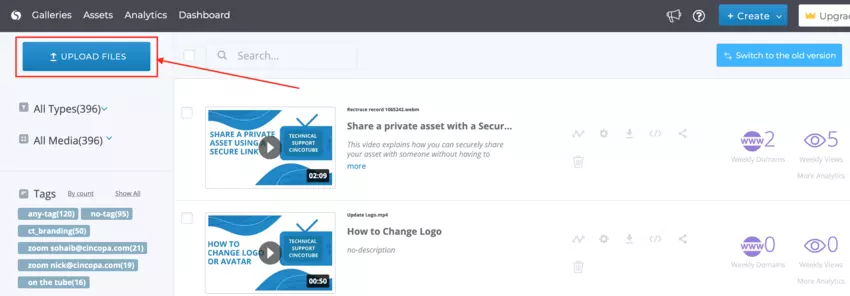
Media Library Page is the place to upload and manage all your media assets.
The Media Library page contains a list of all your media items that you add to your Cincopa account. This means you can customize, delete or share every single media file individually here.
Steps for accessing Media Library page
- Log into your Cincopa Account or Sign up for a new Cincopa Account
- To access the Cincopa Media Library page you will have to simply click on the Media Library page from Cincopa’s homepage.

- Once you are on the Media Library page, Cincopa provides lots of options and customizations that you can use with your Assets.
Here is a list of few things you can do on the Media Library page:
Upload Files
You can upload new files to the Media Library using Cincopa’s different upload methods.
From the top-left corner of the Media Library page, click on Upload Files to upload media (Image, Audio, Video, PDFs, etc).

Note: You can checkout step by step process of uploading an Asset from here
Sort and view all your media files
You can sort the media on your Media Library page using the sorting options available in the top right corner as shown in the screenshot below.
Note: You can checkout step by step process of sorting the media files in the Assets section from here
Smart In-video Search
Users can type in keywords in the search bar to quickly find the asset they need in the Media Library. Click here to learn more about how in-video search works.
Access Analytics
Click on the Analytics option to access analytics for your asset.
Edit information and metadata related to media assets
In order to edit the media information, you will have to click on the Settings as shown in the screenshot below.
Download the media file
From the Media Library page, you also easily download the media files. Simply click on the Download option as shown in the screenshot below.
Copy media embed code
On the Media Library Page, you can also find the option to embed a media asset to your website.
When you click on the Embed option, you will see the options available for embedding the asset on your website.
Note: For step by step instructions on how to embed an asset click here
Share your media file directly from the Media Library page
If you wish to share the asset with someone via social media you can simply click on the Share icon as shown in the screenshot below.
Note: You can also share the media files from inside the Video Settings option as shown in the URL
Delete file
To delete a file from the Media library, click on the Delete icon as shown in the screenshot below.


